
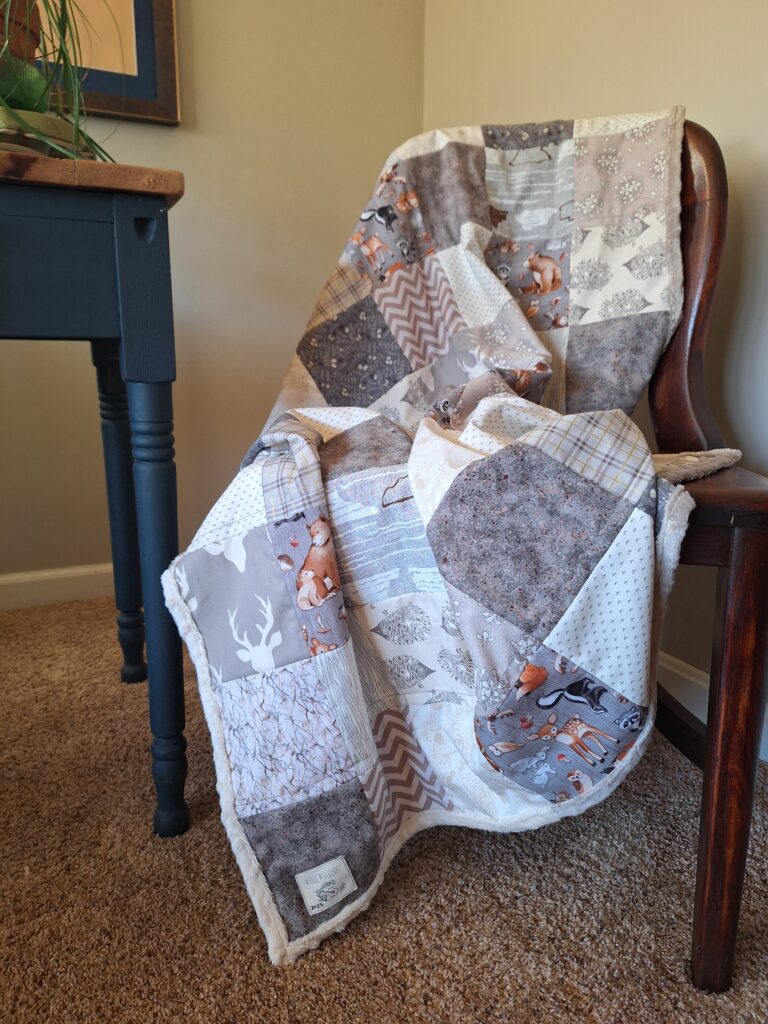
Making a simple patchwork baby quilt with a cozy minky backing is a fun and rewarding sewing project that you can easily personalize. If you’re new to quilting or just looking for a beginner-friendly project, a patchwork baby quilt is the perfect place to start! In this post, I’ll guide you through the steps to create a beautiful gender-neutral quilt featuring woodland baby animals and basic prints. If you’d like more specific information on the prints I chose and why, check out last week’s blog post on selecting the fabric. Plus, with the addition of a soft minky fabric backing, it will be the snuggliest quilt around. Whether you’re making this quilt for a gift or your little one, this tutorial will inspire you!
If you’ve followed my previous blog posts (Making a Patchwork Minky Blanket Part 1 and Part 2)or YouTube videos on quilting and fabric selection, you’ll know that I love teaching my readers how to make beautiful quilts with ease. This new quilt project, which I’ll be covering step-by-step, is a continuation of my earlier work, where I focused on easy and fun quilt-making techniques, specifically the PMBs. And for a more in-depth guide, check out my updated YouTube video that walks you through each step of this process. Let’s dive into how to make your own simple patchwork baby quilt with minky backing!
Step 1: Choose Your Fabrics for a Gender-Neutral Quilt
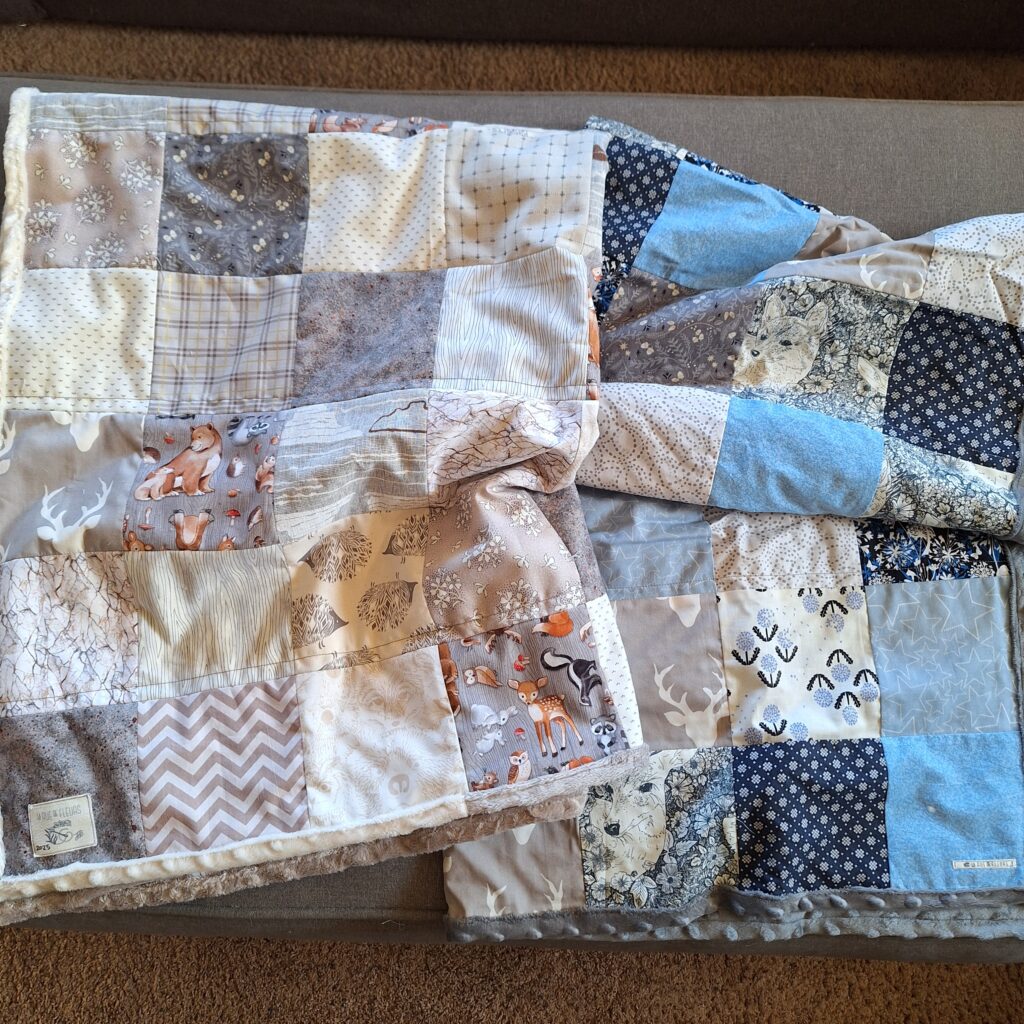
The first step in creating any quilt is selecting the fabric, and for this baby quilt, we’re focusing on a gender-neutral color palette with a woodland baby animal theme. A patchwork design is perfect for showcasing a variety of prints, and by choosing soft colors and fun patterns, you’ll create a modern yet cozy feel.
For this quilt, consider these fabric choices:
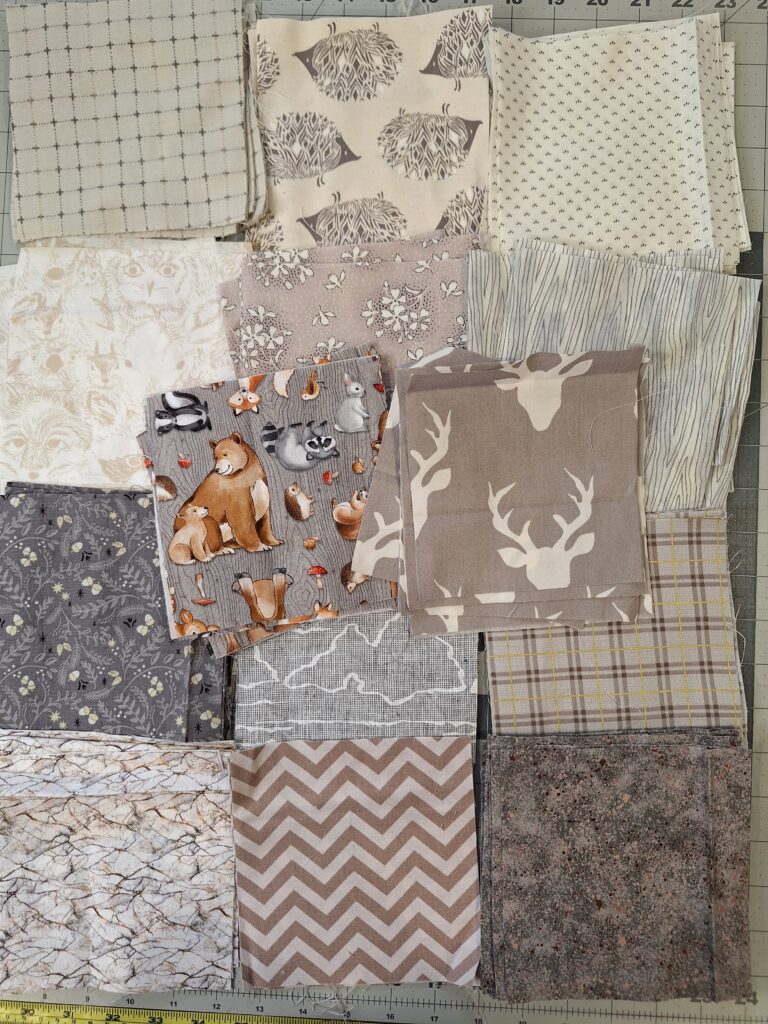
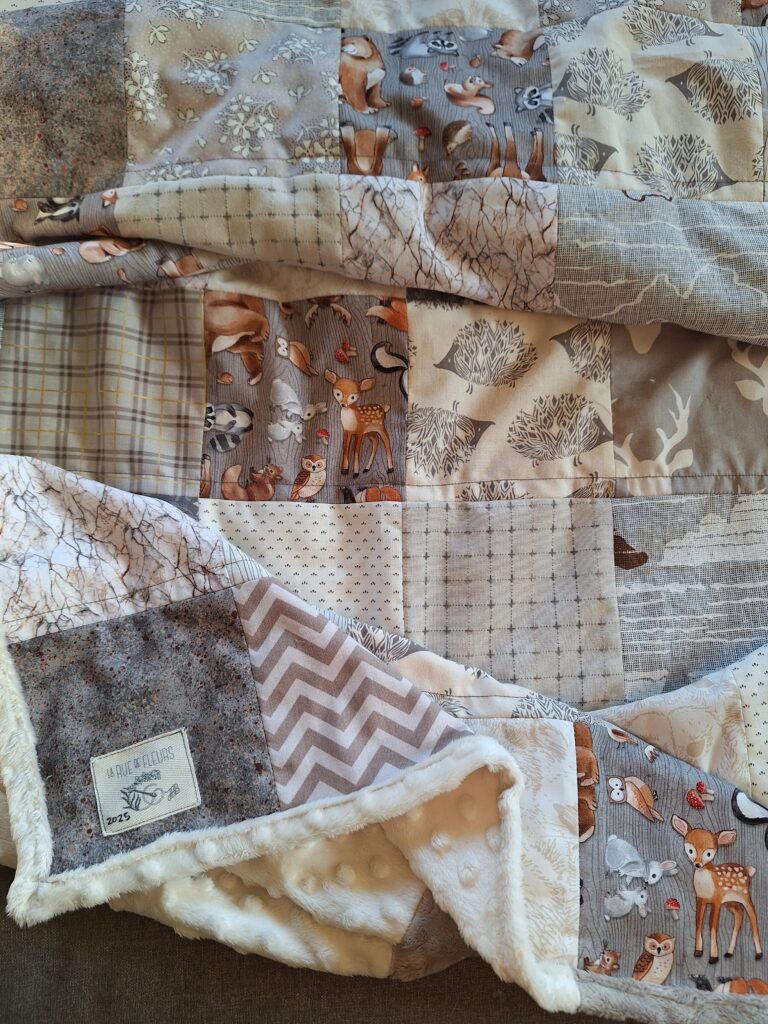
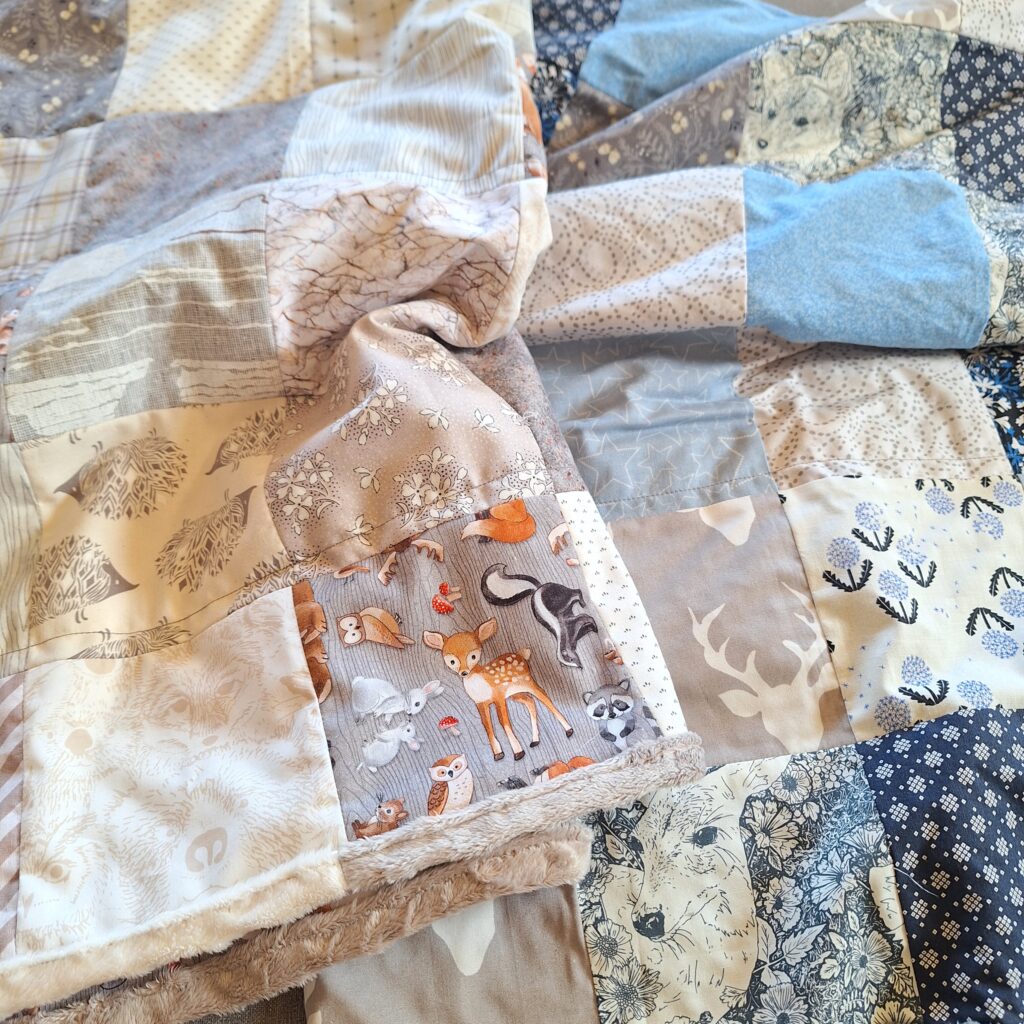
- Woodland baby animals: Look for fabrics that feature cute animals like baby foxes, owls, deer, and bunnies. These prints are whimsical and perfect for a baby quilt, adding a playful touch to the design. Choose fabrics that have soft, muted tones to keep it gender-neutral and calm.
- Basic prints: Adding simple patterns like polka dots, stripes, or small florals will provide contrast and keep the quilt looking balanced. Choose prints in coordinating colors, such as soft greens, warm browns, and creamy whites, to blend seamlessly with the woodland animals.
- Solids or textured fabrics: Incorporating a few solid or textured fabrics (like linen or cotton with a slight texture) will provide visual interest without overwhelming the design. These fabrics can be used to fill in spaces and tie everything together.
Once you have an idea of the color palette and prints you want, begin selecting fabrics that complement each other. Keep in mind that you’ll want a combination of fabrics in various scales (smaller prints and larger prints) to give your patchwork quilt a nice balance.
Step 2: Cut Your Fabric into Squares
After selecting your fabrics, the next step is to cut them into squares for the patchwork design. A simple patchwork design typically consists of equal-sized squares, making it perfect for beginner quilters. You can decide on the size of your squares, but for this quilt, I recommend cutting your fabric into 5 1/2” x 5 1/2” squares. This size is easy to work with and creates a nice-sized quilt with the measurements of 40″ by 55″.
Here’s how to cut your fabric:
- Prewash your fabric: It’s always a good idea to prewash your fabric before cutting, especially if you’re using new fabric. This helps to prevent any shrinkage later on.
- Cut your fabric: Use a fabric rotary cutter, ruler, and cutting mat to cut the fabric into 5 1/2” squares. For variety, mix and match your woodland animal prints, basic prints, and solids. Aim to cut at least 10-15 squares of each print for the baby quilt we’ll be making here, or increase the amount depending on the size of the quilt you’re making. You’ll want to have a nice mix of patterns and colors to create a fun and balanced look.
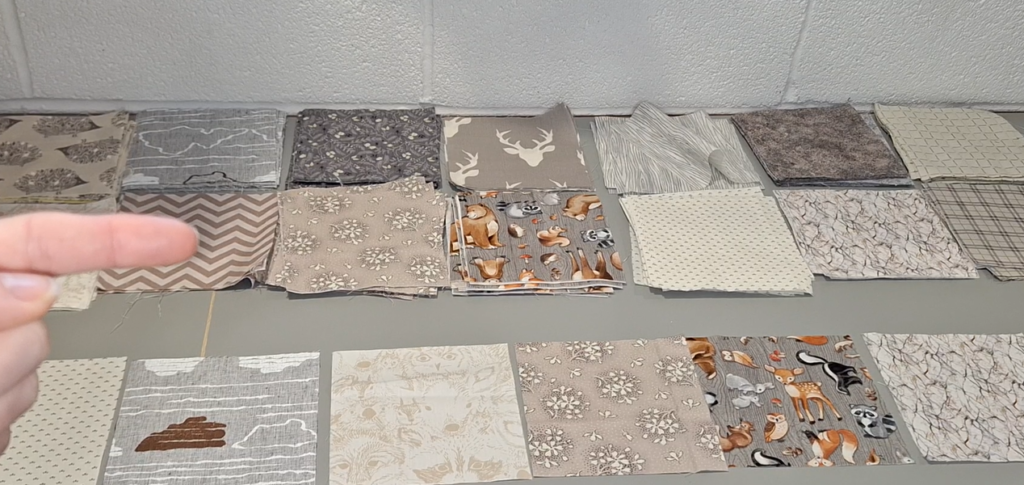
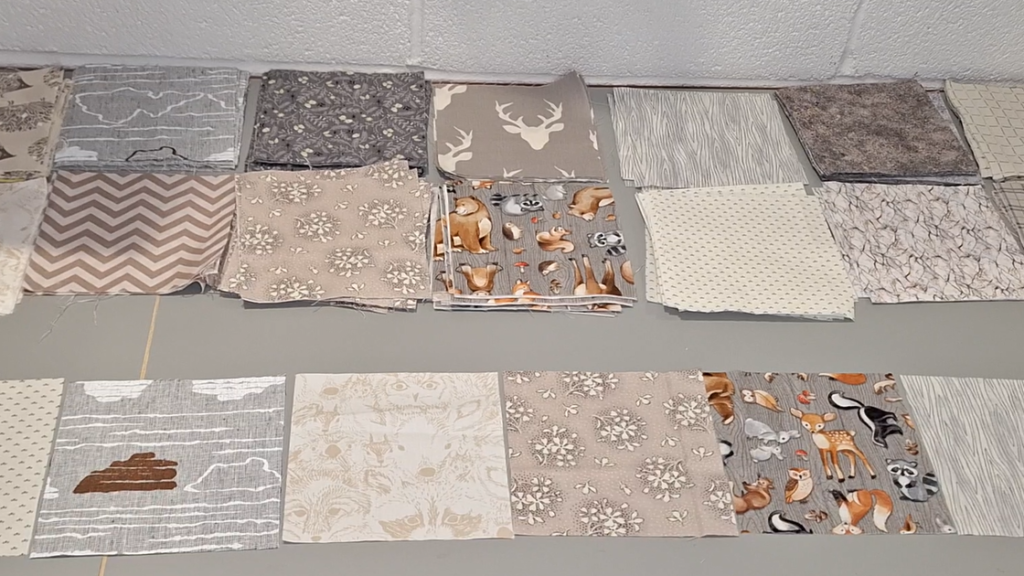
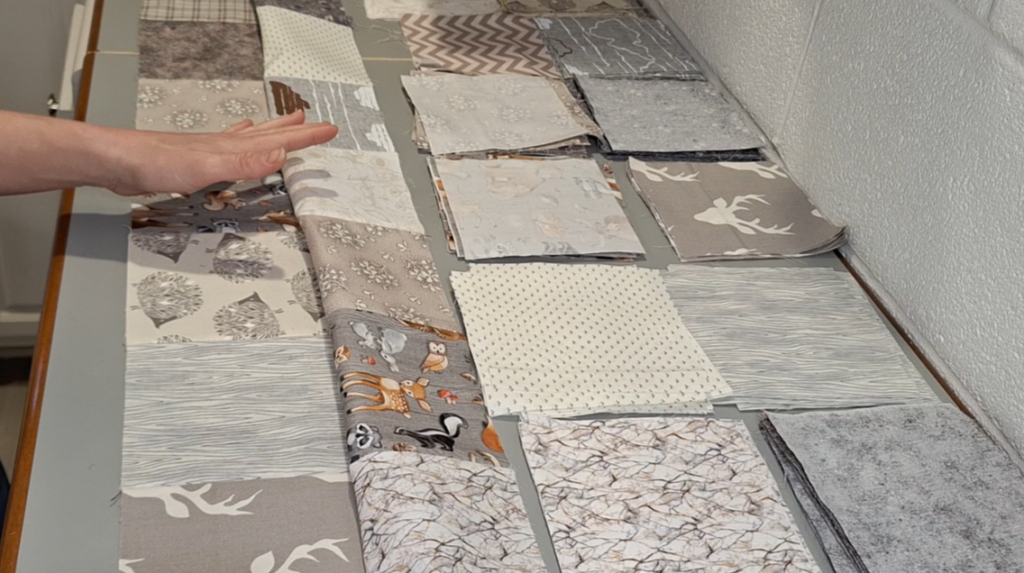
- Organize your squares: Lay the squares out on a flat surface and arrange them to get a sense of how they’ll look together. Try alternating different prints, solids, and animal patterns to create a visually appealing design. I also create categories of prints that are similar to help me space designs throughout the rows and columns. Such as choosing two similar floral prints or plaid prints and organizing them into alternating rows.
This is where you can have some fun! Feel free to rearrange your squares until you find a layout you love.
Step 3: Sew Your Patchwork Squares Together
Once your squares are cut and arranged, it’s time to start sewing them together. This step is the heart of the patchwork process, and it’s also where you’ll start to see your quilt coming together!
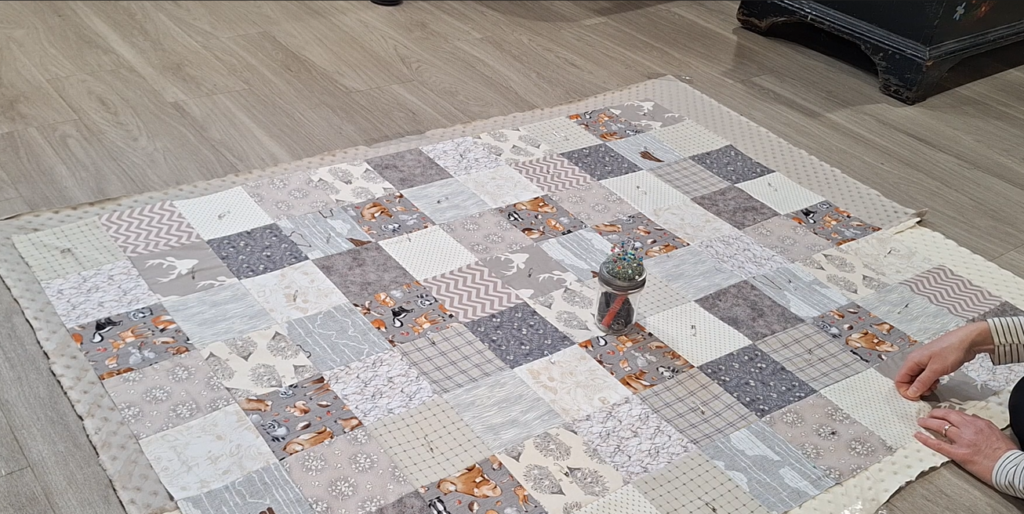
Think in rows and columns to make the process easier. For a quilt with 5 1/2″ squares to measure 40″ by 55″ when finished, you need eight blocks across your columns and eleven rows down the quilt to create the length. Then work to stagger prints throughout the rows and columns. You do not want to bunch the dark or light prints together, so think of creating movement as you work through the quilt top. Bounce the light, dark and prints back and forth through the rows and columns so no two prints or values are touching. This gives your patchwork top a graceful movement and balance for the eye.
To sew the squares:
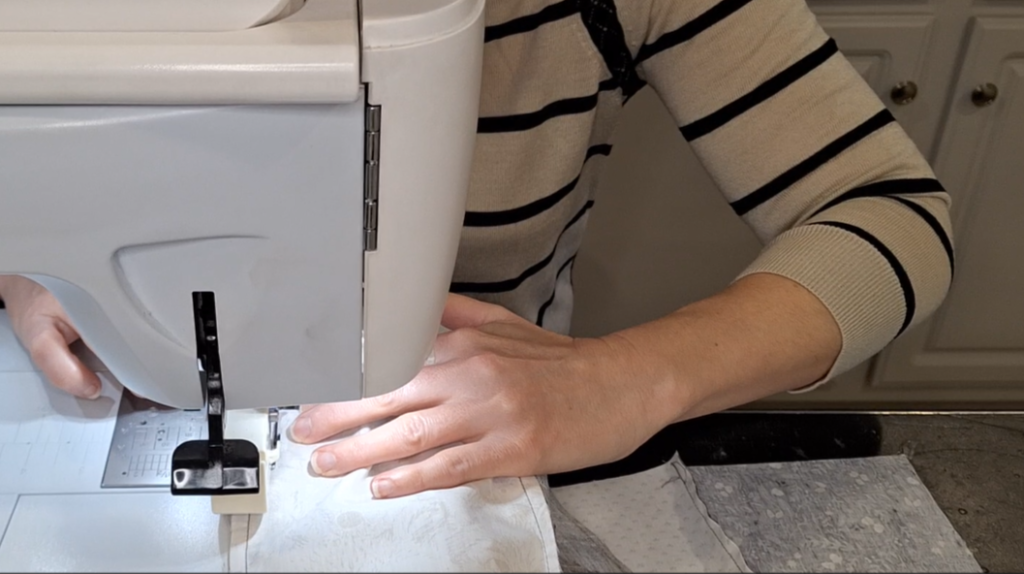
- Align your squares: Place two squares right sides together, aligning the edges. Pin them together to keep them in place.
- Sew the squares: Using a quarter-inch seam allowance, sew along the edge of the two squares with a straight stitch. Continue this for all of your squares, sewing them into rows.
- Join the rows: Once all of your squares are sewn into rows, join the rows together by placing them right sides together and sewing along the edges with a quarter-inch seam allowance.
- Press your seams: Press each seam open or to one side with an iron. Pressing the seams helps the quilt lay flat and gives the finished quilt a cleaner, more polished look.
As you sew, make sure the edges of the squares align neatly. If you notice any fabric shifting, take the time to adjust your seams before moving on. A consistent seam allowance will ensure that your quilt is even and precise.
Step 4: Attach the Minky Backing
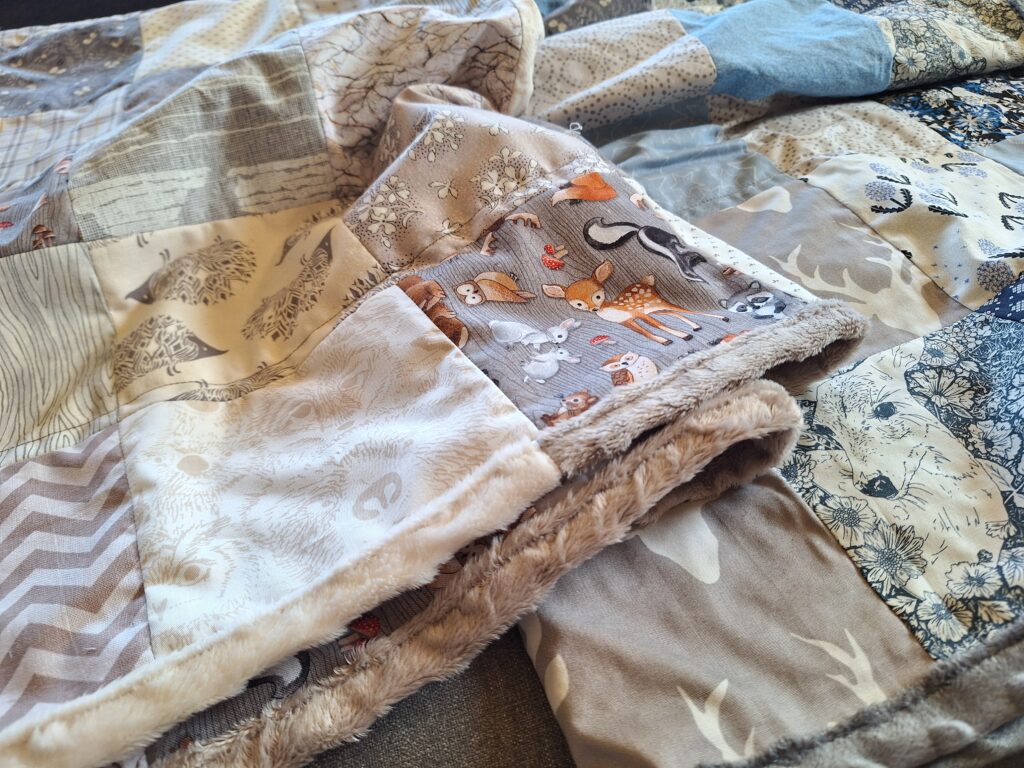
The next step in creating a cozy and snuggly baby quilt is to add a minky fabric backing. Minky is a soft, plush fabric that feels luxurious and gentle against a baby’s skin. It’s the perfect fabric for a quilt that will be used for naps, bedtime, or playtime.
Here’s how to attach the minky backing:
- Prepare your backing: Cut your minky fabric to the size of your quilt top, making sure it’s slightly larger than the quilt top to allow for trimming later. I usually allow 2-3″ around the entire perimeter of the quilt top.
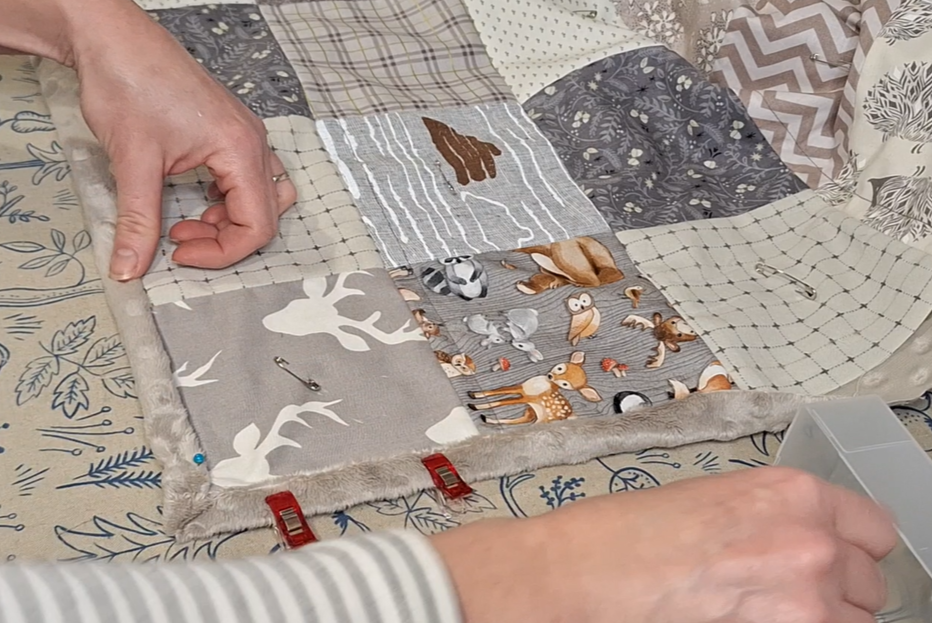
- Pin the quilt top to the backing: Place your quilt top and minky fabric right sides together, pinning the layers together through the center and around the edges. Space your pins about a fist width apart, or in every other 5 1/2″ block. Be sure to pin the fabric securely to prevent shifting as you sew.
- Sew the layers together: Moving from left to right, place your blocks on top of their neighbor right sides together. Using a quarter-inch seam allowance, sew along the right edges of the block pairs. Then pin the pairs together into eight block rows. Finally, sew all your rows together and give the seams a good hot press.
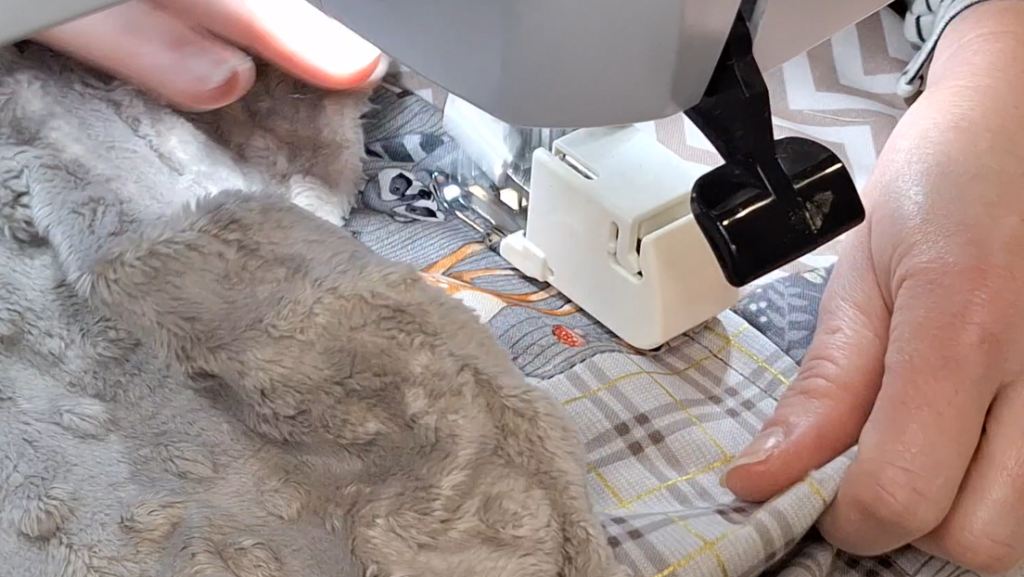
- Quilt the layers: Using your sewing machine, quilt along the seams of the patchwork blocks to hold the quilt layers together. You can also quilt in a simple grid pattern or follow the lines of the patchwork squares for a clean look. I do not heavily quilt my PMBs because I like the weight without a lot of quilting and the minky can be tricky to work with if you over do it.
The minky backing adds a wonderful softness to the quilt and makes it extra cozy for a baby. However, be cautious when sewing with minky, as it can be a bit slippery. My past YouTube videos have more tips on working with minky fabric, so be sure to check those out if you need additional guidance!
Step 5: Final Touches – Create a Self-Binding from the Minky
For this simple patchwork quilt, I recommend using machine binding to keep it quick and easy. The binding here will be rolled over from the minky back to create a soft rim all the way around.
Here’s how to self-bind your baby quilt:
- Trim the Minky Backing: Once the quilt top is quilted, it’s time to add the binding. To make the binding, trim the minky to 1″ away from the patchwork top the entire perimeter around the quilt.
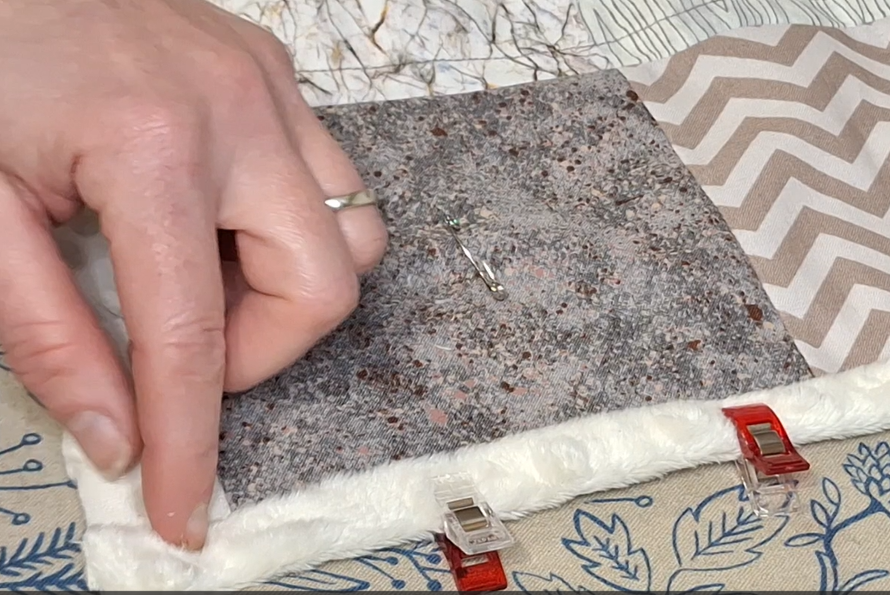
- Roll the Minky Edges: Fold the binding over 1/2″ to meet the raw edges of minky and patchwork. Fold the rolled edge onto the patchwork top to enclose all of the raw edges, and clip or pin in place.
- Fold the Mitered Corner: With one edge folded over as you come into the corner, and add a clip about one inch away from your fold to secure the minky. Bring the end of the folded edge of minky down to line up with the patchwork top on the opposite side of the corner forming an angle with the minky. One direction will be completely folded at this point and the next direction will have a little corner of the minky folded onto it.
- Create the Miter Point: Now fold the raw minky edge into line up with the patchwork top as you have done on the other straight sides. Be careful here to get the fold to line up with the patchwork top with all of that extra bulk building in the corner. Fold the minky over again so that it sits a half inch over the top of the patchwork and is encasing all of the raw edges of both the minky and the patchwork top.
- Pin the Corner to Hold: Secure the fold with a straight pin right into the corner as close as possible to the edge of the minky.
- Complete the Rolled Self-Binding: Continue folding and pinning the minky edge the rest of the way around the patchwork top, making sure to clip about every 2-3 inches.
- Sew the Folds in Place: With the walking foot attached to your machine, take your blanket and all of it’s clips over to your sewing machine. Adjust your needle and foot so that you are sewing slightly inside the 1/2in fold of the edge of the blanket. Either straight stitch or zig zag stitch along the edge of the fold, removing the clips and pins as you go.

Watch the Full YouTube Tutorial
For a detailed visual guide, be sure to check out my latest YouTube video where I walk you through each step of this patchwork baby quilt project. I cover fabric selection, cutting, sewing the patchwork, adding the minky backing, and finishing the quilt with binding. It’s the perfect video companion to this blog post, giving you a complete, hands-on tutorial.
New Pattern Directions Now Available on Etsy!
I’m excited to announce that the pattern directions for this simple patchwork baby quilt with a minky backing are now available for purchase in my Etsy shop! These easy-to-follow pattern instructions will guide you through each step of the process, from fabric selection and cutting to sewing the patchwork and adding the minky backing. Whether you’re a beginner or a seasoned quilter, the pattern is designed to help you create a beautiful, modern baby quilt with ease. Plus, it includes tips for customizing the quilt to suit any theme, whether you want to stick with the woodland baby animal prints or make it your own. Be sure to check it out on Etsy for the full pattern, and start making your own stunning baby quilt today! [Etsy Shop Link]
Final Thoughts
Making a simple patchwork baby quilt with a soft minky backing is a rewarding and fun project that’s perfect for quilters of all skill levels. By following these steps, you can create a gender-neutral woodland-themed quilt that’s both beautiful and practical. Whether you’re making it for a baby shower gift, a new arrival, or your little one, this quilt will be a cherished item for years to come.
Don’t forget to check out my previous blog posts and YouTube videos for more tips and inspiration on quilting, fabric selection, and techniques.
Happy quilting! Make sure to tag me on IG so I can see the beautiful quilts you create!
La Rue de Fleurs/Janice Bailor (@laruedefleurs) • Instagram photos and videos
Inspiration and resources are linked where applicable. All written work and photographs are original content and are copyright protected; kindly give due credit by linking back to my website if you use or share.
(©2025, Janice Bailor // laruedefleurs.com)