If you’re a sewing enthusiast, crafter, or quilter, you understand how important it is to have an organized, functional space to create your projects. The best way to keep your craft supplies in order is to ensure your sewing room is tidy, efficient, and inspiring. Whether working on intricate quilts or sewing some pouches, your environment plays a huge role in your creativity. That’s why I’m thrilled to share my recent sewing room overhaul with you! In this post, I’ll be revealing how I reorganized my space, including some clever storage ideas and tools to help keep my sewing supplies, such as bobbins, spare needles, and sewing machine feet, well-organized. Plus, I’ve included an exclusive YouTube video showing the transformation, so you can see the before-and-after in action!
Why Organization Matters in a Sewing Room
Before diving into the details of my sewing room organization, let’s talk about why it matters. A well-organized sewing room not only helps you find your tools quickly, but it can also boost your productivity and reduce stress. Having everything in its place makes it easier to focus on your projects without distractions. Plus, when your space looks tidy, it can be more inspiring to work in. You’ll feel more motivated to dive into your next quilt, garment, or craft project when your workspace is both functional and aesthetically pleasing.
In my reorganized sewing room, I made sure to focus on storage, accessibility, and aesthetics. You can check out more of the transformation details in my previous post HERE. From neatly arranged fabric shelves to a smart system for organizing my sewing tools, every element is designed to keep me focused on what I love—sewing!
Key Elements of My Reorganized Sewing Room
The best way to create a sewing room that works for you is by considering your own workflow. Are you a quilter who needs lots of fabric storage? Do you work with a lot of small tools that require specialized storage? Do you need a spacious desk for cutting, measuring, and pressing? My sewing room overhaul was centered around addressing these needs and creating an environment that helps me sew more efficiently.
- Fabric Storage Solutions
Fabric is one of the largest components of any sewing space, and it can quickly take over your room if not properly organized. For years, I struggled to find a way to keep my fabric stash tidy. I tried bins, boxes, and bookcases, but nothing seemed to work perfectly.
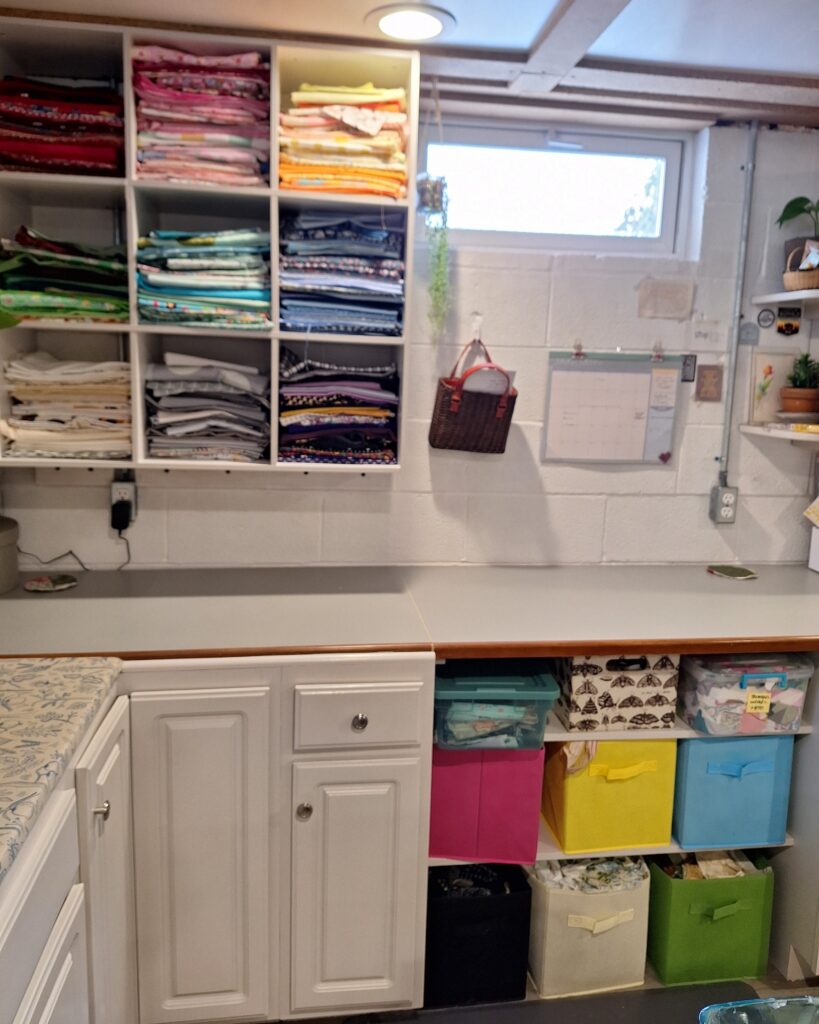
Now, I’ve implemented a new fabric storage solution that combines open shelving and color-coded bins. I fold my fabrics neatly and sort them by color into Ikea Kallax cubes, making it easy to grab what I need for each project. Color-coded bins allow me to store scraps and smaller pieces near my sewing desk and design counter where I am more likely to reach for them.
- A Dedicated Cutting Station
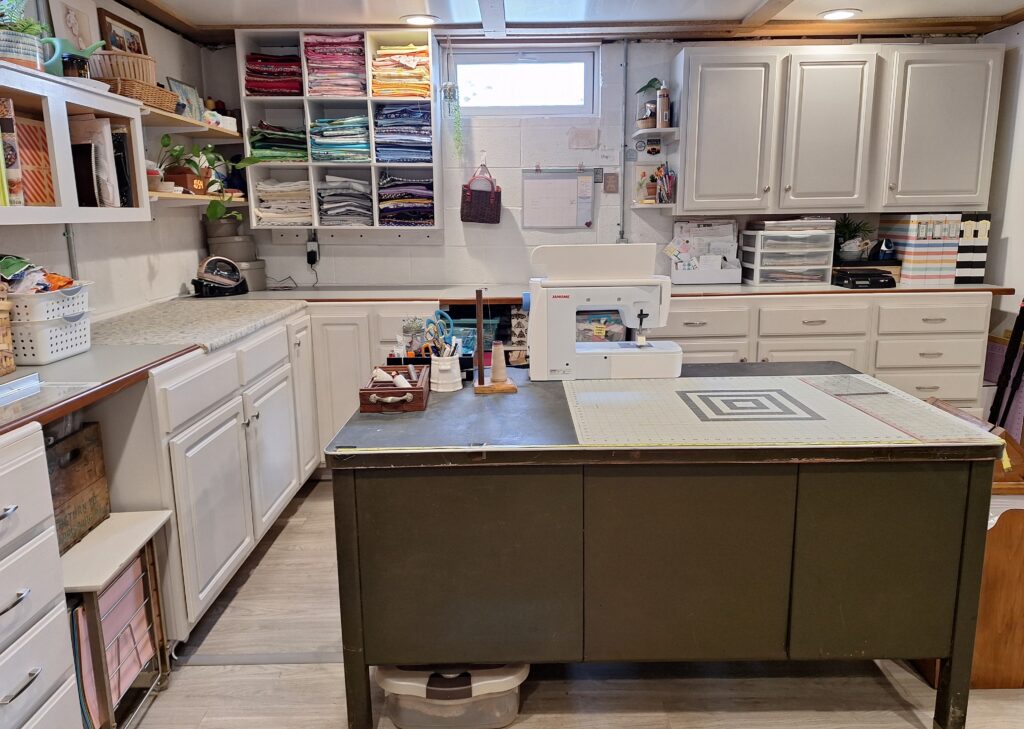
When it comes to sewing, cutting is a task that takes up a significant portion of my time. So, I made sure my cutting station is well-organized and spacious. I’ve placed a large cutting mat on a sturdy table and have a dedicated spot for my rotary cutters, rulers, and other cutting tools. This way, everything I need for cutting is right at my fingertips, making the process smoother and more efficient.
- Sewing Machine Organization
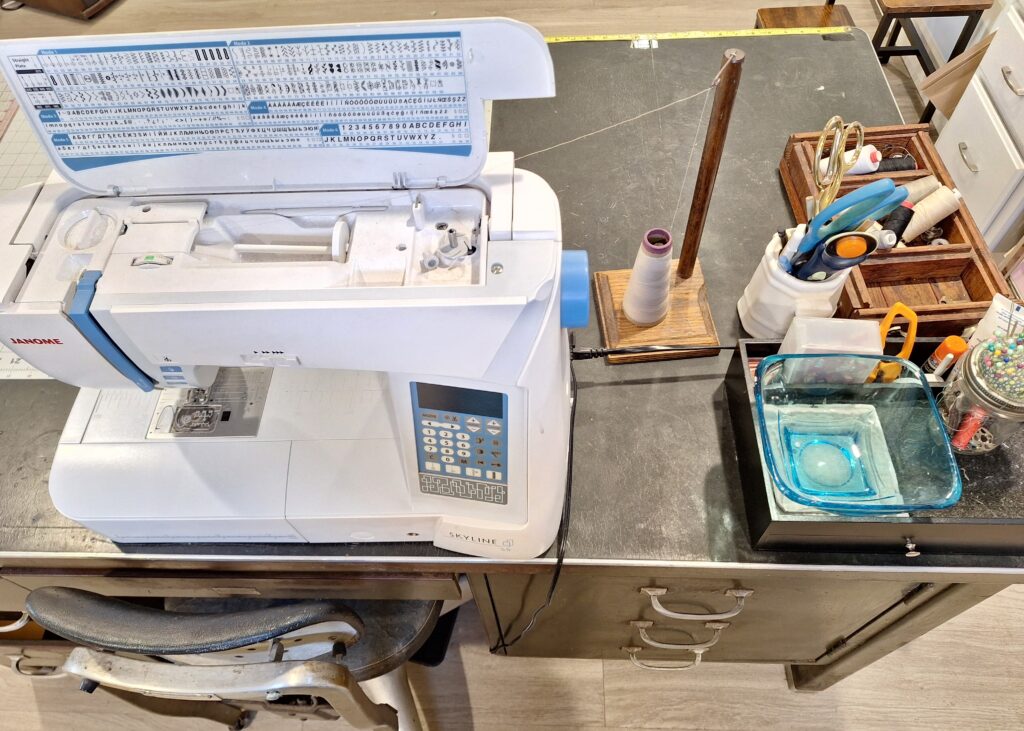
As a passionate sewer and quilter, I rely heavily on my sewing machine and its accessories. One of the key elements of my sewing room overhaul was reorganizing my sewing machine desk and its related supplies. I moved my sewing desk slightly away from the surrounding countertop to open up the flow around my desk area. Taking the sewing zone from a U-shape to more of an island style has improved both the end of my desk and the counter space next door. Previously, both zones were trapped and hard to use, making them chaotic clutter collection spots. Now that I can reach both zones, I am more likely to utilize the space as a worktop, not just a drop zone!
- Desk Organizer for Sewing Supplies: The Game-Changer!
One of the most significant changes I made in my sewing room was the introduction of a traditional desk organizer to house smaller sewing supplies. In the past, I found it difficult to keep track of my bobbins, spare needles, and sewing machine feet. They were often scattered on my work surface, making it frustrating to find exactly what I needed during a sewing project.
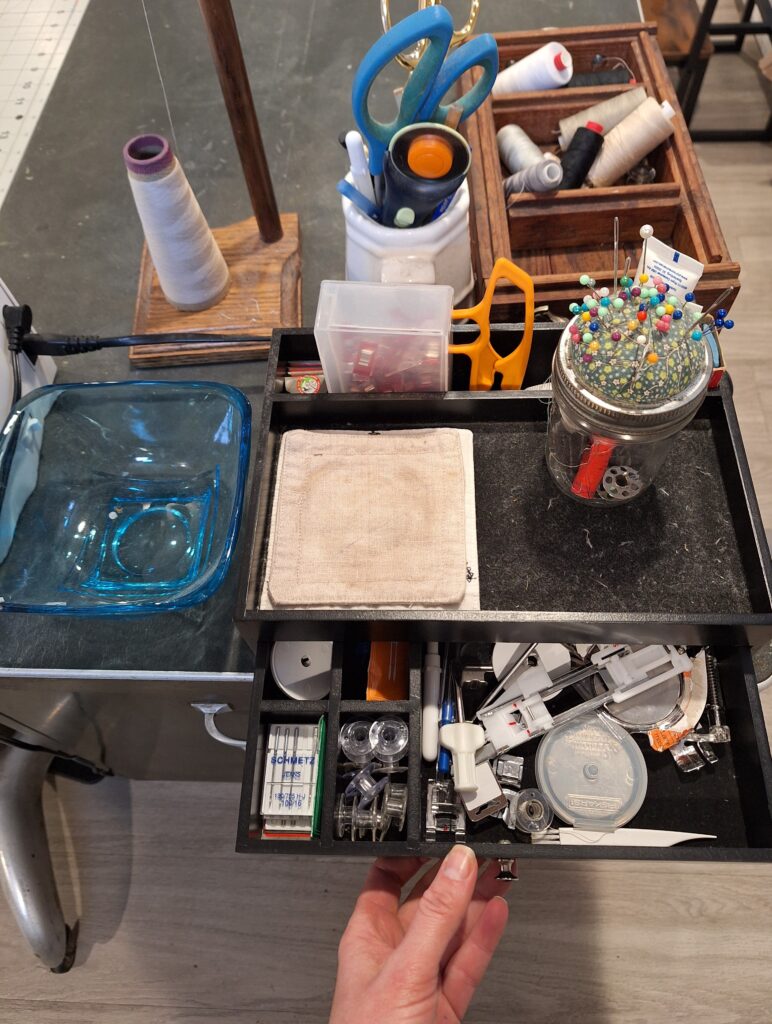
Enter the desk organizer—a lifesaver for all my sewing supplies! The organizer is designed with multiple compartments of varying sizes, perfect for keeping small items like:
- Bobbins: I’ve organized my empty bobbins in one of the organizer’s sections. Now, I can easily grab a bobbin to fill without having to search through a drawer full of mismatched or half-used ones.
- Spare Needles: Another section of the organizer holds my spare sewing machine needles, neatly labeled by type and size. This makes it easy to grab the correct needle when switching between projects.
- Sewing Machine Feet: I keep all of my different presser feet in one section of the organizer, (e.g., zipper feet, walking feet, quilting feet). The small drawer size allows me to quickly locate and grab what I need.
This desk organizer not only helps keep my supplies sorted but also keeps them easily accessible, which is vital for a smooth workflow.
- Repurposed Containers for Small Tools and Trash Collection
In addition to the desk organizer, I utilize an old kitchen crock to house my smaller sewing tools. This includes scissors, fabric turners, marking tools, and rotary cutters. The crock was a free element repurposed from another area of my home allowing me to keep everything visible and within reach. Plus, it adds a cute, decorative element to the room.
In addition to the crock, I have a small glass bowl right next to my sewing machine to collect snips of fabric and threads. Having the bowl right next to my hand makes it super easy to toss in small bits that might otherwise seem like a bother to get up and throw in the trash. When to bowl is full, I dump the whole thing into the bin. Having this small bowl seems redundant, but I assure you it keeps so much small trash from collecting on the floor.
- A Quilting Corner
For quilting projects, I created a dedicated space where I can lay out large quilt tops or work on assembling quilt blocks. The front of my desk area has a large cutting mat, and a long tape measure which keeps most measuring and cutting tasks right in one zone. I utilize the open floor space in front of my desk to lay out quilt blocks for design and organization. To the right of my sewing desk is the ironing station making it easy to pop up and press between pieces. Everything I need to quilt is right around my sewing desk, so I don’t have to worry about going far when working on a project.
- Zoning for Maximum Efficiency
One of the most essential parts of my sewing room overhaul was creating storage zones! I grouped like craft items into each section of the desk organizer, every drawer, and even the bins that store fabric scraps. This makes it so much easier to locate exactly what I need when I need it.
The YouTube Video Reveal
I know you’re excited to see how it all turned out! In addition to this detailed blog post, I’ve created a YouTube video that takes you on a tour of my reorganized sewing room. You’ll see firsthand how I’ve transformed the space and get a closer look at the desk organizer I use to store my bobbins, needles, and sewing feet.
The video also highlights other organizational tips, such as how to maximize vertical space, set up a dedicated sewing machine station, and make the most of your available storage options. If you’ve been struggling with keeping your sewing room organized, this video is a must-watch!
Watch the full sewing room reveal here!
Tips for Maintaining Your Organized Sewing Room
Once your sewing room is organized, it’s essential to keep it that way. Here are a few tips to help maintain the order and cleanliness of your space:
- Put things back where they belong: After each sewing session, take a few minutes to tidy up and put everything back in its designated spot.
- Use containers: Invest in small containers and boxes to store smaller items like buttons, pins, and threads. This keeps them from getting lost or scattered around your sewing area.
- Regularly declutter: Periodically review your supplies and get rid of items you no longer use. This helps prevent unnecessary clutter from building up in your sewing room.
- Stay organized as you work: Try to keep your workspace neat while you’re working on a project. If you don’t already, consider utilizing the garbage bowl system to collect small threads and offcuts while you’re working. A clean and clutter-free environment will help you stay focused and productive.
Final Thoughts on My Sewing Room Overhaul
Organizing your sewing room is one of the best ways to enhance your crafting experience. With the right storage solutions, such as using a traditional desk organizer for your sewing supplies, you’ll be able to find what you need quickly and easily. From bobbins and spare needles to sewing machine feet, everything can have its place. A tidy sewing space not only makes your projects more enjoyable but also inspires creativity and allows for more productive sewing sessions.
I hope this sewing room reveal has given you some ideas and inspiration for your own space. Don’t forget to check out the accompanying YouTube video for a full tour of my sewing room transformation! Whether you’re a quilter, garment maker, or casual crafter, organizing your supplies is key to making your sewing experience as enjoyable as possible.
Happy sewing, and I’ll see you in the next post! Janice
Inspiration and resources are linked where applicable. All written work and photographs are original content and are copyright protected; kindly give due credit by linking back to my website if you use or share.
(©2025, Janice Bailor // laruedefleurs.com)