If you’re on the lookout for a delightful, easy-to-learn, and visually stunning craft project, silk ribbon mini embroidery is the perfect choice. It’s a beautiful blend of elegance and playfulness, perfect for those who love to create art with a soft, luxurious touch. Whether you’re new to embroidery or a seasoned pro, mini embroidery with silk ribbons offers endless creative possibilities—and we’re here to explore all the fun ways you can get started, from beginner tips to turning your creations into wearable art.
What is Silk Ribbon Mini Embroidery?
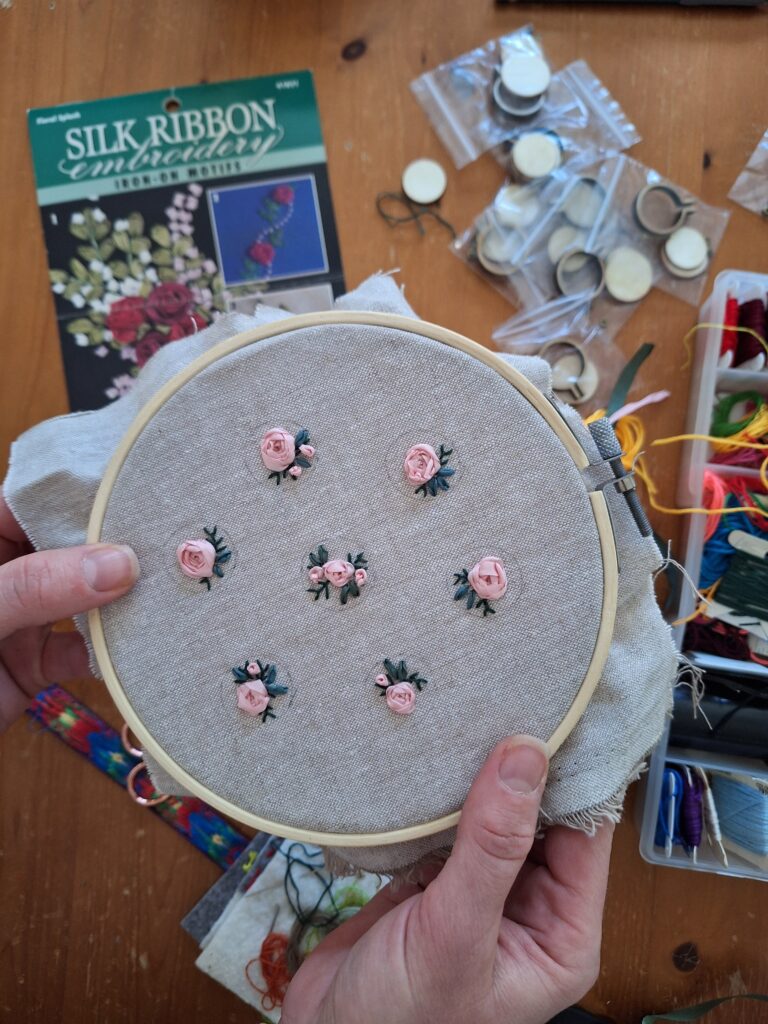
Silk ribbon embroidery is a technique that involves stitching with narrow ribbons made of silk, usually measuring between 1/8th to 1/4 inches (4mm and 7mm) wide. The silky smooth texture of the ribbon gives embroidery a soft, 3D effect that is unlike traditional thread work. When you shrink this technique down into a mini version, the results are absolutely charming.
Mini embroidery, typically done on small embroidery hoops (often measuring between 3-6 inches in diameter), focuses on intricate yet delicate designs. You can go even smaller, as I have done here, creating miniature charms on micro 1-inch hoops. Think of tiny flowers, adorable animals, or abstract patterns that are rendered in rich, vibrant colors. The beauty of silk ribbon mini embroidery is in its versatility and the depth it adds to a miniature project.
If you don’t want to invest in silk ribbon but still want to try the technique, you can use thin strips of cotton. I have employed the same embroidery techniques with thin cotton ribbons in the past and created beautiful results. Check out those canvases HERE. The difference will be the difficulty level of sewing with the ribbons. Cotton will cause more drag on the needle and fray compared to the smooth silk ribbon.
Why Silk Ribbon?
Why choose silk ribbons over regular threads? It’s simple—silk ribbons create a luxurious, textured finish that thread just can’t replicate. Silk ribbon embroidery gives your projects a soft, three-dimensional quality that seems to pop off the fabric. The ribbons come in a variety of stunning colors, from pastel pinks and greens to rich blues and golds, allowing you to experiment with endless combinations. Check out Etsy for some great sampler packs of silk ribbon for your embroidery.
Additionally, the texture of the silk ribbon allows for a more expressive approach to embroidery. The flexible, soft nature of the ribbon makes it easy to work with, giving you more freedom in how you manipulate the material. You can create smooth, flowing curves, gentle folds, and even subtle dimensional effects.
Getting Started with Silk Ribbon Mini Embroidery
If you’re new to silk ribbon embroidery, don’t worry! Starting with a mini project is an excellent way to dive into the world of ribbon embroidery. Here’s what you’ll need to get started:
Materials You’ll Need:
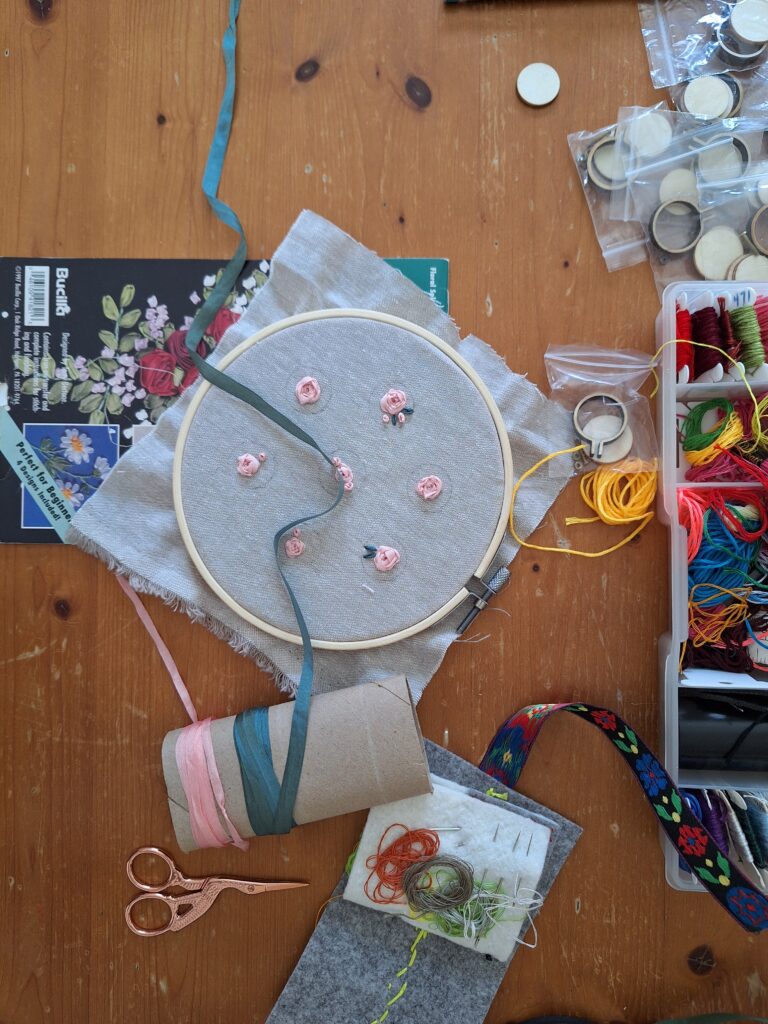
- Silk Ribbons: Choose ribbons in different widths (4mm, 7mm) and a variety of colors. You don’t need to go overboard; a small selection of colors will work great for mini embroidery.
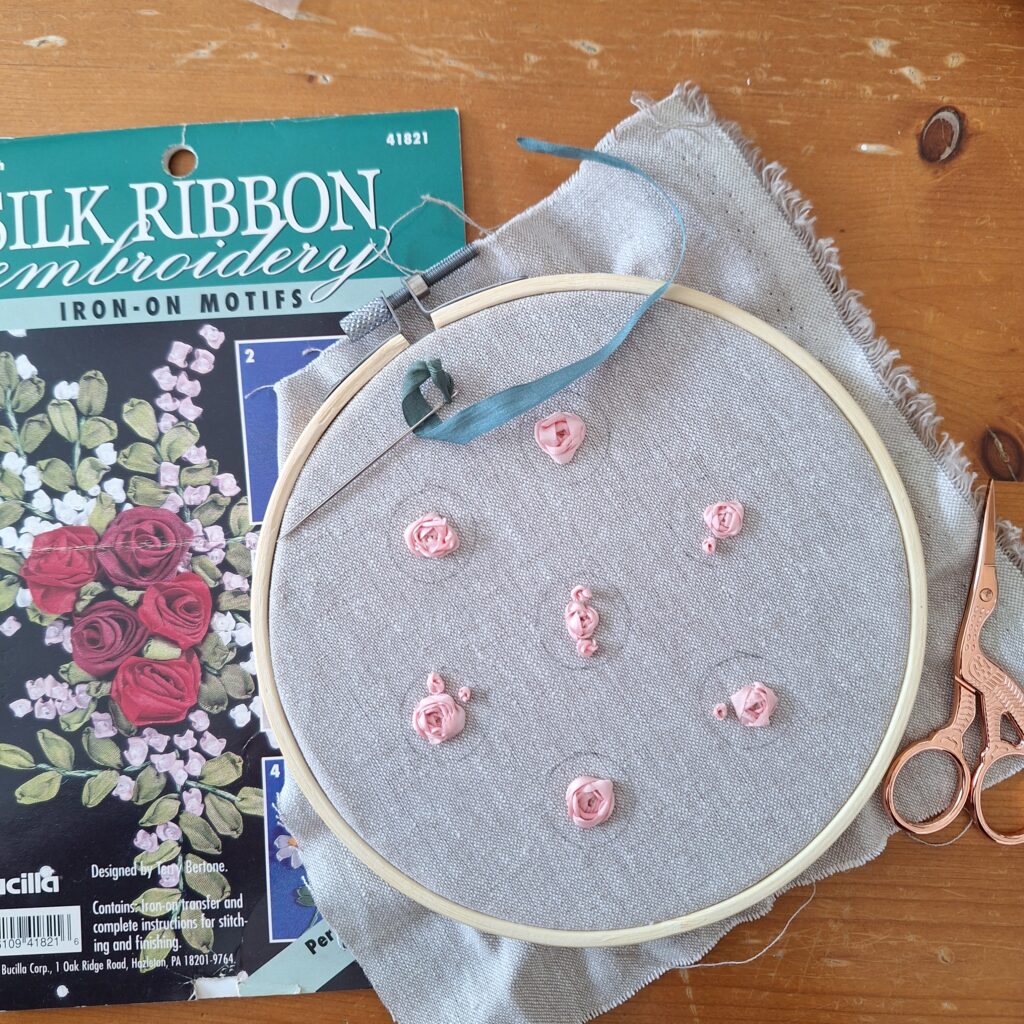
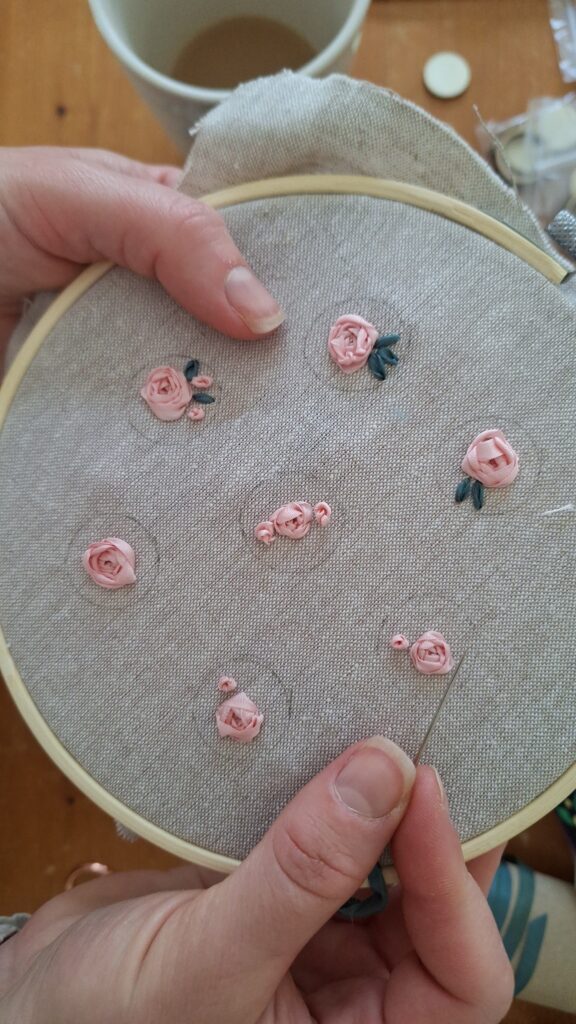
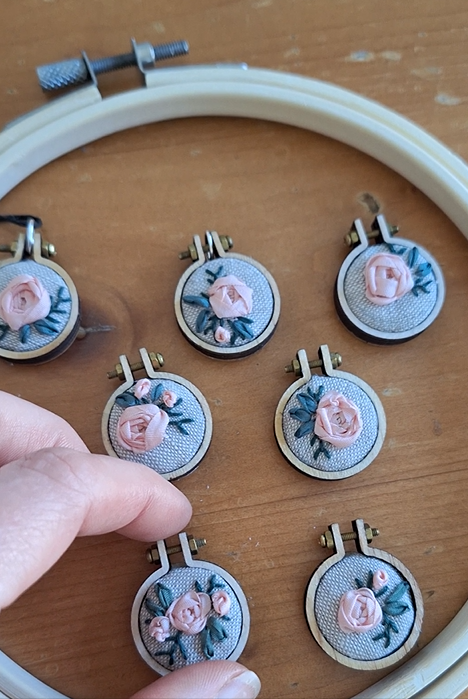
- Mini Embroidery Hoop: A small hoop (3-6 inches) is perfect for creating several mini designs at once. I used my charm frames to lightly outline the area I wanted to stitch within. Then I was able to create several mini canvases all at once. The smaller surface area means you’ll be stitching on a compact canvas, which can make it easier to learn the techniques. And batch creating makes each threading of the needle more efficient!
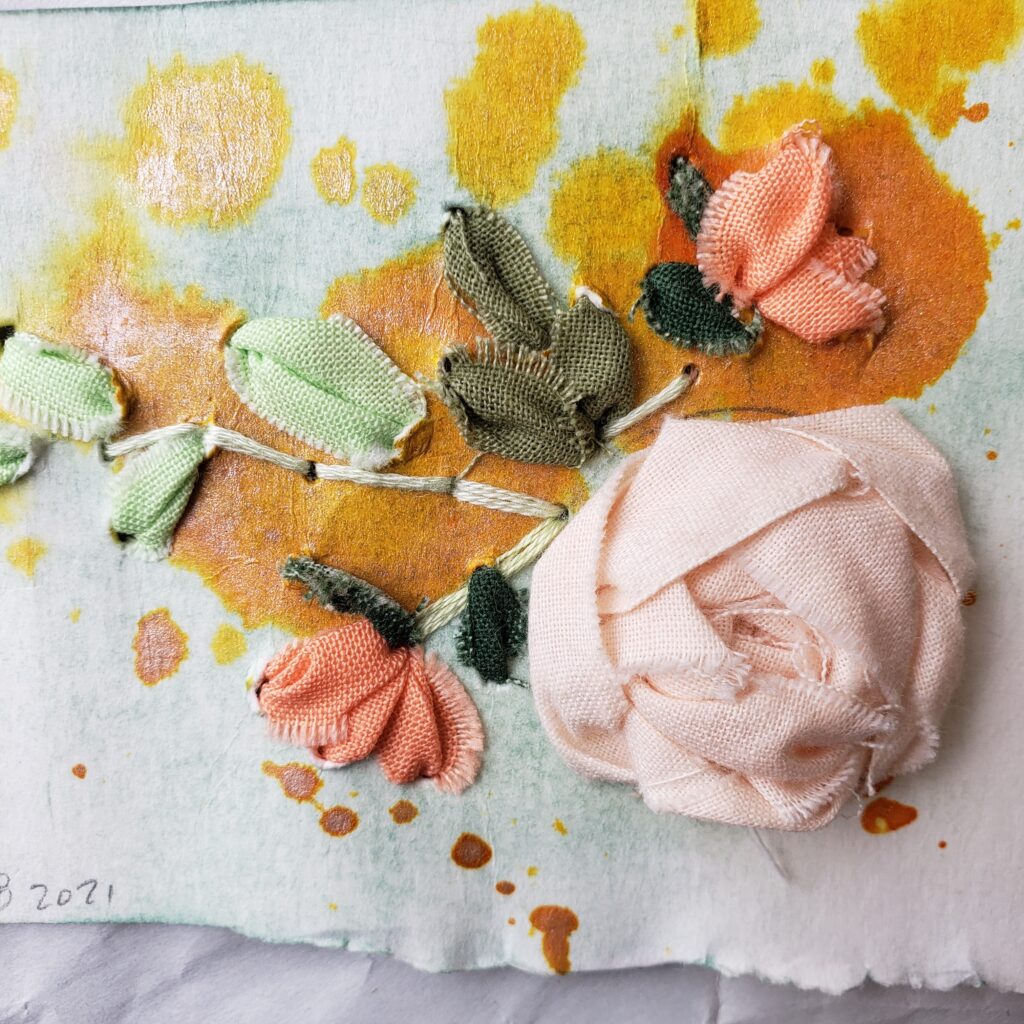
- Fabric: A natural fabric like cotton or linen is ideal, as it holds the silk ribbon well and provides a sturdy foundation for your stitches. Think about how the color of your canvas fabric will influence your stitch designs. I used oatmeal linen to keep my work sweet and light. If I had used a dark background the entire mood of the rose composition would chang from light to moody.
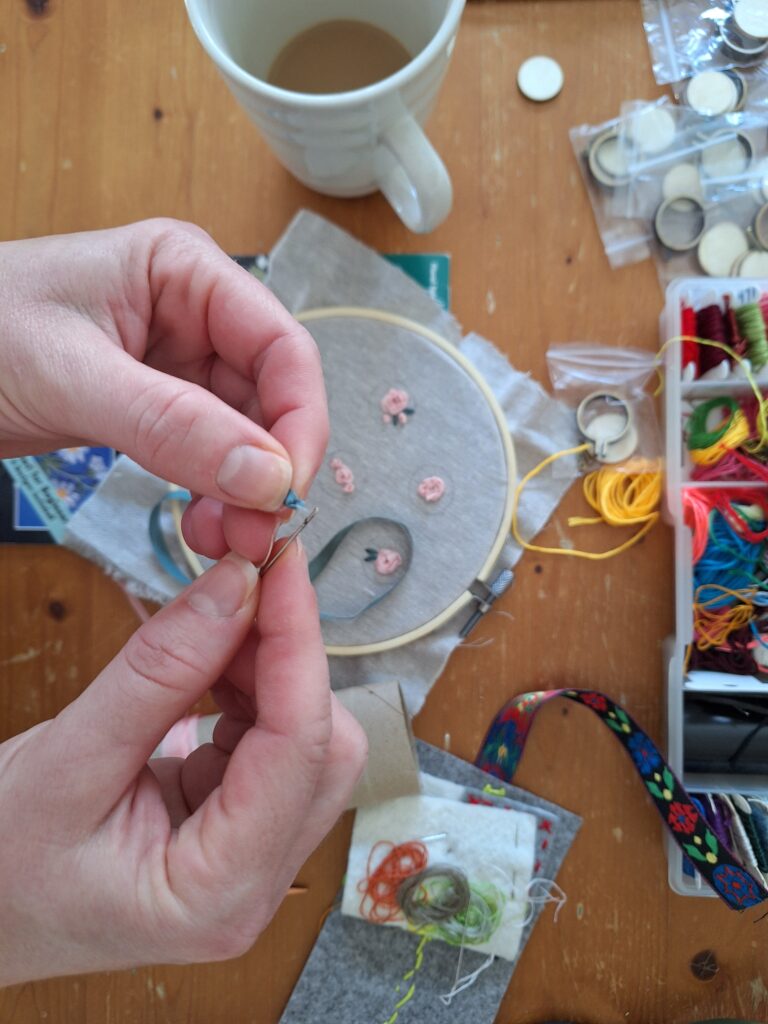
- Needles: Use embroidery needles with a larger eye to accommodate the silk ribbon. Be sure to select the right size based on the width of your ribbon.
- Embroidery Scissors: A sharp pair of scissors is essential for cutting your ribbon cleanly without fraying.
Basic Stitches for Silk Ribbon Mini Embroidery
Before diving into complex designs, it’s important to learn the basic stitches that form the foundation of silk ribbon mini embroidery. Here are a few stitches to get you started:
- Straight Stitch: This is the most basic stitch, simply pushing the ribbon through the fabric and pulling it back out. This stitch can be used for outlining or creating texture in the design.
- Lazy Daisy: Perfect for creating petals of flowers, this stitch involves looping the ribbon into a petal shape, leaving a small “tail” that you stitch down.
- French Knots: A great stitch for adding dimension and texture, French knots are formed by wrapping the ribbon around the needle several times before pulling it through the fabric.
- Spiderweb Rose: This technique involves creating a 5-spoken framework of stitches that act as anchor stitches to weave your rosette. By loosely pulling the ribbon over and under and around the spokes, the ribbon creates a beautiful and very natural-looking rose flower.
- Fly Stitch: This technique uses thinner embroidery threads to create a fern-like leaf effect. It’s particularly effective for foliage filler and leaves.
You can start with simple motifs like flowers, leaves, or even abstract patterns. The key is to play with the textures and colors of the silk ribbon, experimenting with different stitches until you find the effect you love.
Turning Mini Embroidery Hoops Into Wearable Art
While mini embroidery projects are adorable on their own, why stop there? One of the most delightful ways to enjoy your mini silk ribbon embroidery creations is by turning them into wearable art, specifically necklaces. It’s a fun way to showcase your intricate craftsmanship and turn your embroidered pieces into a personal fashion statement.
How to Make a Mini Embroidery Necklace
Here’s how you can turn your mini silk ribbon embroidery hoops into wearable necklaces that are both chic and meaningful:
1. Choose Your Design
Start by choosing a design that you think will look great as a necklace. Small flowers, abstract designs, or even tiny animal motifs work wonderfully in miniature. You can also incorporate elements like pearls or beads for added flair. Keep in mind that the design should not be too heavy or bulky since you’ll be wearing it around your neck.
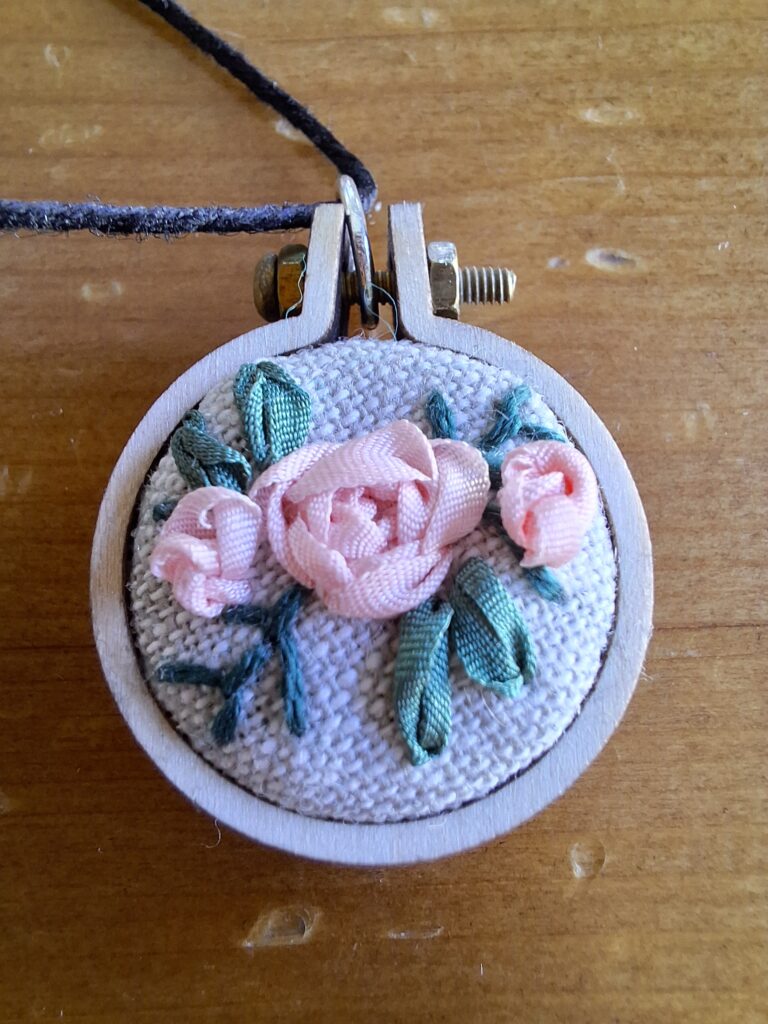
For my charms, I chose to keep it simple with one large spider web rose as the focal point. If the featured rose was on the smaller side, I added a few French knots in the same ribbon. These knots look like small rose buds. Then I filled in around each rose with a smattering of greenery in complementary silk and embroidery floss. The dark green is striking next to the pale pink.
Remember to keep in mind the impact of negative space, even in your embroidery work. Leaving some area of the background unfilled allows your design elements to shine.
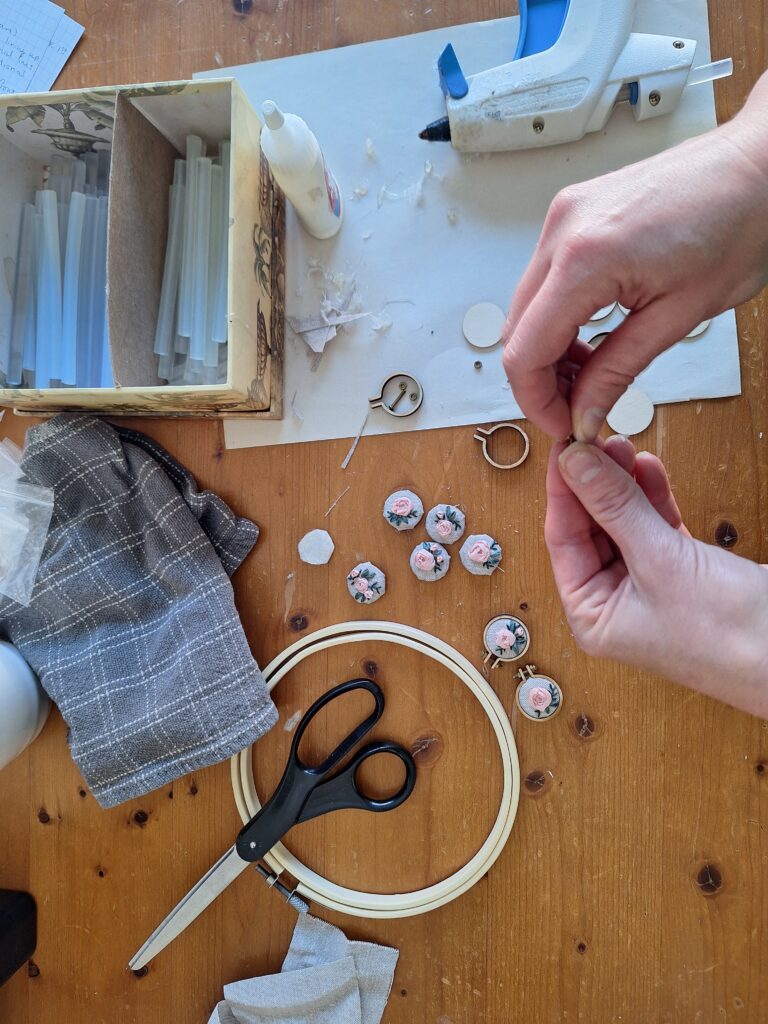
2. Create Your Mini Embroidery Hoop
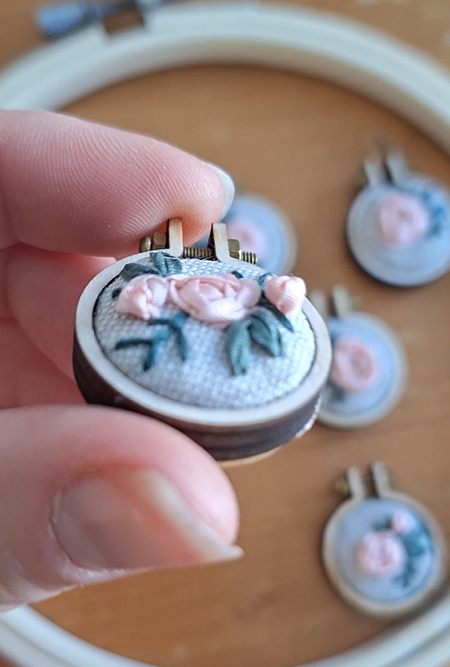
Stitch your design onto fabric in a mini embroidery hoop. Be sure to keep the edges neat and trim any excess fabric. If you want your piece to have a clean, professional look, you can finish the back of your hoop with felt or fabric to hide the threads. The mini hoops linked HERE include a small backer piece of wood that you can glue on to cover the back of your embroidery.
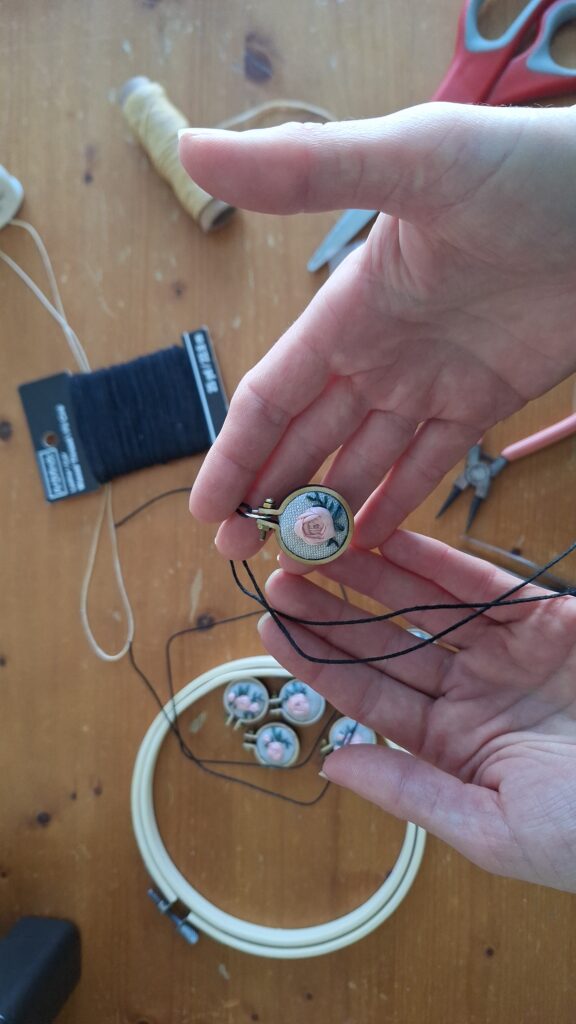
3. Prepare the Necklace Setting
Once your mini hoop is ready, it’s time to turn it into jewelry. You’ll need a jewelry finding such as a small jump ring or a pendant bail. Simply use pliers to attach the jump ring to the top of the mini hoop, ensuring it’s secure. Small jewelry pliers are a minor investment but will be a welcome addition to your crafting tool stock for finishing off any tiny project. This will serve as the connector for the necklace chain.
4. Add a Chain or Cord
Choose a chain or cord that complements your design. You can opt for a delicate gold or silver chain for a classic look, or a leather cord for a more boho, rustic vibe. Attach the chain to the jump ring, and voilà—you’ve got a one-of-a-kind embroidered necklace!
5. Wear and Enjoy!
Now comes the best part—wearing your new mini silk ribbon embroidery necklace! Pair it with a simple outfit to let the pendant shine, or give it as a thoughtful gift to a friend who appreciates handmade accessories. You’ll be amazed at how such a tiny embroidery project can make such a big statement.
Other Creative Ideas for Mini Embroidery
While wearable necklaces are one way to enjoy your mini embroidery creations, there are plenty of other ways to showcase your artwork. Here are a few ideas to spark your creativity:
- Mini Embroidered Brooches: Turn your mini hoops into chic brooches or pins. With the rise of Granny Style and Cottage Core aesthetics, it has never been chicer to wear some small stitches reminiscent of the Victorian era. Simply add a pin back to the hoop, and you’ve got a wearable piece of art that can be attached to coats, bags, or hats.
- Keychains: Attach your mini embroidery hoop to a keychain for a fun and personalized accessory that you can carry with you everywhere. One caveat to note on this application would be to be mindful of the dimension of your stitching. You wouldn’t want to create a masterpiece only to have any loose or dimensional threads get snagged and ripped.
- Gift Tags: Create small embroidered tags to attach to presents. These mini works of art make thoughtful and unique additions to gifts for birthdays, holidays, or weddings. They very well may become a treasure just as valued as the gift they are attached to.
- Bookmarks: The scale of mini embroidery would be perfect for a bookmark. If you are applying it to this application, again, I’d be mindful of how dimensional you make the stitches!
- Framed Art or Fridge Magnets: Use mini hoops to create small, framed pieces of art that you can hang on the wall or display in your home. Add a magnet to the back of one of the mini hoops and use it as charming decor on the fridge or notice board. These are perfect for a whimsical, handcrafted touch in your decor.
The Therapeutic Joy of Silk Ribbon Mini Embroidery
Beyond the aesthetic appeal, one of the best things about silk ribbon mini embroidery is how therapeutic it can be. The act of stitching with ribbon, whether you’re creating a floral design or a whimsical scene, can be incredibly calming. It’s an opportunity to slow down, focus, and let your creativity flow.
Whether you’re working on a tiny hoop, stitching on a necklace, or crafting small art pieces, the repetitive motions of embroidery have been known to reduce stress and increase mindfulness. Plus, there’s a sense of accomplishment that comes with creating something beautiful and unique by hand. The end result? A crafted masterpiece and a satisfied soul.
If you would like to support my work, kindly consider purchasing my handmade goods. All seven of my mini silk ribbon rose charms are currently available in my Etsy shop HERE.
The YouTube Video Reveal
I know you’re excited to see how they all turned out! In addition to this detailed blog post, I’ve created a two part YouTube video series that walks you through my creative process. In Part One, you’ll see firsthand how I’ve used the vintage silk ribbon, piece of linen, and miniature embroidery hoops to create these adorable necklace charms.
The Joy of Silk Ribbon Embroidery Part One: Creating Stunning Rosettes
The Part Two video shares a few tips on finishing off the charms and creating a necklace perfect for gifting. If you’ve been wanting to create some sweet charms to showcase your stitchwork, this video is a must-watch!
The Joy of Silk Ribbon AEmbroidery Part Two: Making the Silk Rose Mini Embroideries Into Charms
Final Thoughts
Silk ribbon mini embroidery is more than just a craft; it’s a journey into the world of texture, color, and creativity. Whether you’re creating a piece of wearable art or simply enjoying the therapeutic process, there’s no shortage of ways to make the most of this delightful technique.
So, why not give it a try? Grab your mini hoop, some silk ribbon, and start stitching your way to a new, creative adventure. Who knows, you might just end up with a whole collection of miniature embroidery masterpieces ready to wear, share, or display with pride!
Happy stitching! Janice
Inspiration and resources are linked where applicable. All written work and photographs are original content and are copyright protected; kindly give due credit by linking back to my website if you use or share.
(©2025, Janice Bailor // laruedefleurs.com)