
Back in my late high school and college days, I was also wild about crafting. In fact, I would say I spent more time creating and experimenting with different crafts in my dorm room than pursuing regular college activities like socializing. (Forever an introvert, I guess.)
My poor husband, only my boyfriend at that point, was forced to take me to craft stores to shop for materials on our weekend dates. He really should have known what he was getting into when we married. Anyway, the point is, I always loved browsing the aisles looking for a new craft item I was just familiar enough with to give it a go. That is how I found silk ribbon embroidery.
I loved the look of the large ribbons all twisted up into floral shapes using the embroidery stitches I already knew. The texture was so inviting. I bought a whole kit. And in typical fashion, I came up with a totally over-ambitious project to use my new materials. As I jumped into the project of stitching a new top cover for some simple sandals I had bought at the thrift shop, I quickly realized I did not have the skills of a cobbler.
I lost interest in completing my project, using the silk ribbons, and wearing the sandals. I donated the sandals and tucked the embroidery ribbons in a box, moving them around through several apartments, houses, and interactions of my crafting space for over a decade.
Then, like only the very best hoard of supplies can deliver, I stumbled upon the box of ribbons again and had a new idea.
The Idea
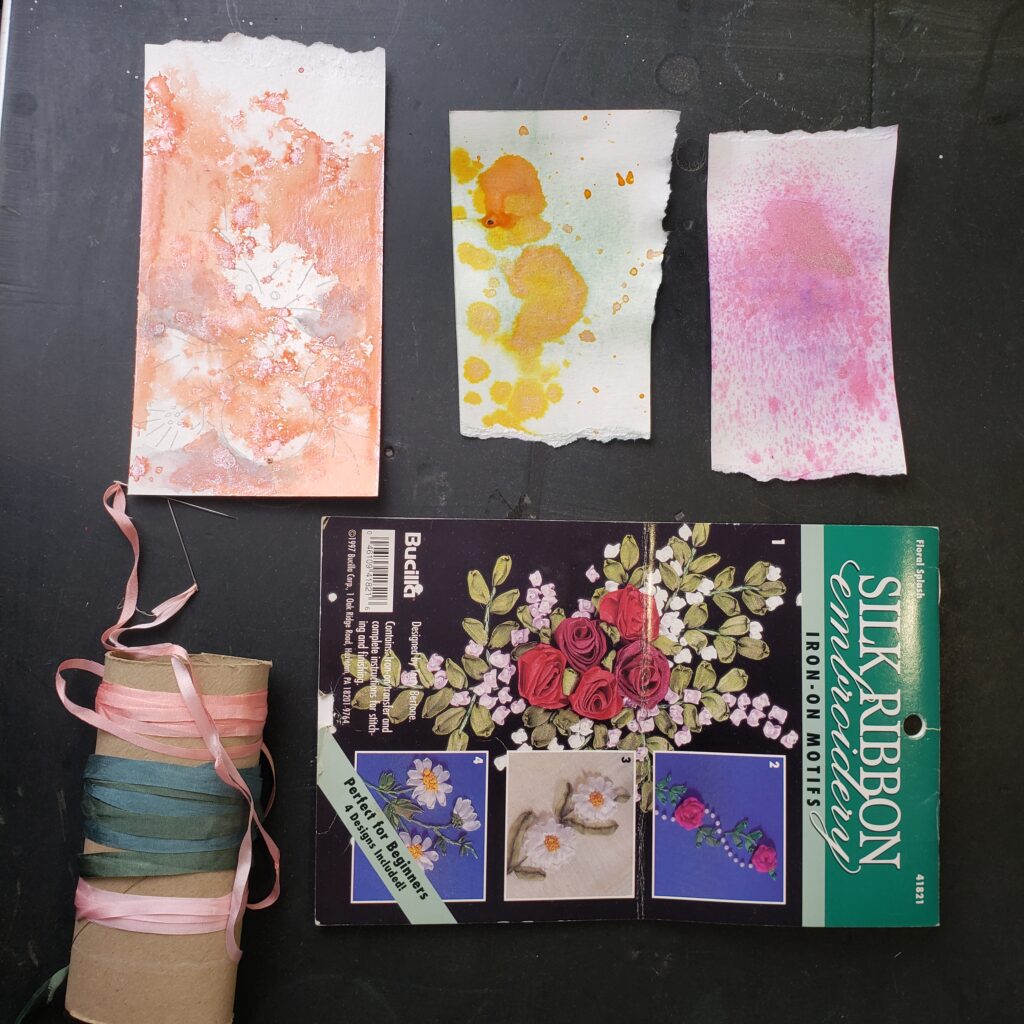
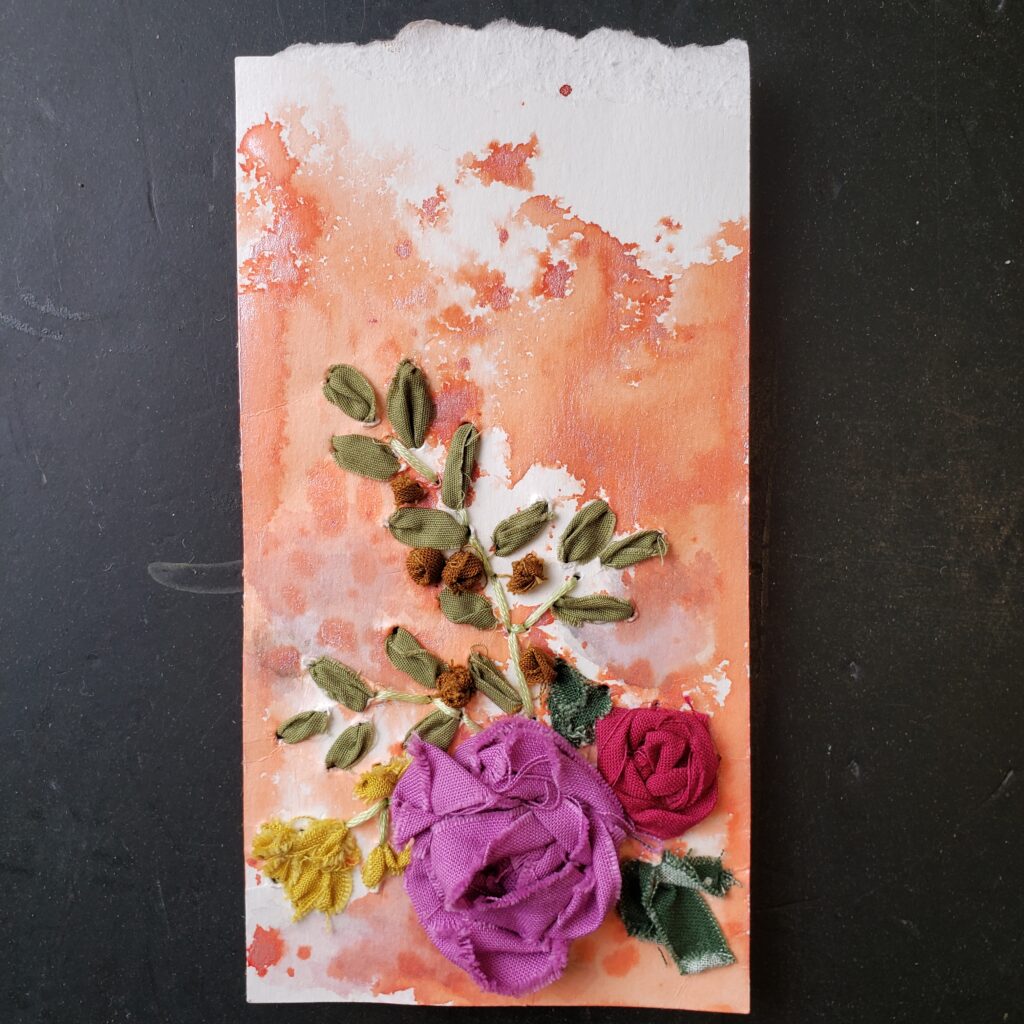
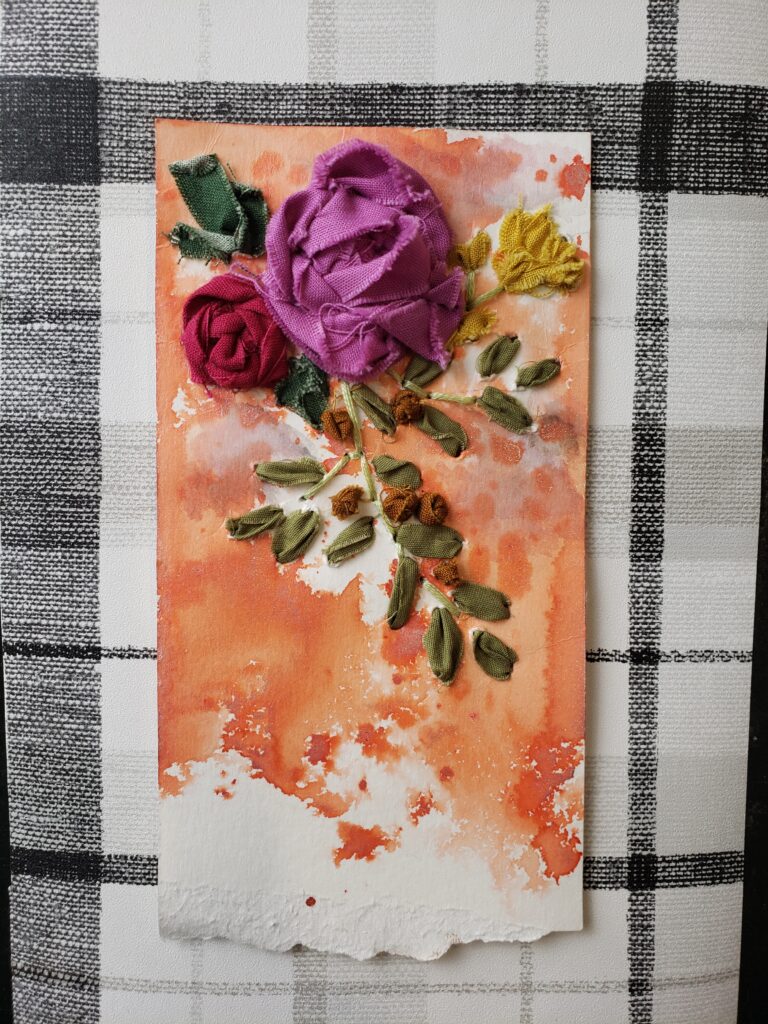
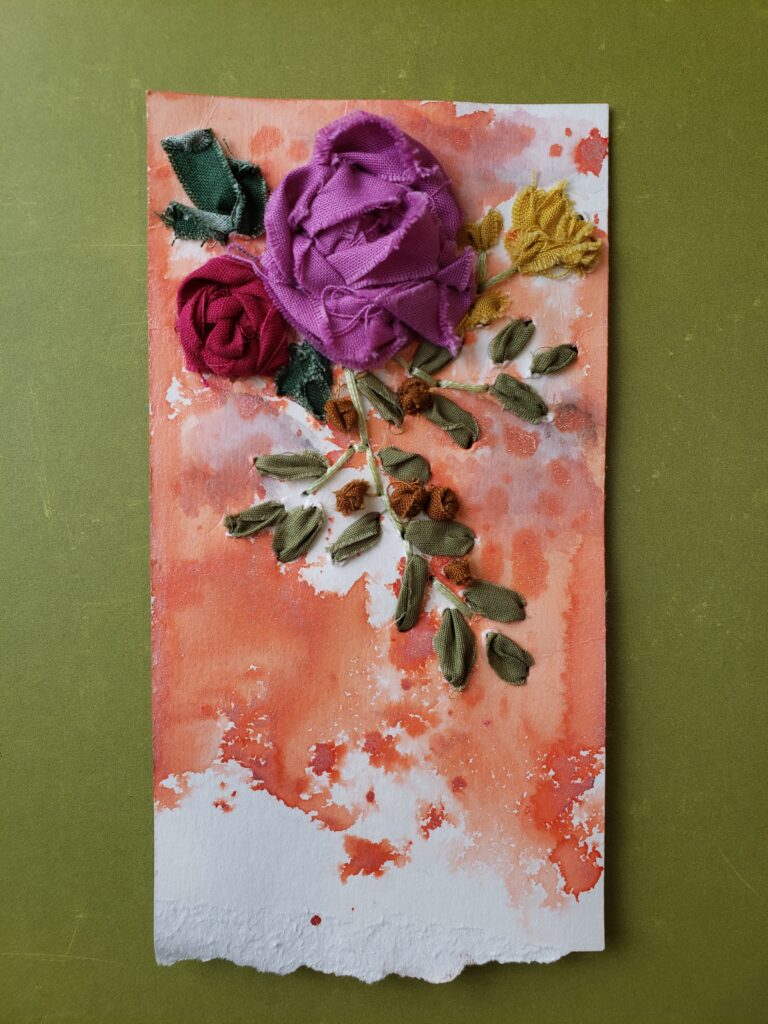
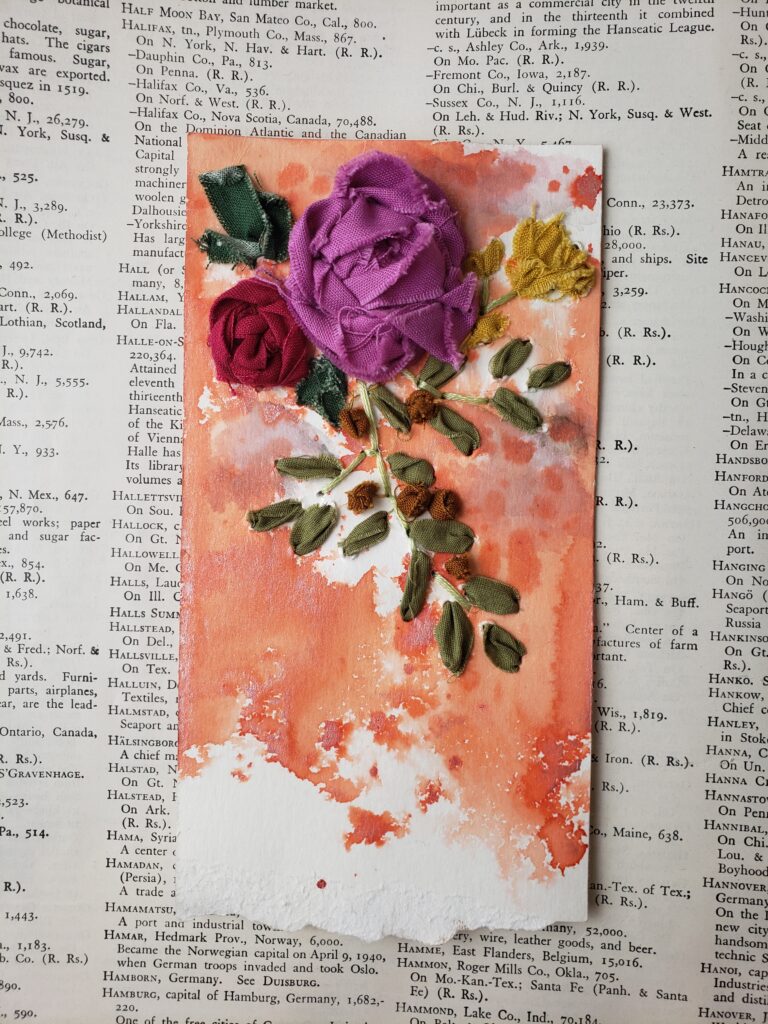
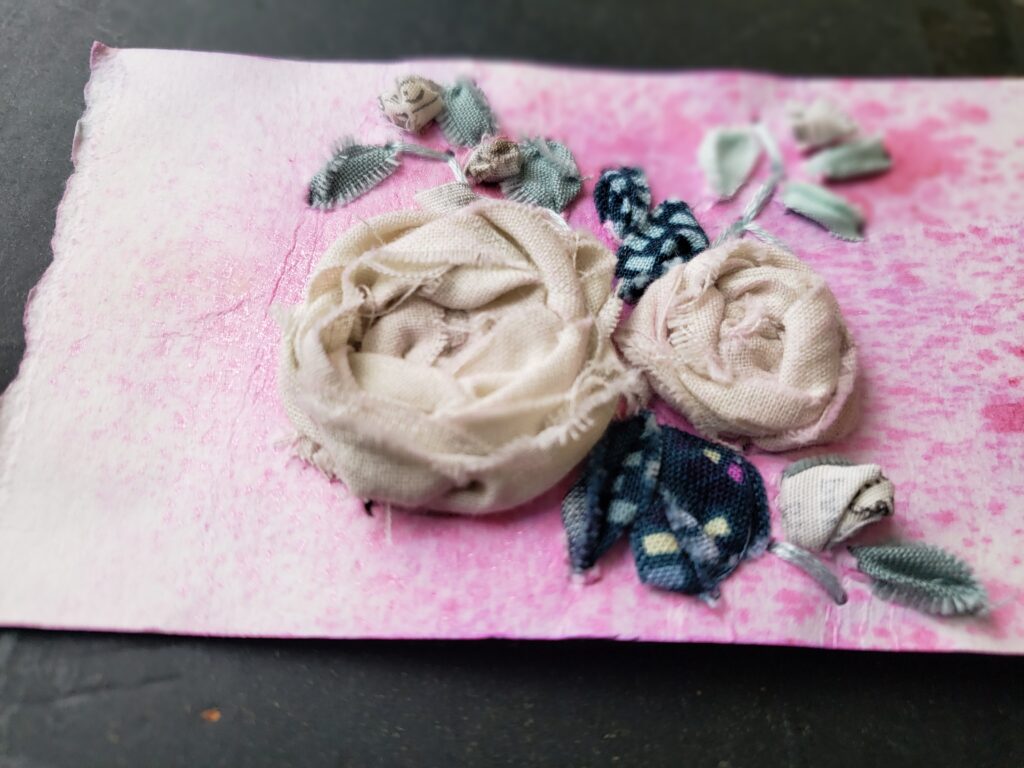
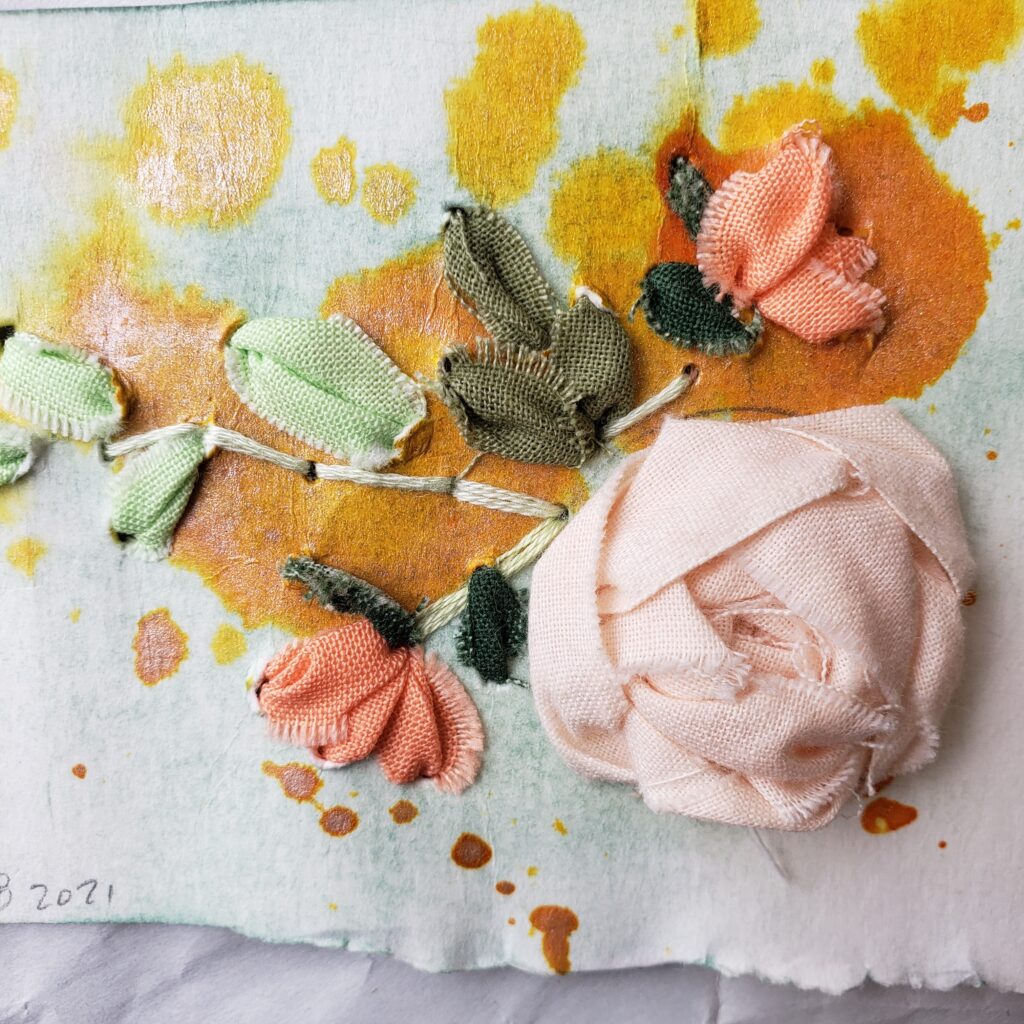
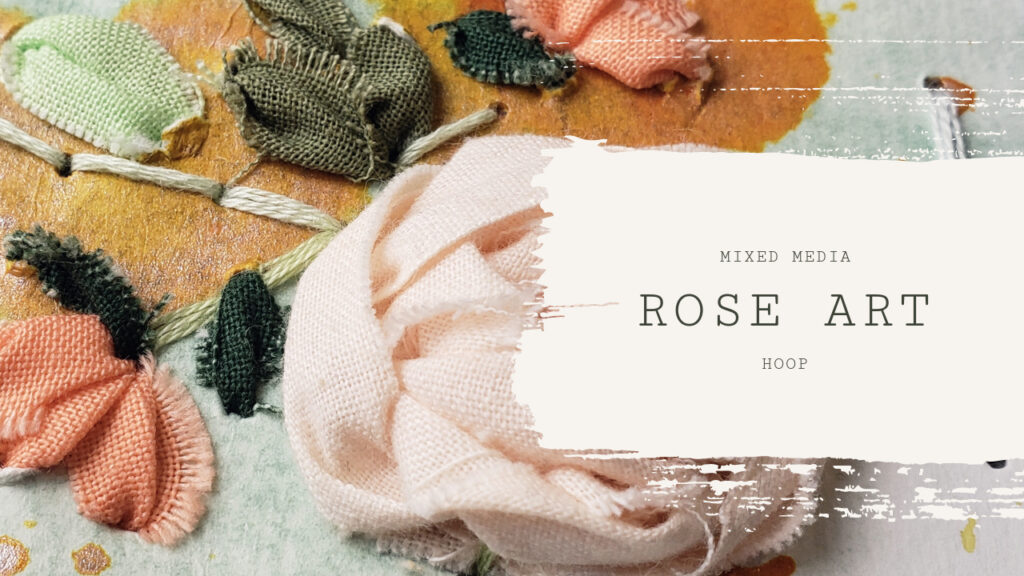
I decided to use a few scraps of mixed media paper and play with creating inked backgrounds. The slim cuts of paper absorbed the inks and watercolors so beautifully. I love the effortless effect of the drips and dribbles of ink absorbing into the paper. The cards seemed like the perfect background to highlight some fancy stitch work.
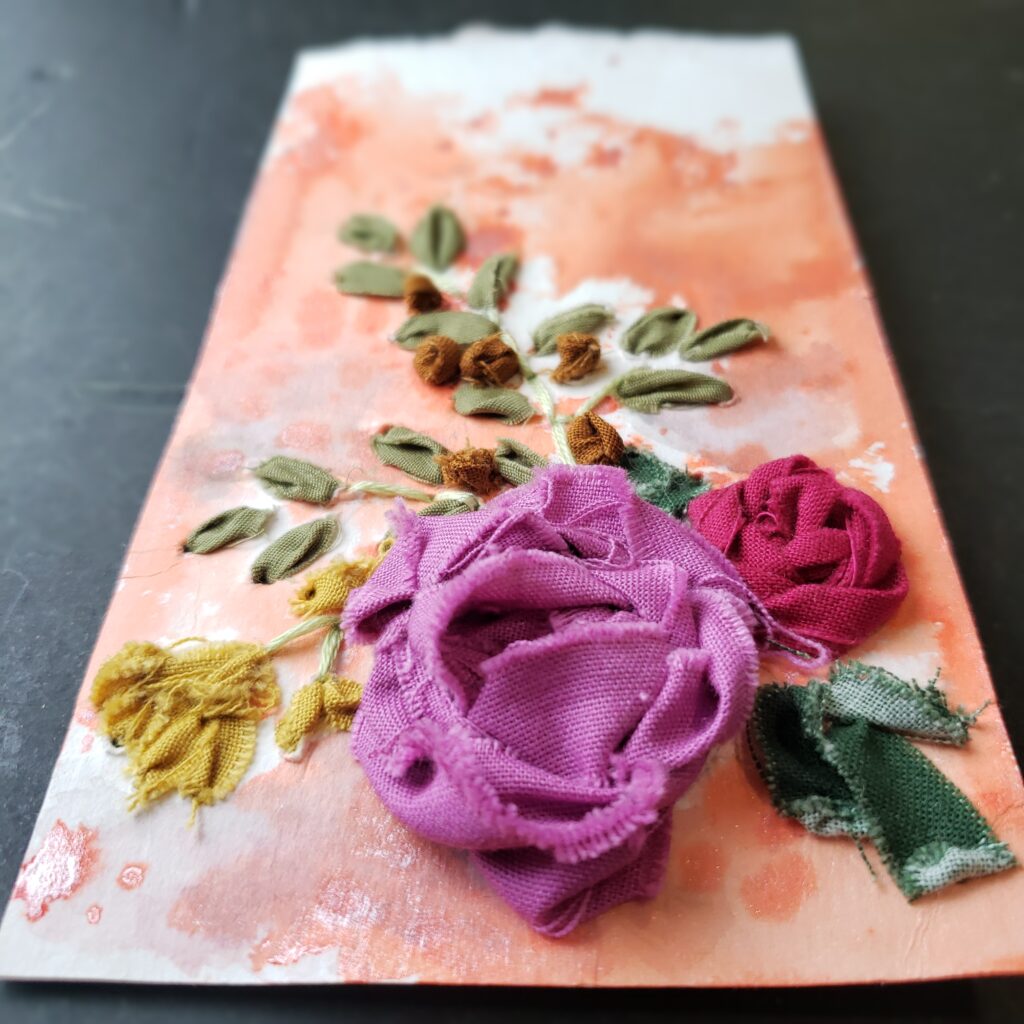
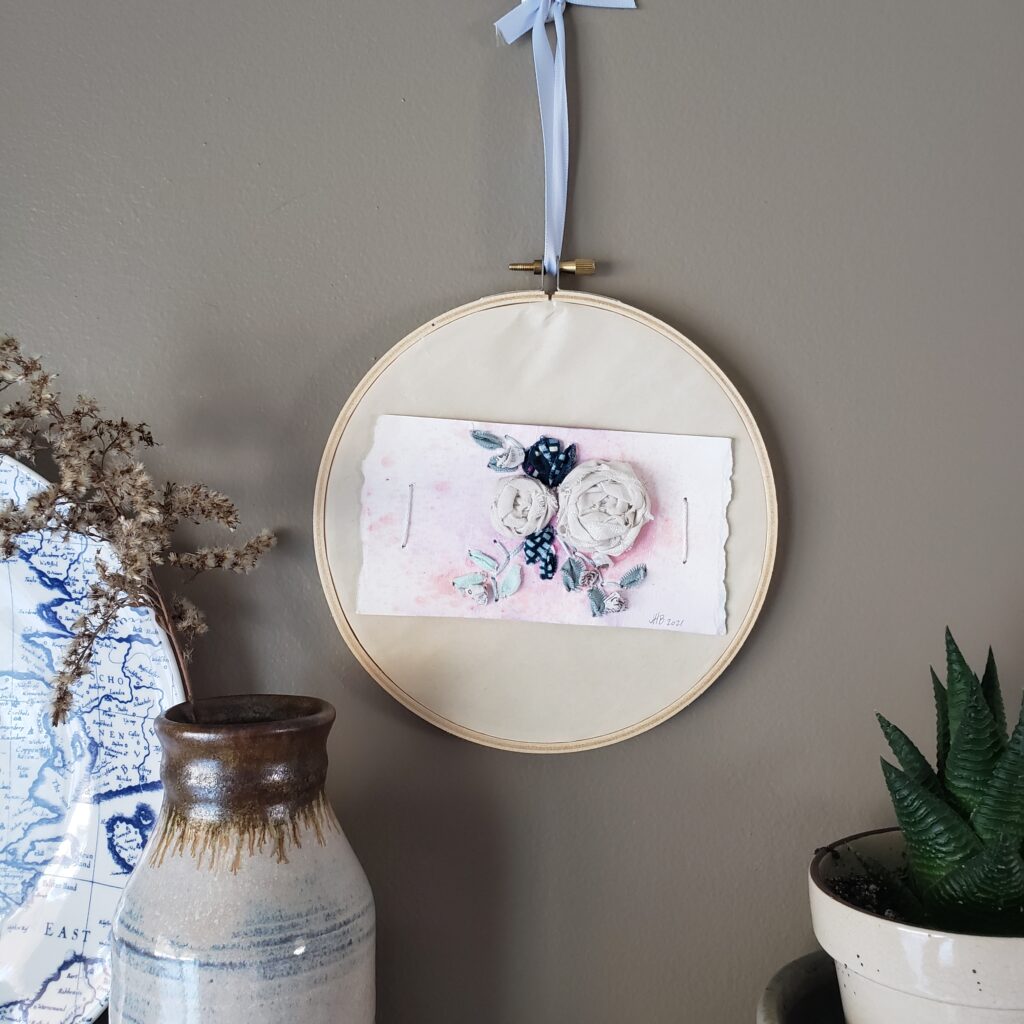
I used the sketches from inside the embroidery pamphlet to get ideas of how to design my floral sprays on the background of the paper and which flower stitches I may want to use. Staying with mostly roses seemed like the best course of action, as I knew I wanted to experiment with lots of texture and ribbon sizes. The framework of the embroidery rose is laid out much like a spiderweb. Think of it like spokes of a wheel which you then weave through on top of the surface.

Creating the Stitches
In my original playtime with the mixed media paper, I found it was both easy to rip, and also difficult to puncture with a needle. The least amount of up and down through the paper the better off I knew I would be. I used an awl to help poke the holes initially, but it was tough going. My fingers ached after only a few stitches through the paper.
As a crafter, and quilter in particular, I simply love every little bit of the materials I work with. I find it so hard to let even the thinnest bits of fabric hit the trash bin. For better or worse, I save a lot of these thin strips in an old oatmeal tube. Well, it just so happens those thin strips of solid pieces of cotton were perfect for the rose embroidery! Hoarding tendencies reinforced – haha.
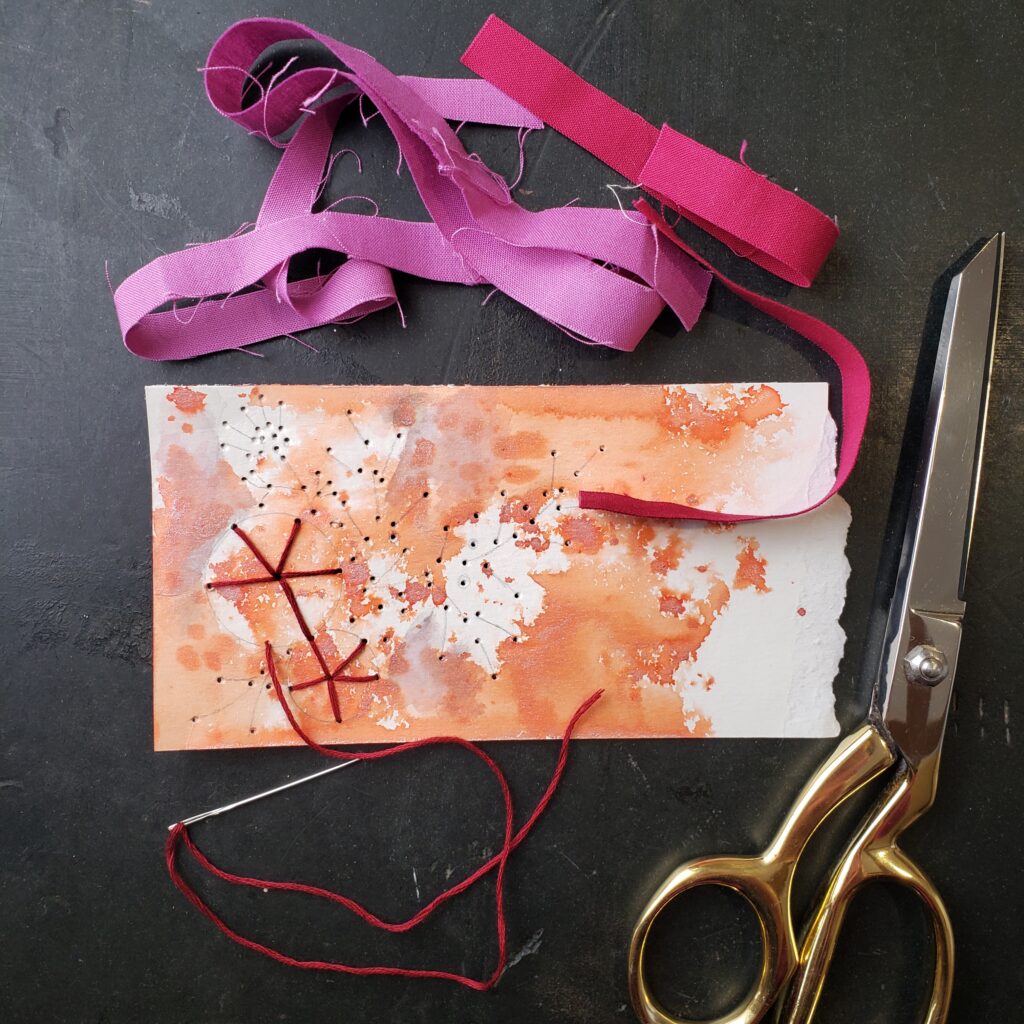
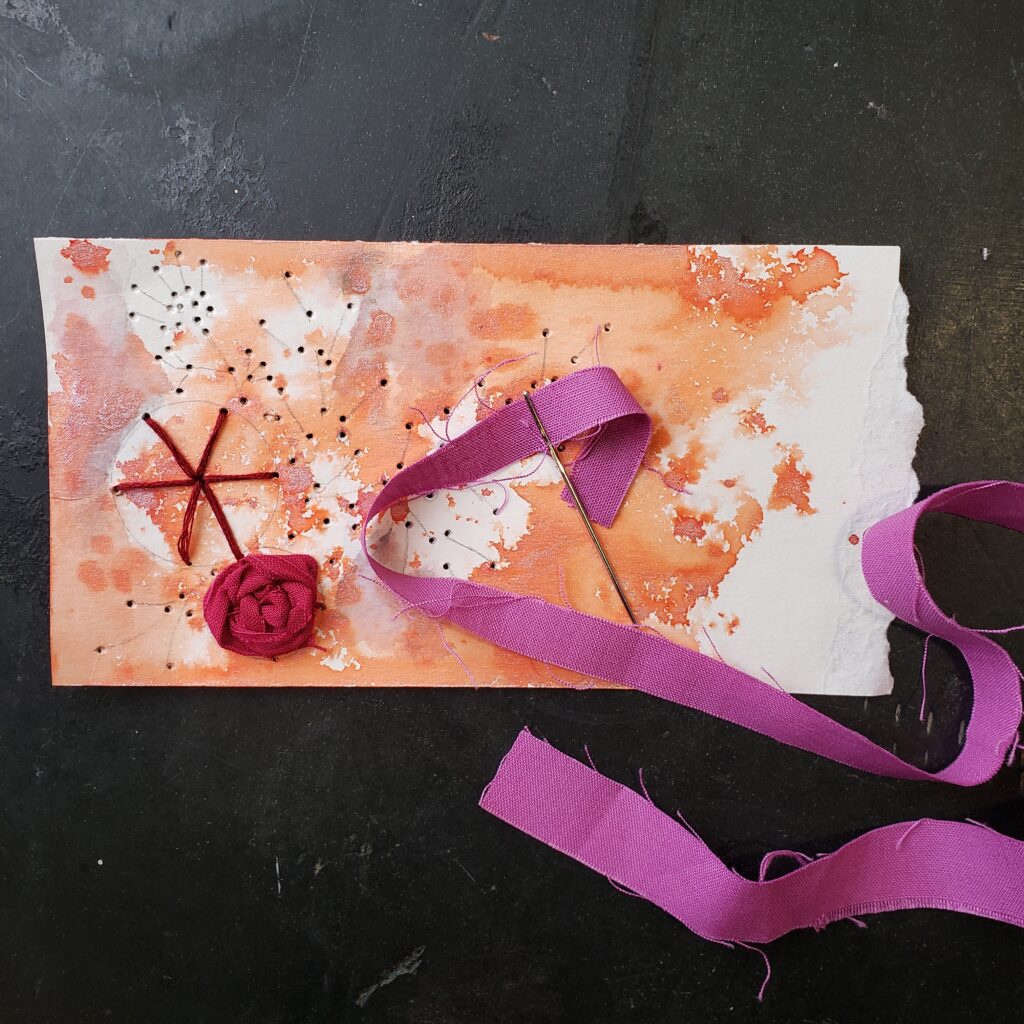
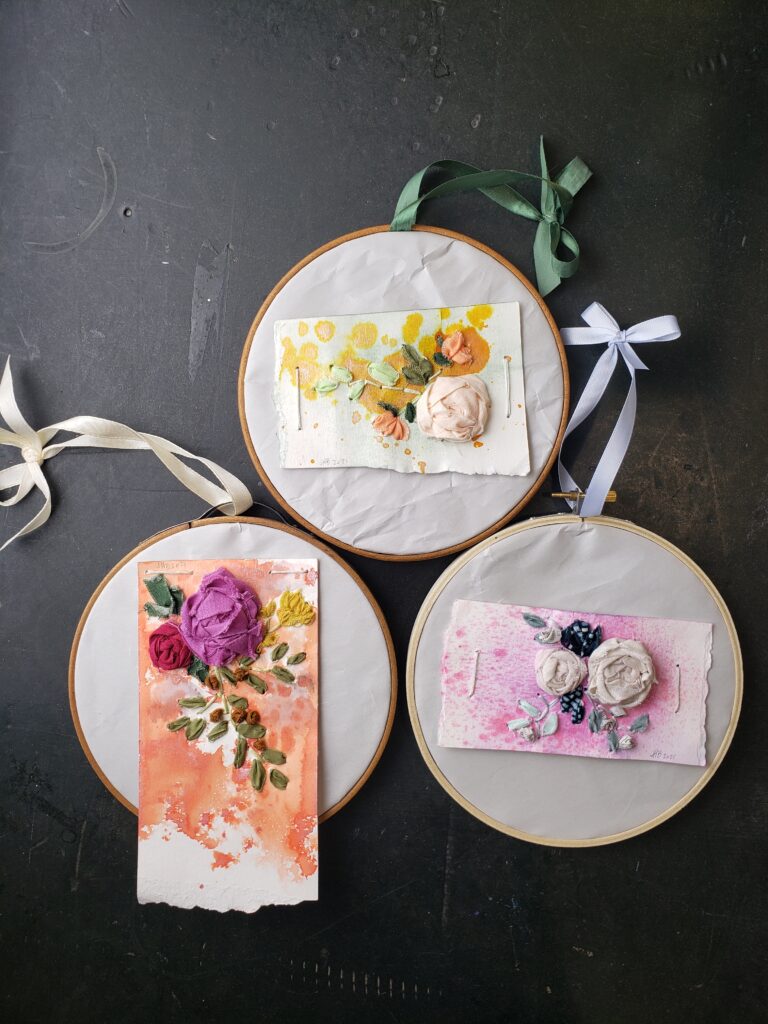
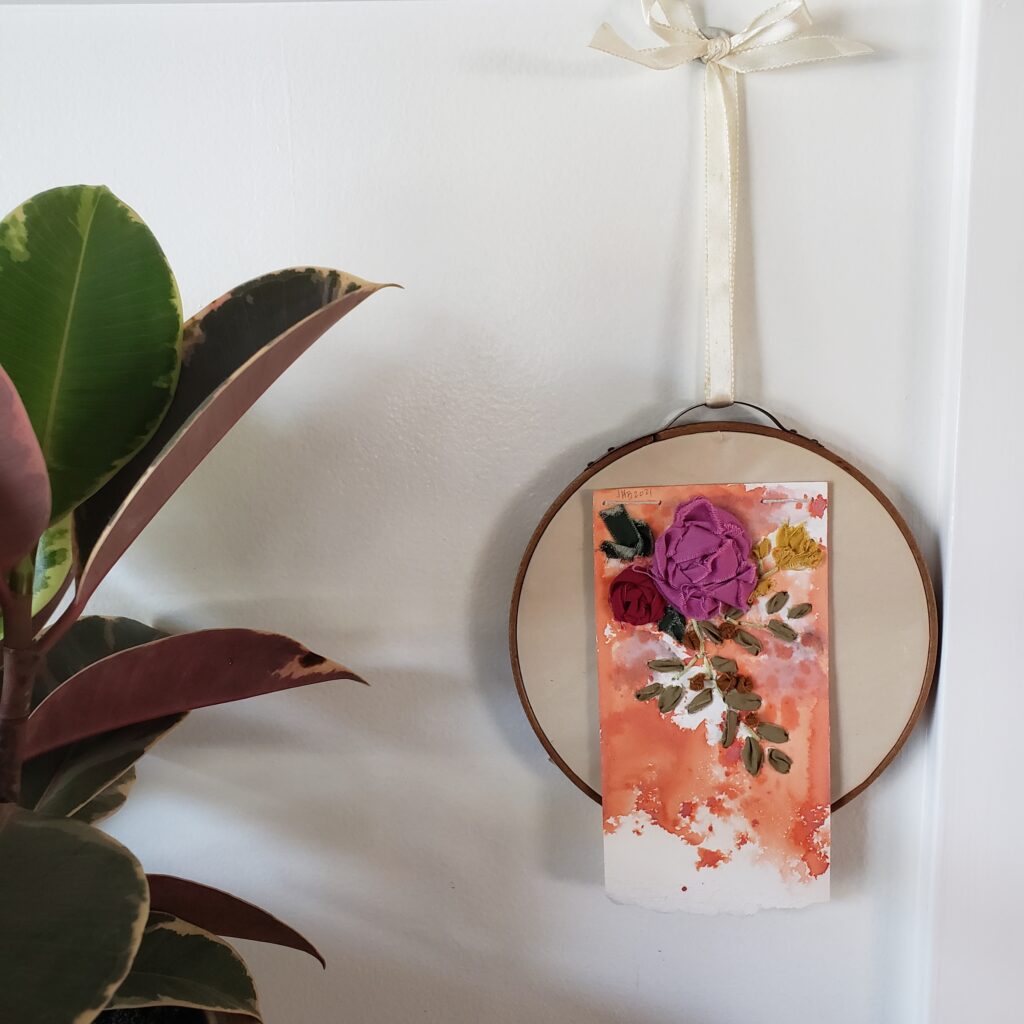
Using the cotton strips I created several large and a few small roses on each color card. I chose colors of fabric that complimented the backgrounds. I fell particularly in love with the sangria roses on the warm orange ink background. The combination of both created a romantic sunset vibe.
After I stitched the roses and took a break for my fingers to stop throbbing, I again referenced the ribbon embroidery kit to get additional ideas for finishing my stitched floral spray. I used thin strips of green fabrics to add leaves and other thin strips of cotton for minor flowers.
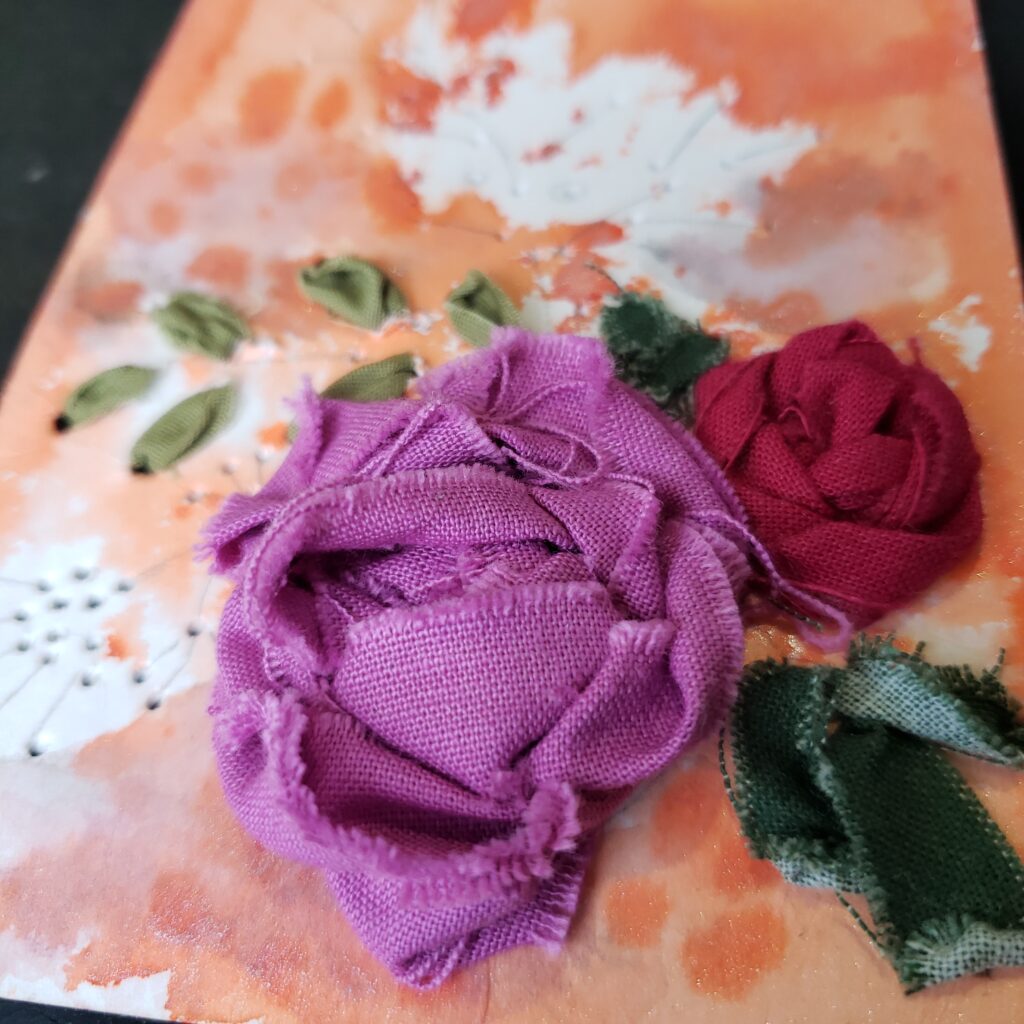
I love how the fabrics slightly frayed around the edges from being pulled through the paper. The texture of the fabric, with little loose threads, adds so much depth and interest to the overall look in my opinion.

Mounting the Stitched Cards
After I finished all three rose cards, I realized they needed some way to be displayed. I first placed the cards on various background papers and solicited opinions from my Instagram followers as to which best set off the composition. Tell me, which is your favorite?
In the end, I decided to go with a very neutral paper background set into an embroidery hoop to serve as the frame. I attached each card with a few delicate lines of stitching and some double-sided adhesive. A coordinating ribbon at the top of the hoop allows them to be hung as part of a gallery wall.
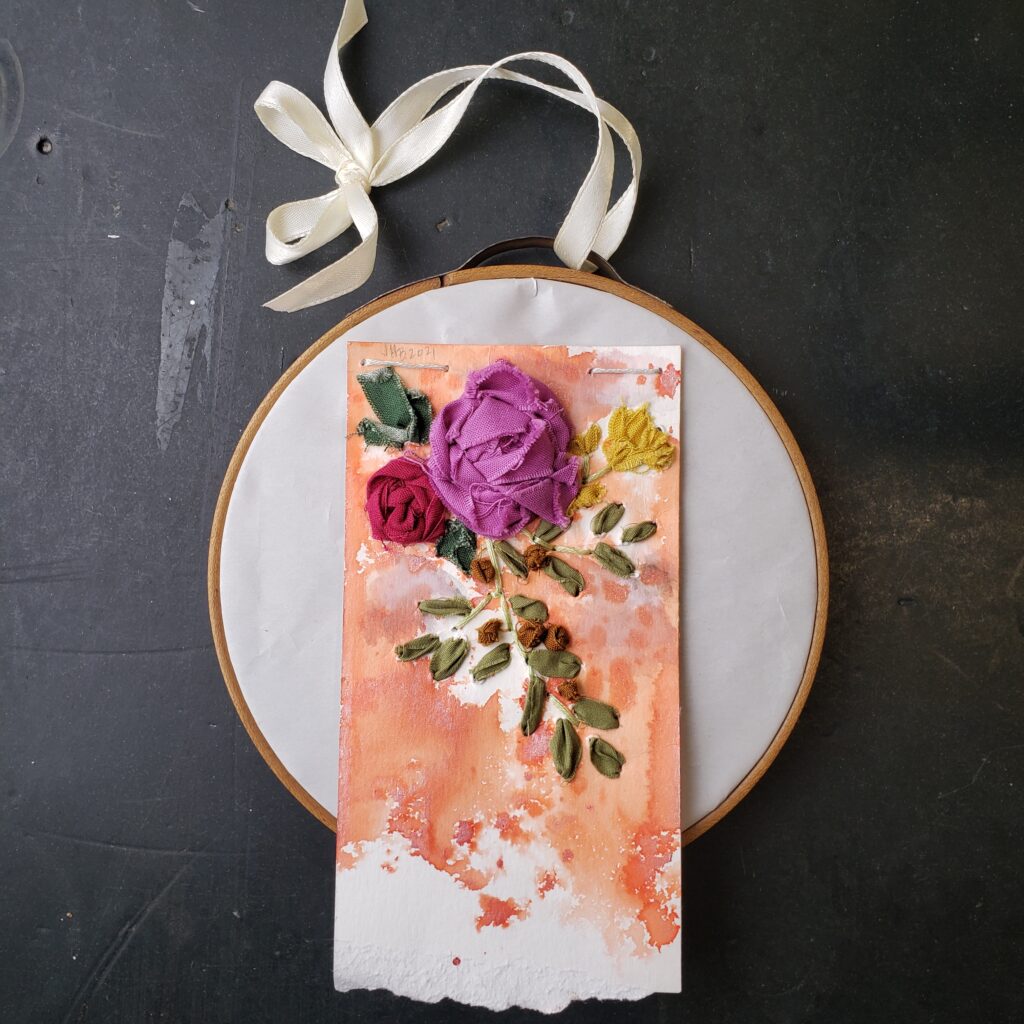
Embroidery hoops make lovely frames for 3D artwork, especially anything stitched. You can get a few more ideas about using embroidery hoops in your projects from the Top Five list I wrote on the subject here.
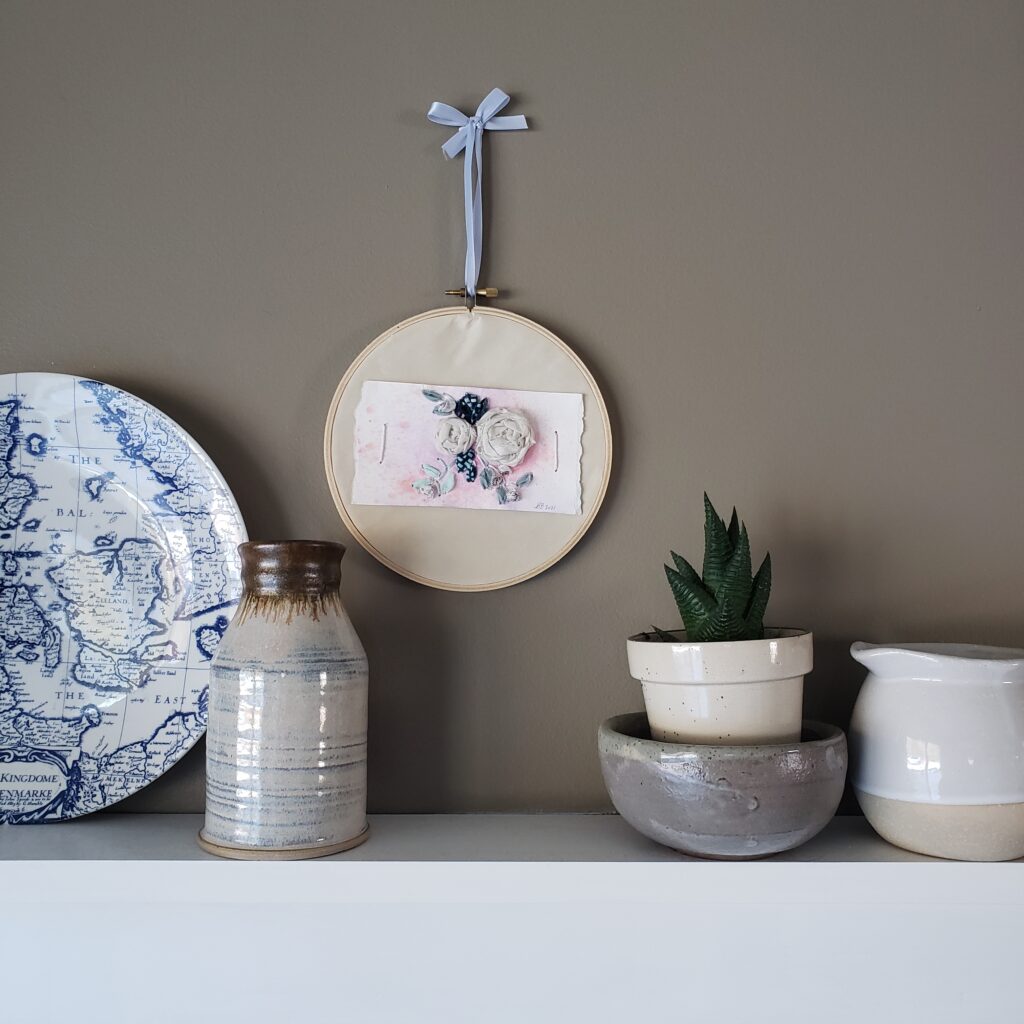
I made three versions of the rose embroidery hoops. Each has its own personality, which I love. The sangria rose feels very romantic. The white rose feels very tranquil. And the peach rose feels very serene. All are available for purchase in the La Rue de Fleurs Etsy shop.


Use and Styling
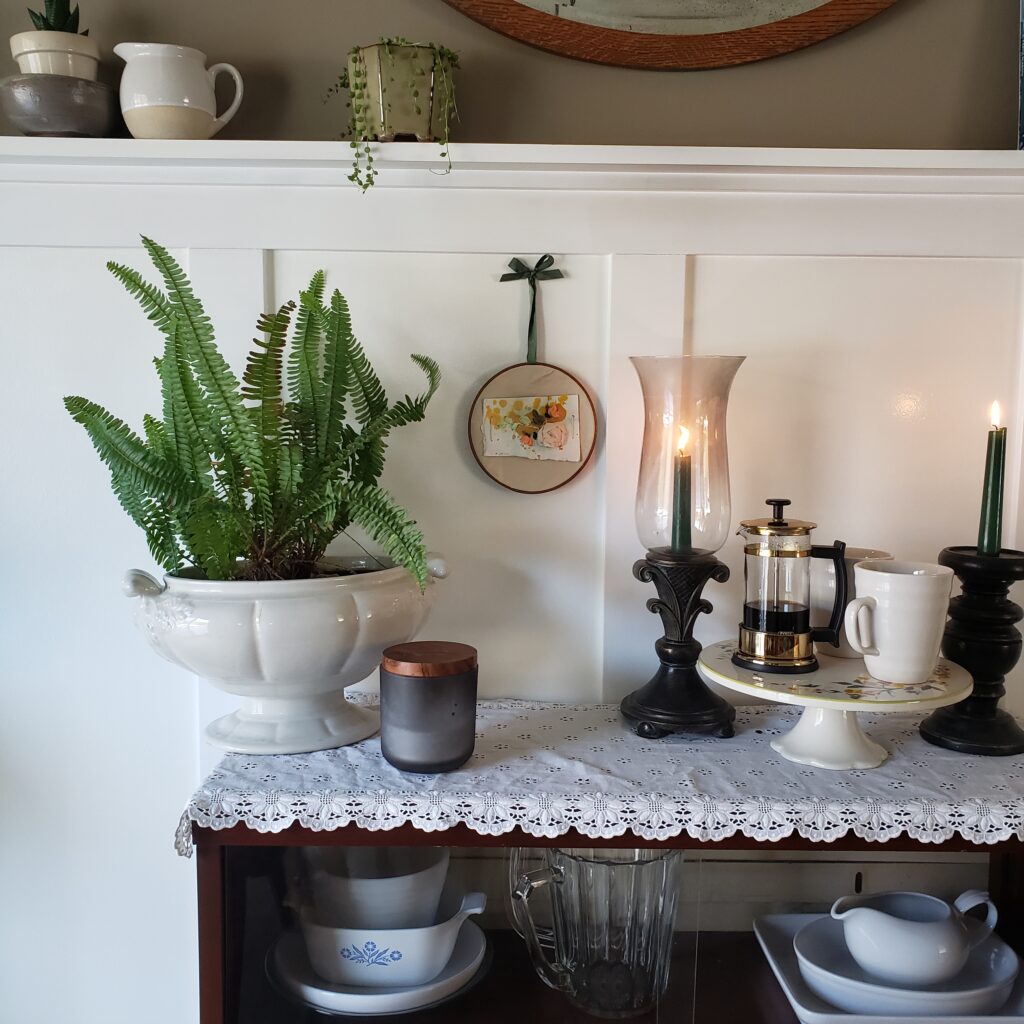
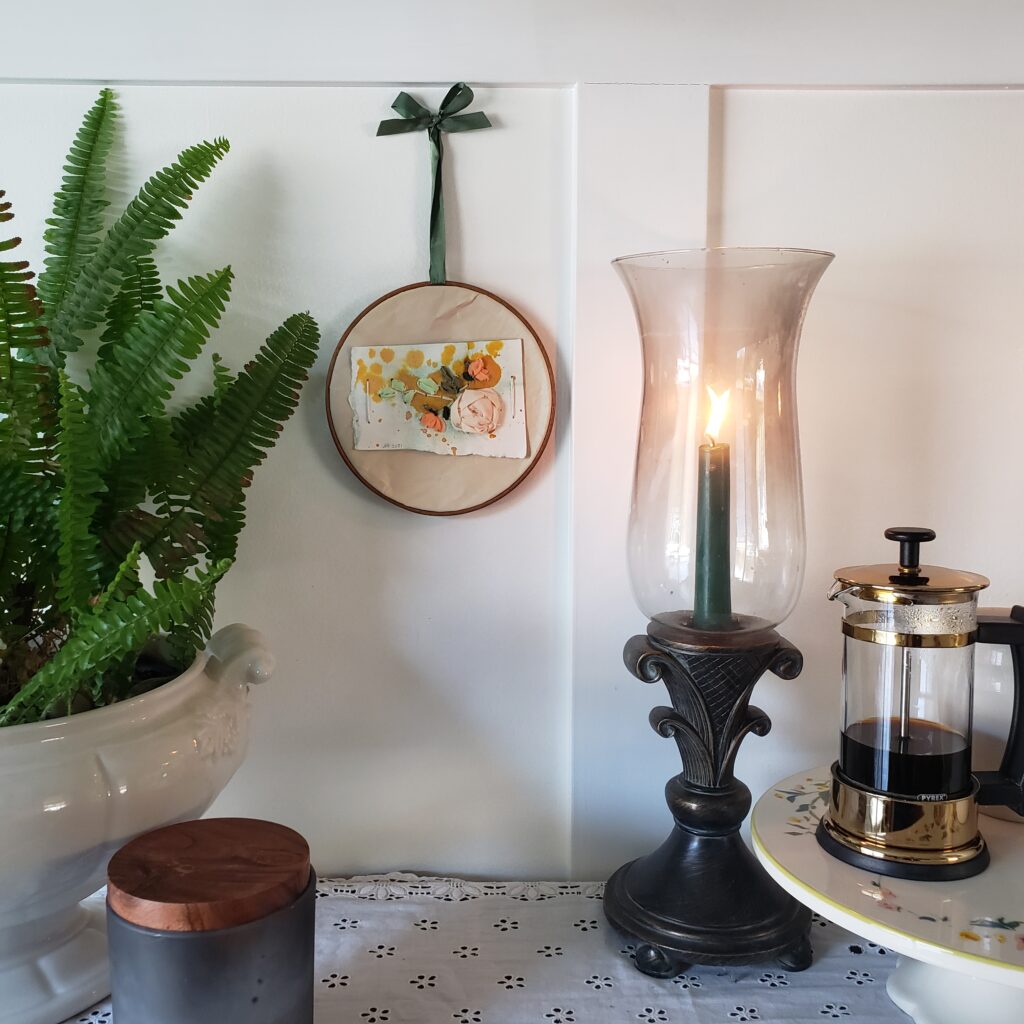
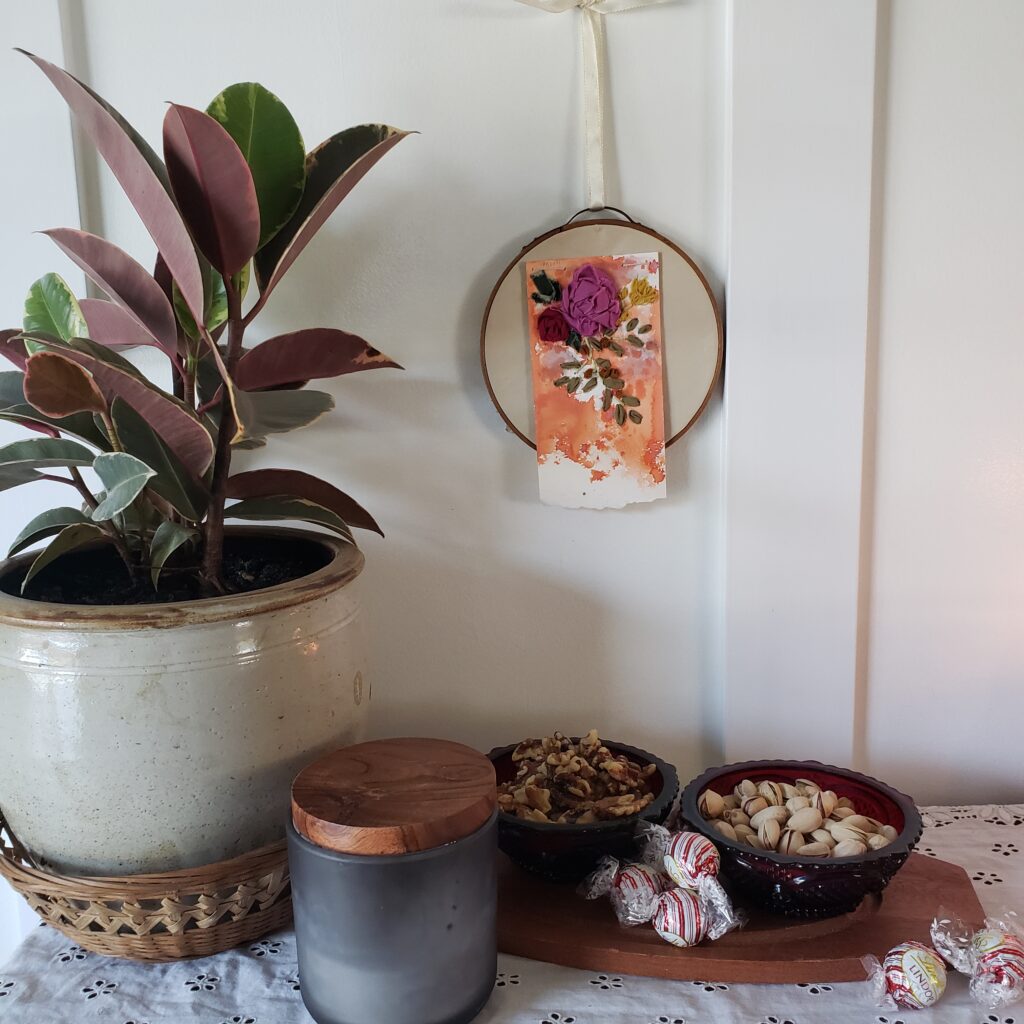
I see each rose embroidery hoop art as an individual piece of textural beauty that would make a great addition to a gallery wall. Perfect in a newborn’s nursery or hanging near a cozy seating area, I would place the hoops where the texture could be seen and appreciated. I have styled each of the hoops over a sideboard and around a mantel area with different accessories for you to get an idea of how they may work in your home.
In addition, I have created a few small videos showing each hoop which you can view on the Etsy Shop Products playlist on the La Rue de Fleurs Youtube channel. I think the video really allows you to see the overall styling and texture in much more detail as well.
Wouldn’t the hoops be perfect in a coffee bar or over a serving area where you and your guests could really enjoy the texture up close? I might be a little biased, but I think they really create a wow factor!
Purchase the Sangria Rose Hoop here.

Purchase the White Rose Hoop here.

Purchase the Peach Rose Hoop here.
Thank you so much for supporting my micro-business and handmade in America! Stay creative friends! Janice
Inspiration and resources are linked where applicable. All written work and photographs are original content and are copyright protected; kindly give due credit by linking back to my website if you use or share.
(©2022, Janice Bailor // laruedefleurs.com)