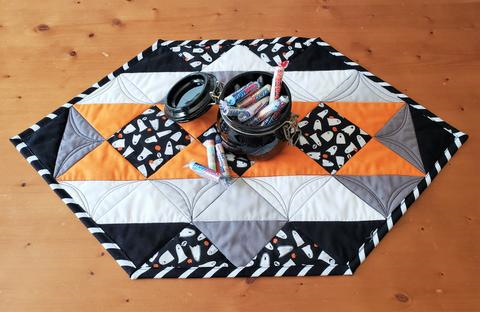
In 2018 I made a Works In Progress (WIP) list. I did a terrible job of working through it for a variety of reasons. When my 2019/20 work season started back up I made a plan to recommit myself to working through that old WIP list. I would revisit everything with a plan to finish and definitely not starting anything else until I have completed the majority of items on the list! So far, I have been doing well and have completed about a half dozen of the listed projects since my kids returned to school the third week of August. One of the projects I began last spring was the writing of a table runner pattern. I also had an idea to make a small table runner out of left over half square triangle blocks in black, gray and orange from another custom project I had done several years ago. (No scrap left behind!) In an effort to work out a few things for the pattern writing project and use up these old blocks, I made a Halloween table mat. Basically, I wanted to use up Halloween fabrics I had in my stash that I no longer like or get much use out of and I thought they would go well with the HSTs I had to use up. Along the way I took a few pictures and decided to practice my pattern writing skills as well. So, I present to you this FREE Tutorial and Pattern of the On-Point Table Mat!!
Let’s do this tutorial!
To make the On-Point Table Mat or Casserole Hot Mat, you will need the following fabrics and notions:
- 5, 4 1/2in squares of a feature fabric. You can trim down left over charm squares, fussy cut a favorite print or pull from your stash.
- 16, 5in squares, in a mix of light, medium and dark, or various colors complimenting your feature fabric. Again, a great way to use up a few left over charm squares or pull from your stash.
- 1/2 yard backing fabric, or piece from your stash for equivalent
- 1/2 yard batting or insulated batting
- 2 WOF (width of fabric) by 2 1/2in strips binding fabric. Use up two strips from a jelly roll, or leftover binding from a larger quilt project
- scissors and rotary cutter with mat and acrylic ruler
- pins, thread, all the usual stuff
Make the 2 at a Time Half Square Triangle (HST) Blocks:

- Choose 2 of 5in squares and, using your rotary cutter and ruler, cut on the diagonal to make four triangle pieces. Set aside.
- Sort your stack of 5in squares into piles of light, medium and dark fabrics. Pair up 4 light and 4 dark and 3 medium and 3 dark fabric squares.
- With right sides together (RST), draw a diagonal line from corner to corner on both the light and medium fabrics.
- Sew 1/4in seam down both sides of the line through all of your square sets.
- Trim each square set apart by cutting down your drawn line, being careful not to cut into your stitches. You will now have two matching HST units.
- Open the HST units and press the seam. I prefer to press my seams open when possible, which I feel reduces bulk in the following seams. However, lots of quilters press “to the dark side” (much as Darth Vader would, by making sure their seam is pressed to be under the darkest fabric. You can do either.
- Using your clear acrylic ruler, square up your HST blocks to 4 1/2in. If you’ve never “squared up” a block, it is simply making the block very straight all the way around. Sometimes the seams or fabric might pull slightly when you are sewing things together, ever so slightly -or sometimes in the case of sewing triangle units, more- wonky. Place the clear acrylic ruler with the 45° line on your center seam of the fabrics and trim around the two straight outside edges. Rotate the ruler, or your block if you’re using a square ruler, and do the other two sides. Now you’re all perfectly square! It is tedious, but worth it, as this little bit of off square can be amplified as you work your way into larger and larger rows and blocks.
- Yay! All of your HSTs are fabulously square, crisply pressed and ready to go! Now, let’s lay them out.
Lay out the Pattern:
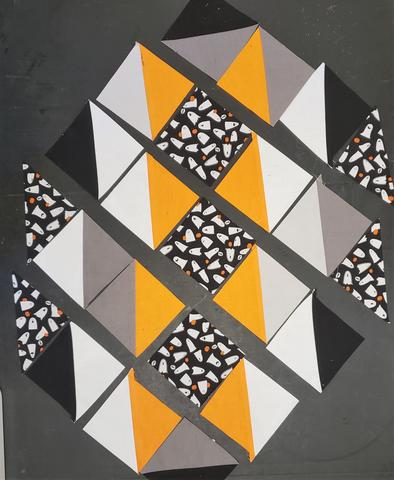
- Grab your 4 1/2in feature fabric squares, newly made HSTs and find a nice size place to lay everything out. I would choose a table or floor nearby your sewing machine so they are within easy reach and reference while you sew everything together.
- Lay your three 4 1/2in feature fabric squares out like a row of diamonds, points at the top and bottom with points touching across the row. We will work out from this center row of the layout, so leave yourself plenty of room around all sides.
- Now arrange your HSTs nestled into the open spaces created by the center row. I have arranged my HSTs with the light side of the HSTs facing in toward the darker feature fabric for the most contrast. This now makes the top points the dark print.
- Nestle the dark points of your medium and dark combination HSTs in between the open spaces created by the previous row. Notice the line of light, dark and medium fabrics you have created.
- Create a straight top and bottom edge to your mat by adding the triangle pieces cut from the 5in squares.
Assemble the mat:
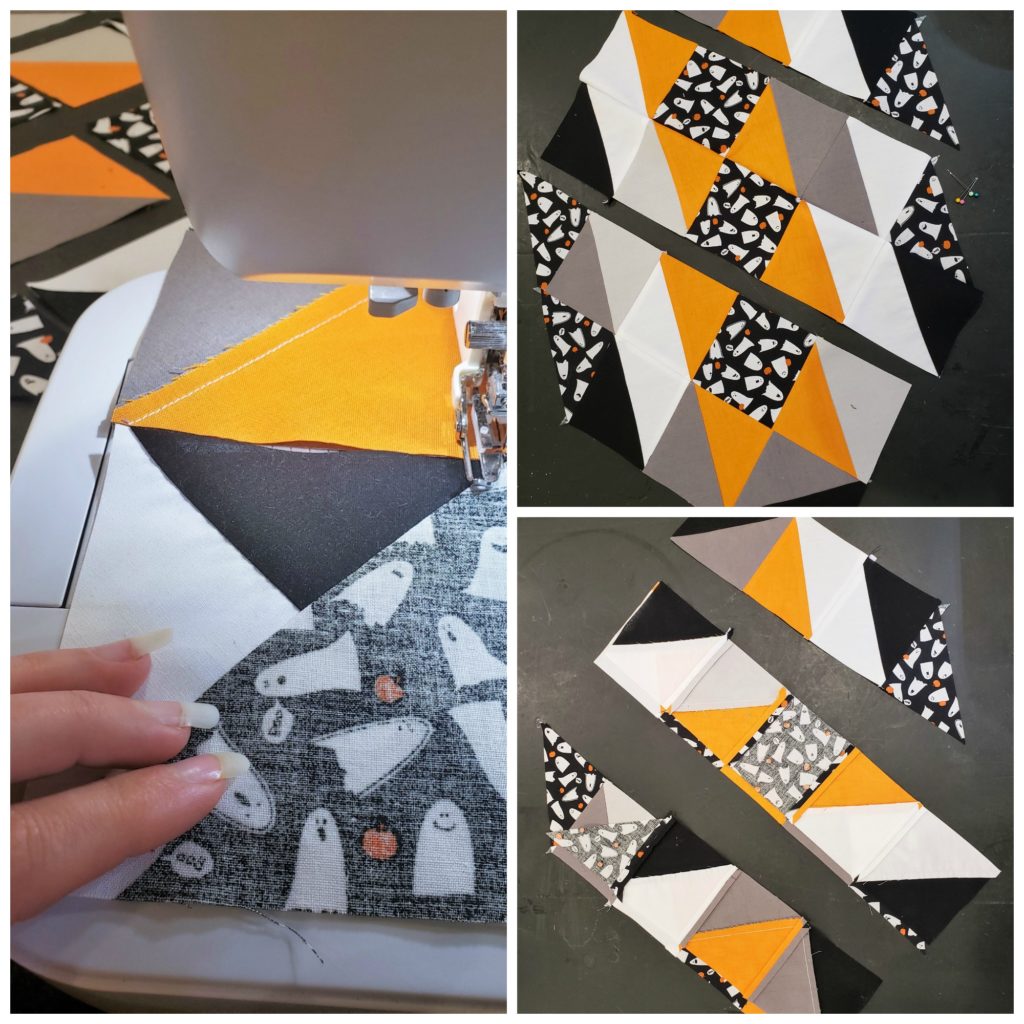
- Begin sewing all of the blocks together in rows along the diagonal working from one side to the other. Add the triangle pieces by lining up the 90° corner with the corner of the square next to it allowing the triangle point to hang off of the outer edge.
- Press each row flat after joining all of the blocks.
- Combine rows on the diagonal, staggering the seams of the row next to it so the HST blocks line up with the feature or background prints (see photo). Pin in place at each seam to create a crisp joining of the blocks and rows.
- Press all seams open and trim if necessary around the exterior of the mat to neaten any edges before finishing.
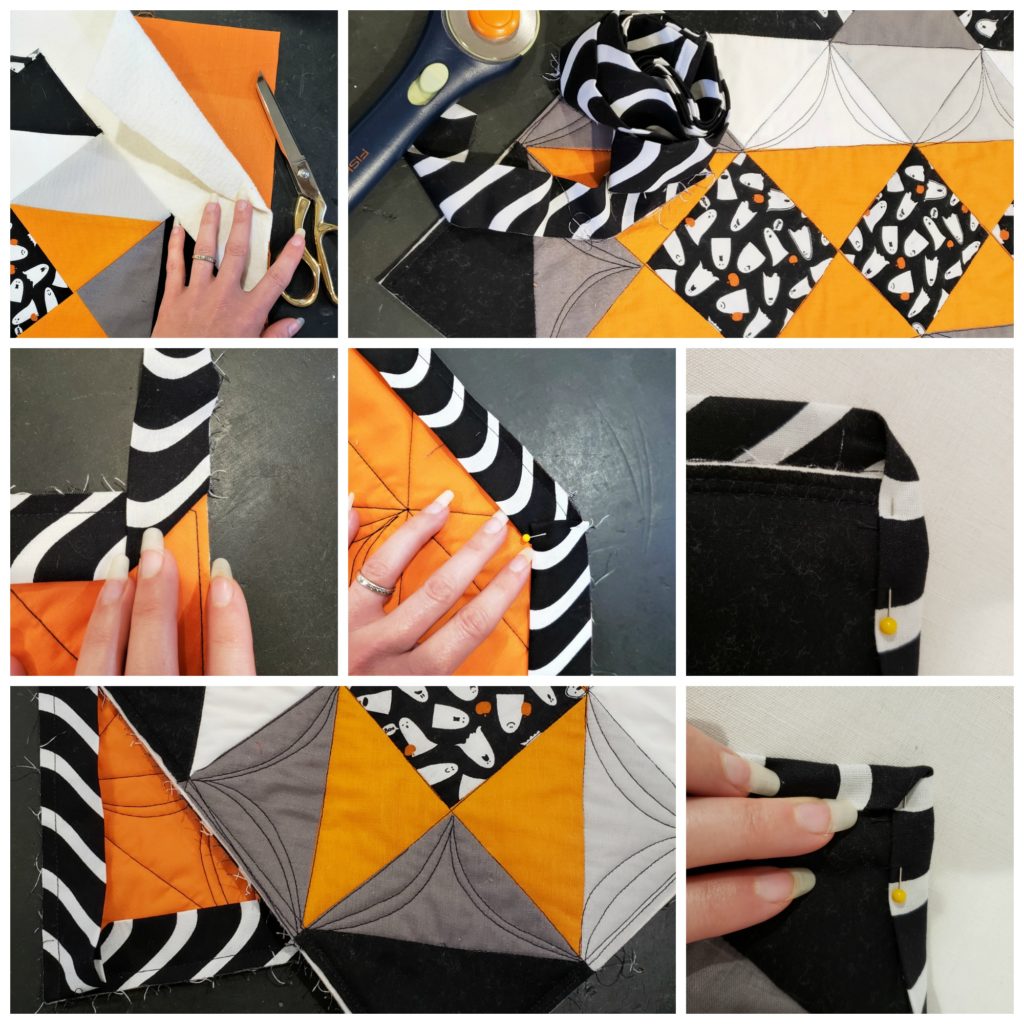
Finishing Instructions:
- Cut a strip of batting and muslin backing approximately 2-3in wider and longer on all sides than your finished table runner top.
- Assemble the quilt sandwich for the runner by laying out the muslin backing (right side down), batting in the center and runner on top, right side up.
- Baste and quilt as desired and trim edges. The cover mat has been quilted in a grid pattern following the seam lines of the piecing with a free hand scalloped detail in a row of the blocks as well.
- Prepare the binding by cutting 2 ½ in by WOF strips of fabric and attaching all strips together on the diagonal. Press strips wrong sides together in half lengthwise along the entire length of the binding to complete.
- Attach binding to the quilt sandwich by lining up all raw edges, mitering the corners as you go.
- To miter corners, sew into the corner stopping a ¼ in from the end, back stitch and remove the runner from the sewing machine.
- With the runner lying flat, fold the binding up and away from the runner, making the binding straight with the unsewn side.
- Fold the binding down to the sewn side, leaving a diagonal fold on the underside of the binding and pin fold in place.
- Place the runner back into the sewing machine and sew down the fold and continue on sewing binding.
- Make a miter at each corner, adjusting the amount of fold as necessary.
- Join the ends of the binding together where they meet and attach to the quilt sandwich.
- Press and fold binding over to the opposite side of the quilt to finish. Tuck the mitered corner flat, pinning into place as necessary.
- Finish the binding with your preferred method, either by hand stitching in place or machine stitching.

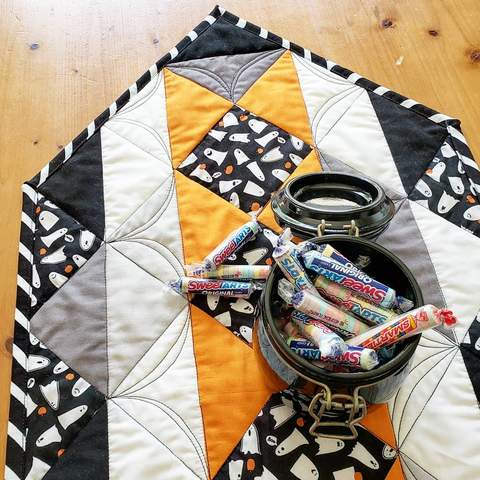
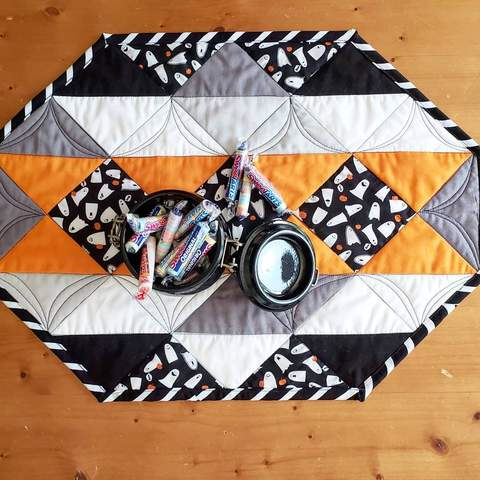
Ta-Da! You have made a really fun Table Mat perfect for corralling holiday candy bowls, or more practically, protecting your table from hot casseroles. For additional heat resistance, you could use insulated batting or add an additional layer of traditional batting.
Don’t limit yourself to Halloween. This Table Mat would be a great afternoon or weekend project to sew up in seasonal or non-seasonal prints for your home or friends and family, teachers, new neighbors, etc. Think of all the Christmas and holiday gifting you could knock out with just this one simple pattern. Not to mention the stash busting potential!!
Speaking of stash busting and quick holiday gifts, I will be releasing my Woven Trellis Table Linens Bundle very soon! The bundle will include patterns for a casserole or small table runner, place mat set of four or six, and two variations of the woven trellis table runner. It is really exciting to be releasing my first pattern and hope it is just the beginning to a new part of my design life! I hope you will find the set enjoyable to make and easy to play with again and again!
If you make the table mat above inspired by my project, please leave a comment below or share a picture by tagging me on social media @laruedefleurs. I would love to see how you interpret the idea and how it worked for you! Go forth and create! xoxo, Janice
Purchase the handmade table mat above in the La Rue de Fleurs Etsy shop here.
Inspiration and resources are linked where applicable. All written work and photographs are original content and are copyright protected; kindly give due credit by linking back to my website if you use or share.
(©2019, Janice Bailor // laruedefleurs.com)