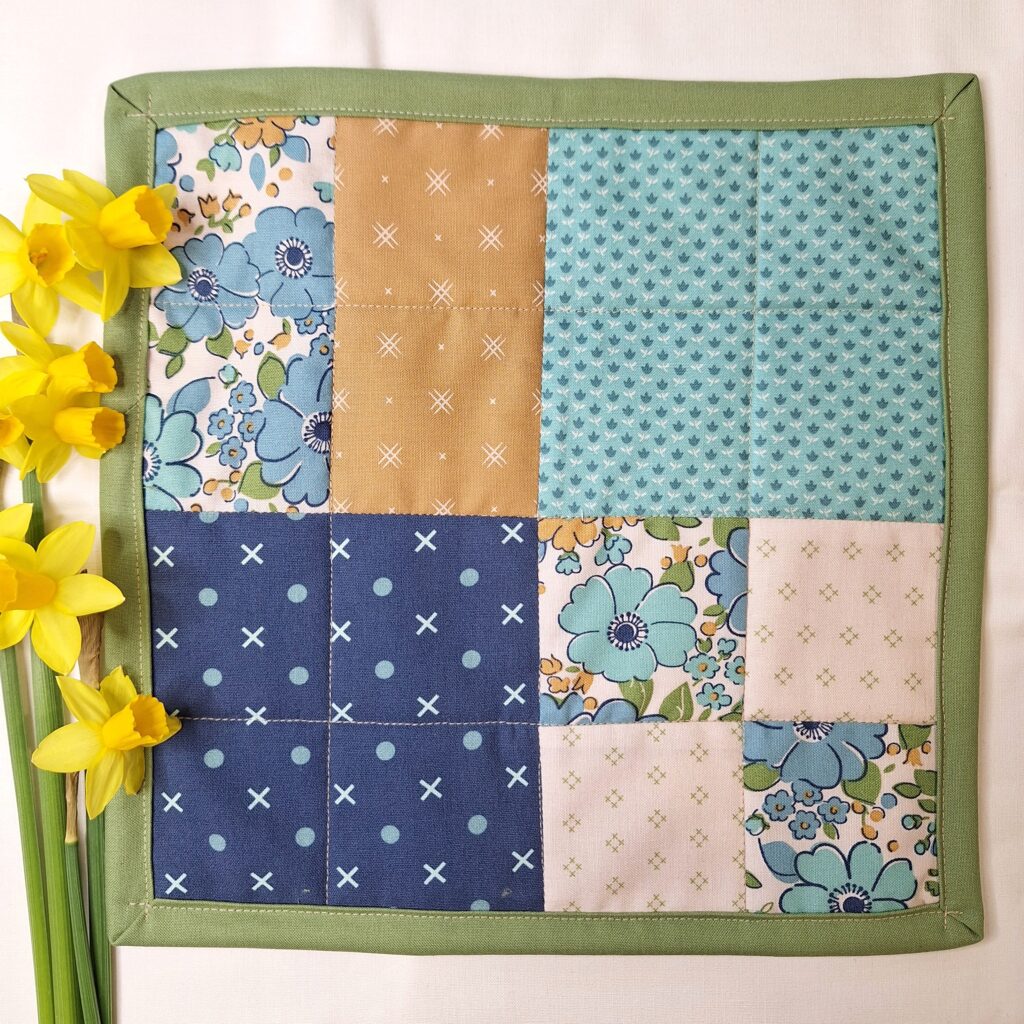
If you’re looking for a fun and simple quilting project, this Beginner Patchwork Mini Quilt is the perfect place to start! Finishing at just 10 inches square, this mini quilt is a great way to practice your piecing, quilting, and binding skills without committing to a full-sized quilt. Whether you’re brand new to quilting or just want a quick weekend project, this one’s for you.
In my latest YouTube video tutorial, I walk you through each step of the process—from cutting your fabric pieces to sewing your blocks together, adding batting and backing, and finishing with a clean, professional-looking quilt binding. I also share some of my favorite beginner quilting tips to help you get beautiful, crisp results.
What You’ll Need:
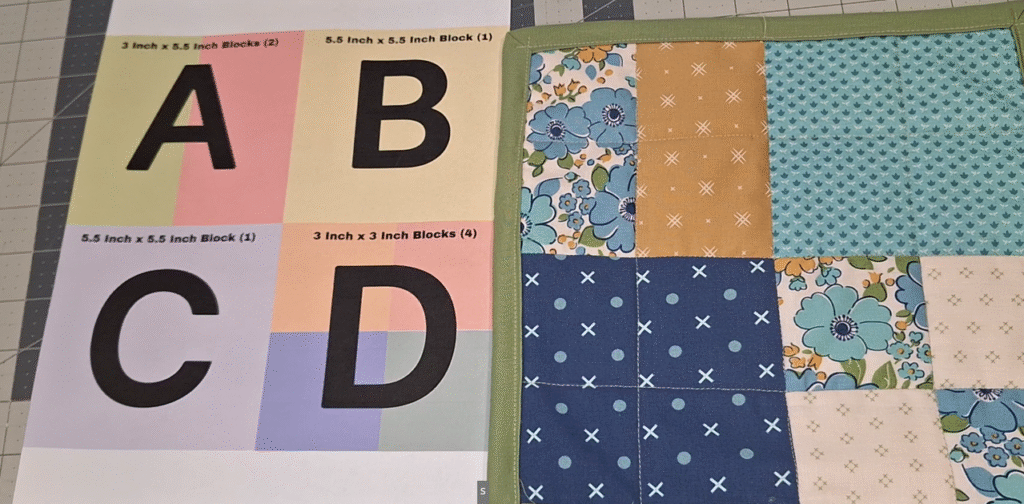
Fabric Cuts:
- 2 squares at 5 1/2″ x 5 1/2″
- 2 rectangles at 3″ x 5 1/2″
- 4 squares at 3″ x 3″
Binding:
- 2 strips at 2 1/2″ x width of fabric (WOF)
Backing & Batting:
- 1 piece of backing fabric, 12″ x 12″
- 1 piece of batting, 12″ x 12″
Finished Size:
10″ x 10″
How to Create Mitered Quilt Binding – Step-by-Step
Mitered corners give your mini quilt a clean, polished look. Here’s how to do it:
1. Prepare Your Binding Strips
Join your 2 1/2″ WOF strips with a diagonal seam, trim the excess, and press open. Then fold the binding in half lengthwise with wrong sides together and press.
2. Attach the Binding
Start by aligning the raw edge of your binding with the raw edge of your quilt. Begin stitching about 4″ from the end of the binding, using a 1/4″ seam allowance. Stop stitching 1/4″ before the corner and backstitch.
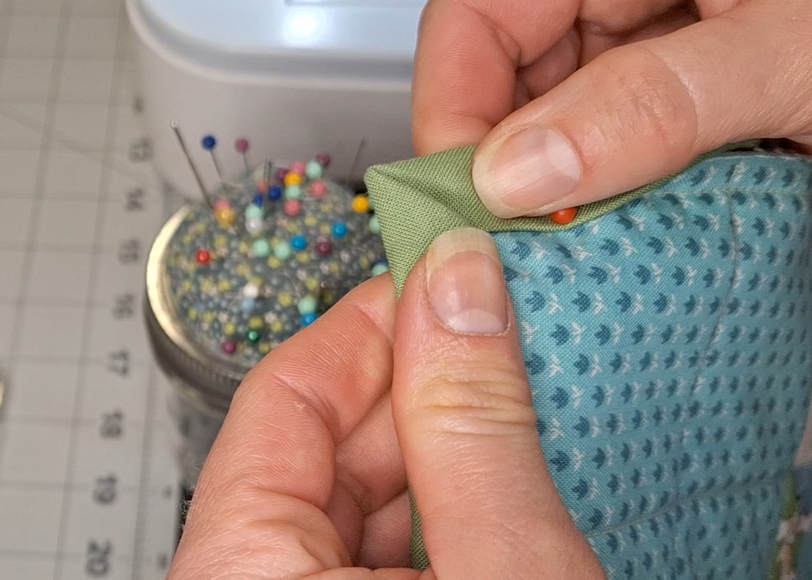
3. Create the Miter
Remove the quilt from your machine. Fold the binding up at a 45° angle, away from the quilt, so it forms a diagonal line. Then fold it back down so the folded edge aligns with the next side of the quilt. Start stitching from the edge and continue down the next side.

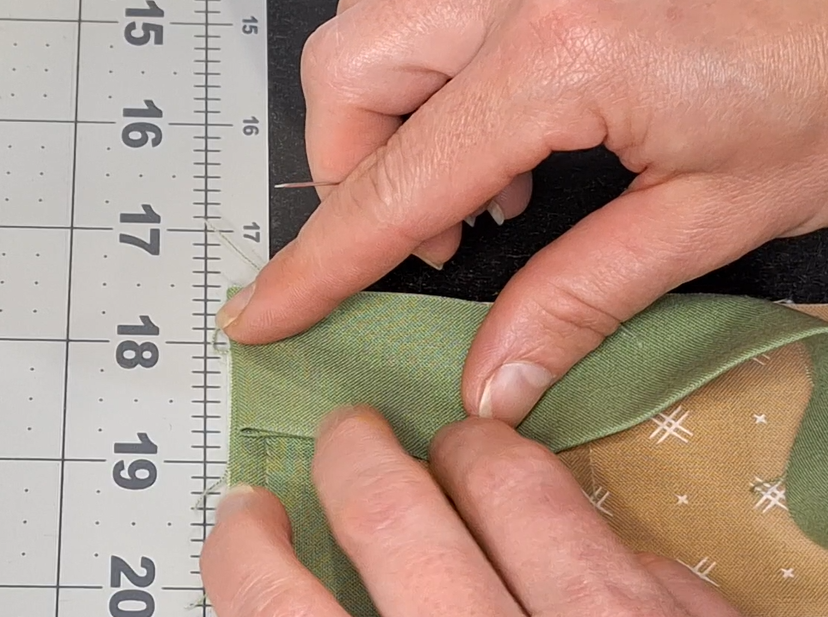
4. Repeat on All Corners
Repeat this mitering process on each corner. It may take a bit of practice, but the results are worth it!
5. Join the Binding Ends
When you reach the starting point, join the two binding tails with a diagonal seam, trim, and finish stitching to close the gap.
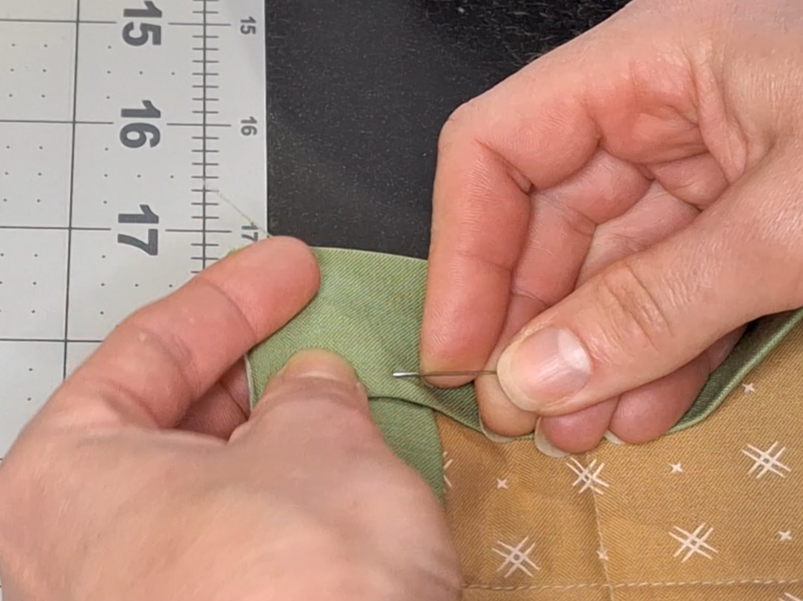
6. Fold and Finish
Fold the binding over to the back of the quilt and hand stitch or machine stitch in place, making sure your mitered corners are neat and secure.
👉 Watch the full video tutorial here and sew along with me as we make this cute and easy mini quilt together!
Happy quilting! 🧵Janice
La Rue de Fleurs/Janice Bailor (@laruedefleurs) • Instagram photos and videos
Inspiration and resources are linked where applicable. All written work and photographs are original content and are copyright protected; kindly give due credit by linking back to my website if you use or share.
(©2025, Janice Bailor // laruedefleurs.com)