Let’s make a quick, fun and functional holiday project to add some pizzazz to your table. Today I am briefly walking you through all of the steps to make the Woven Trellis Casserole Hot Pad found in my new Woven Trellis Table Linens Bundle Pattern released last week. This fun project is perfect for those holiday fat quarters you’ve been stashing and make great hostess gifts too.
Speaking of stash busting and quick holiday gifts, you can get the Woven Trellis Table Linens Bundle in the online shop, follow the link below! The bundle includes patterns for a casserole or small table runner (we will be making one today), place mat set of four or six, and two variations of the woven trellis table runner. It is really exciting to be releasing my first pattern and hope it is just the beginning to a new part of my design life! I hope you will find the set enjoyable to make and easy to play with again and again!
Let’s get started!
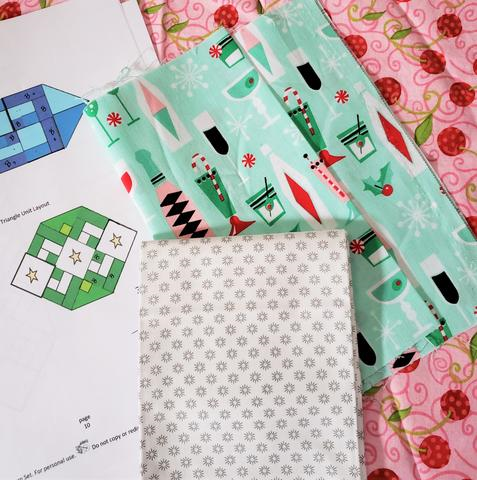
To begin, you will need the Woven Trellis Table Linens Bundle Pattern of course! Grab yours by clicking above or at the bottom of this blog post and instantly print it out at home. I have included full color layouts for each of the four pattern variations. There is even a coloring page toward the back of the pattern if you’re a visual planner like me and like to play with color combinations before you begin.
For the Casserole Pad you will need three center squares of a fun feature print. I have selected a retro holiday cocktail fabric to bring a bit of spunk to my holiday dinner. The aqua, black, red and green are a cool, non-traditional mix and the pink in those cocktail glasses inspired me to look for a print that might work with the brighter colors in the feature fabric. I was delighted to find this retro pink cherry print and a little spark print, both of which coordinate with the colors and talk to the feature fabric through their print as well. I love when my stash giveth so freely!
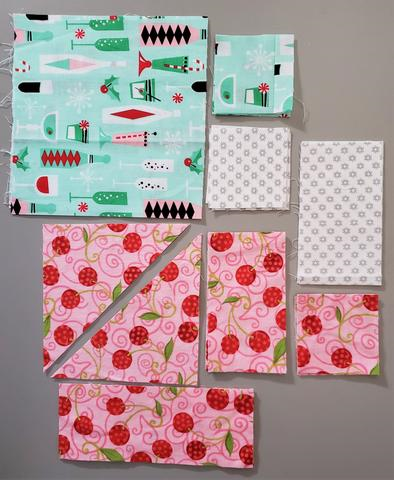
Next, I followed the cutting instructions included in the pattern. Several of the pattern variations in the Woven Trellis Table Linens Bundle lend themselves to using up scraps or just a few fat quarters. I love when I can make something impressive and gift-worthy from just a small investment of materials or possibly left over bits from previous projects.
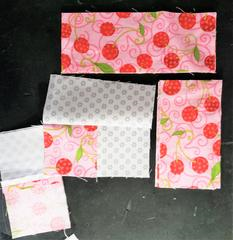
I then proceeded to follow the instructions for making the Log Cabin unit blocks for the pattern. This unit is used in several variations throughout the entire bundle and is a great basic block to know if you are at any level of quilting. I prefer to lay out my block and chain piece as I go. The instructions guide you step-by-step through the piecing process with detailed descriptions as well as diagrams so you will be able to follow along regardless of learning style or experience level.
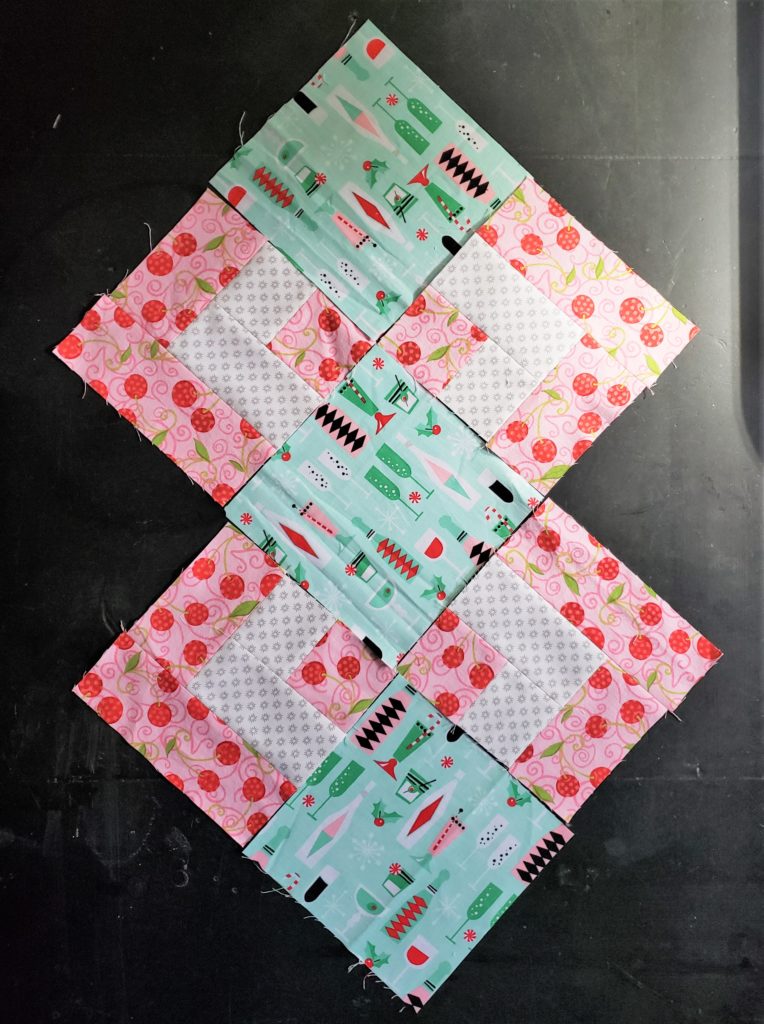
After making all of the log cabin units, I like to lay out the blocks I have ready, following the diagrams. Now it is time to move on to the set-in square blocks that will add a little detail to the outer edge of our hot pad. The “woven” detail appears when you lay the log cabin unit blocks with the feature fabric blocks, as they begin to appear to be connected. This is a fun element of the pattern to explore through your fabric choices. The woven feature can either be emphasized or suppressed depending on the relationship you make between the two.
Making the Set-In Square block looks tricky, but I assure you it isn’t and the directions will guide you through in detail. Learning new blocks and techniques is one of the best parts of trying a new pattern. Expanding your knowledge and creativity will allow so much growth as a quilt artist and have family and friends really “oohing and ahhing” over how you have been able to create what looks like a very complicated design.
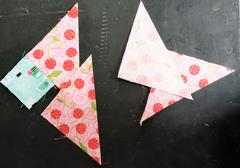
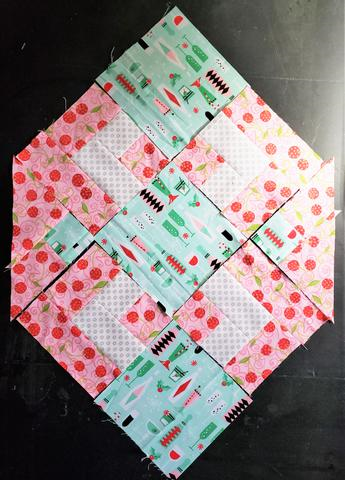
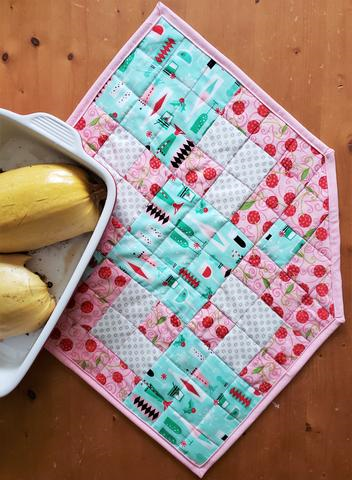
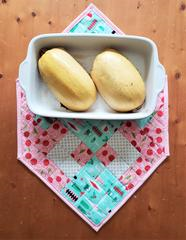
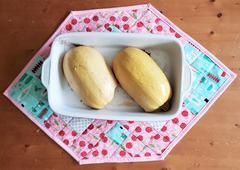
After piecing and pressing all of the blocks, it is time to lay them out according to the pattern diagram and sew the blocks and rows together. Just a few seams joins the entire top of the Casserole Hot Pad together. The unique rhombus shape of the hot pad is designed to add a little extra room around the dish for serving utensils and spills. Plus, it’s just more fun than a rectangle, don’t you agree!?!
To finish your casserole hot pad you will need a small piece of batting, a small length of binding and some muslin backing fabric. I recommend muslin as an economical choice of a piece which you will rarely see off the table. Quilting and binding can be done in your preferred style, or you can again follow my instructions. Don’t get anxious about the mitered corners, there are diagrams for those too!
Once you’ve completed the Woven Trellis Casserole Hot Pad you’ll be ready to spice up your serving game! I hope you will find the hot pad, as well as the other patterns in the bundle, to be of a generous size so you never feel restricted in the size dish you can place on it. I also find the patterns to be so fun to scale up and down to meet the needs of your table regardless of length. I truly believe this pattern is really versatile and will be a great source of home decor and gifts for years to come.

If you make the casserole hot pad above inspired by my project, or any of the patterns in the Woven Trellis Table Linens Bundle please leave a comment below or share a picture by tagging me on social media @laruedefleurs. I would love to see how you interpret the idea and how it worked for you!
Go forth and create! xoxo, Janice
Inspiration and resources are linked where applicable. All written work and photographs are original content and are copyright protected; kindly give due credit by linking back to my website if you use or share.
(©2019, Janice Bailor // laruedefleurs.com)