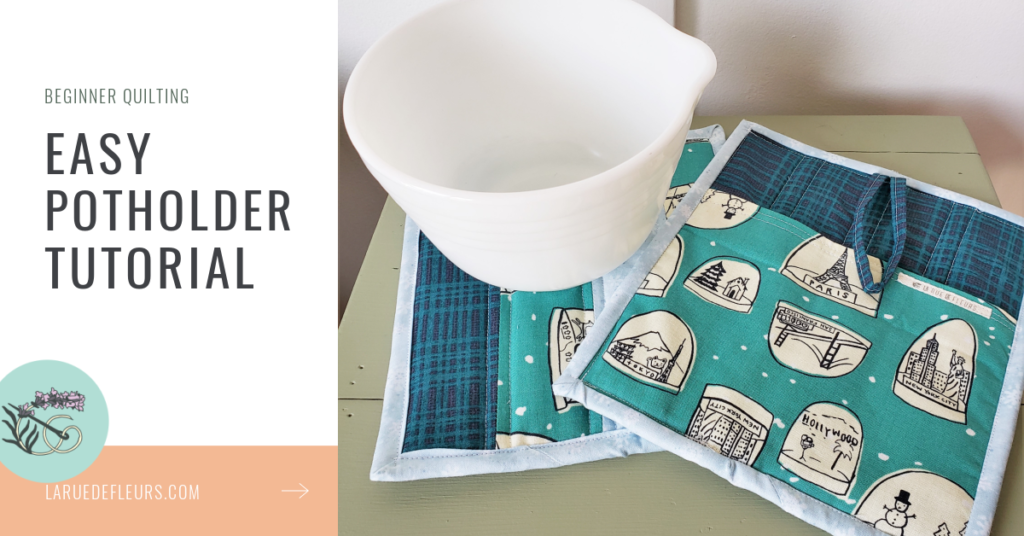

An excellent beginner quilting project, this simple patchwork pot holder includes a pieced top and pocket back. Practice simple piecing, minimal quilting and the mitered binding technique in this great project for you home or for gifting.
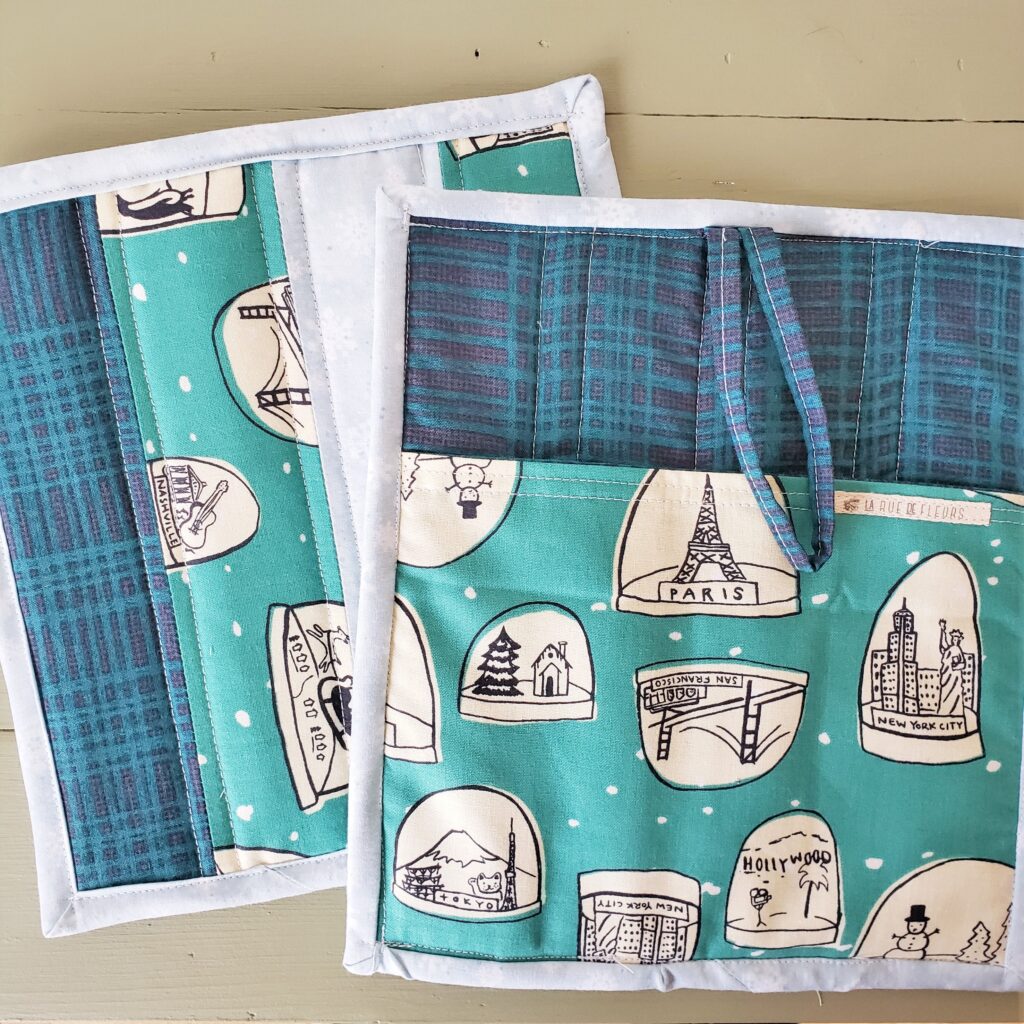
The patchwork pot holder is perfect for using up scrap fabrics or playing with a few fat quarter pieces of fabric. Choose fun prints that coordinate well. I suggest choosing one print fabric to be your bold feature element and two supporting fabrics to reinforce the colors or theme. Here I have used the Snow Globe print from Cotton and Steel as my feature fabric. It sets the overall theme with the playful winter, snowflakes and travel icons. The color of the print is a dominant aqua with accents of cream and black. To compliment the Snow Globe print, I chose a more basic plaid in a dark blue and aqua and a soft blue snowflake print.

Prepare your fabrics and cut according to the diagram above.
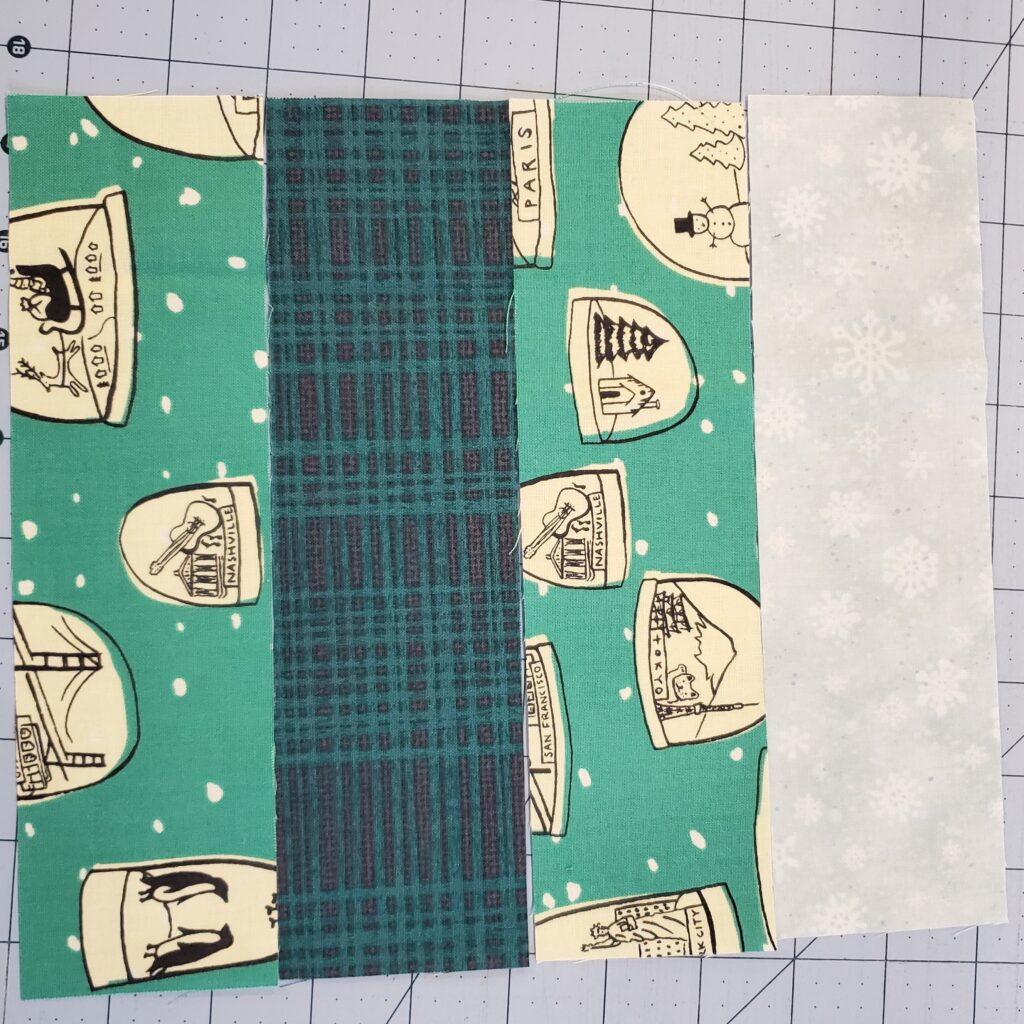
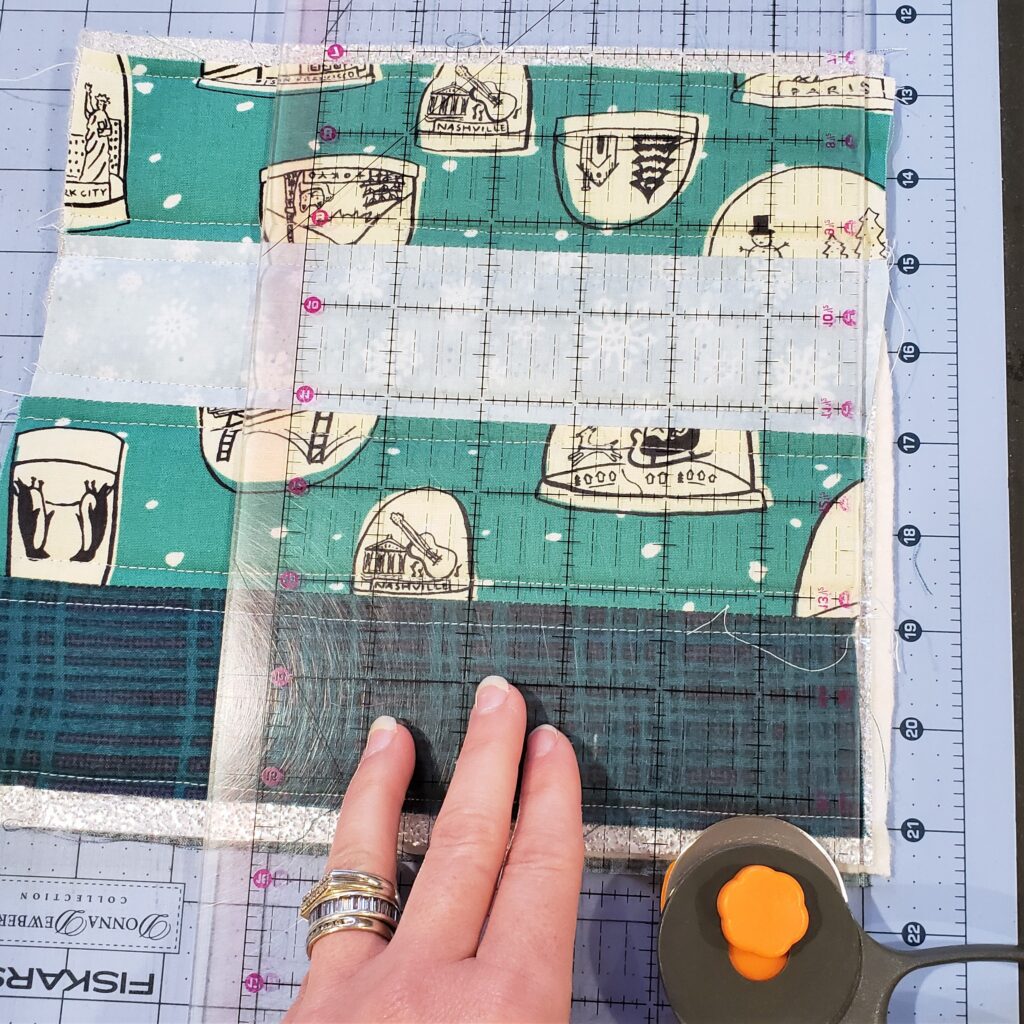
Arrange your 2.5 by 9in strips of fabric in an alternating patter making sure no two of the same fabrics touch. Sew right sides together (RST) using a quarter inch seam. Press the seams flat.

Layer the pieced top panel right side up with the piece of insul-bright (shiny side up), batting and bottom 9 by 9in backing fabric square wrong side up. Pin the layers together and machine quilt as desired. I simply quilt to either side of the pieced seams approximately 1/4in out from the seam to highlight the piecing details.
After quilting, trim the body of the pot holder to 8in square. Set the top aside for a moment while we create the back pocket.

Sew both the feature and complimentary print 6 by 9in rectangles RST using a 1/4in seam allowance across the top 9in edge. Open the prints along the sewn seam and press the fabrics along the seam lining up all of the raw edges. Stitch the fold in place by sewing a 1/4in down from the top.

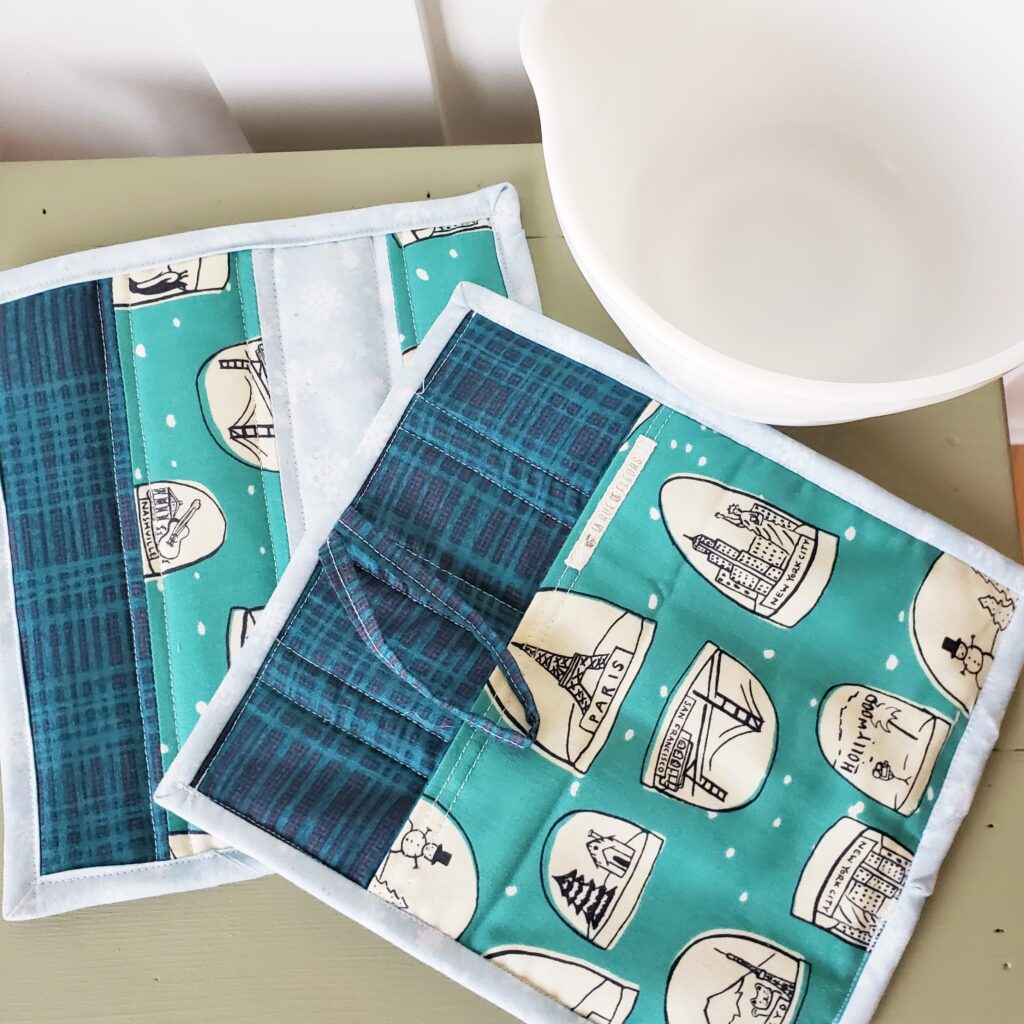
Line up the bottom raw edges of the pocket piece with the bottom of the patchwork piece with the accent fabrics touching. Center the pocket if needed and pin in place. Stitch the pocket to the pieced pot holder top using a 1/8in seam allowance around all three raw edges. After sewing the pocket to the top, trim away any excess around the sides and neaten the entire body piece up to prepare for binding and finishing.
Use the 1.5 by 4in piece of accent fabric to create a small loop for the hanging tab. Fold and press the rectangle in half then fold each edge in toward the center crease and stitch along the open edge to full enclose the raw edges. Pin the tab in place at the top center back so it can be stitched in place when you add the binding.


Prepare the binding by cutting 2 ½ in by WOF strips of fabric and attaching all strips together on the diagonal. Press strips wrong sides together in half lengthwise along the entire length of the binding to complete. Attach binding to the quilt sandwich by lining up all raw edges, mitering the corners as you go.
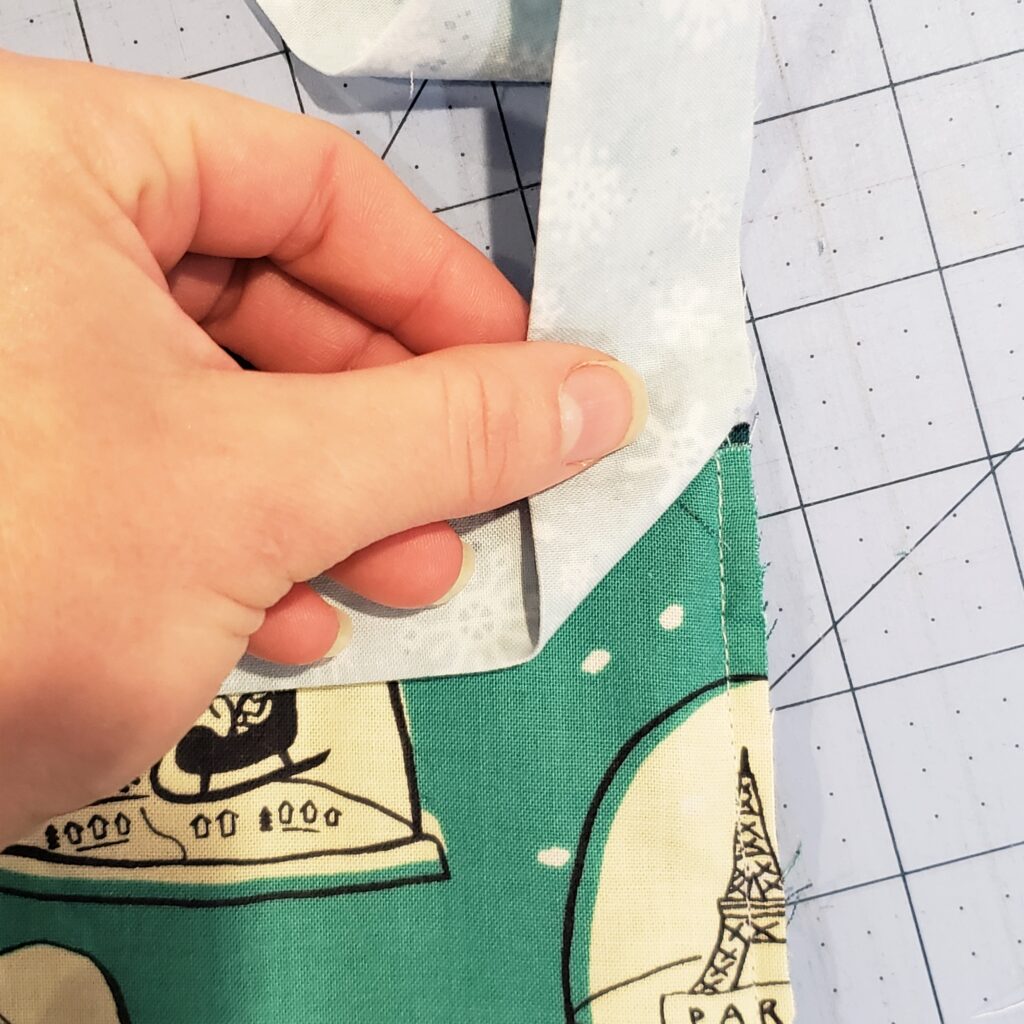

To miter corners, sew into the corner stopping a ¼ in from the end, backstitch and remove the runner from the sewing machine. With the runner lying flat, fold the binding up and away from the runner, making the binding straight with the unsewn side. Fold the binding down to the sewn side, leaving a diagonal fold on the underside of the binding and pin fold in place. Place the runner back into the sewing machine and sew down the fold and continue on sewing binding. Make a miter at each corner, adjusting the amount of fold as necessary. Join the ends of the binding together where they meet and attach to the quilt sandwich. Press and fold binding over to the opposite side of the quilt to finish. Tuck the mitered corner flat, pinning into place as necessary. Finish the binding with your preferred method, either by hand stitching in place or machine stitching.
For a video tutorial on how to bind a quilt, watch the link below.:
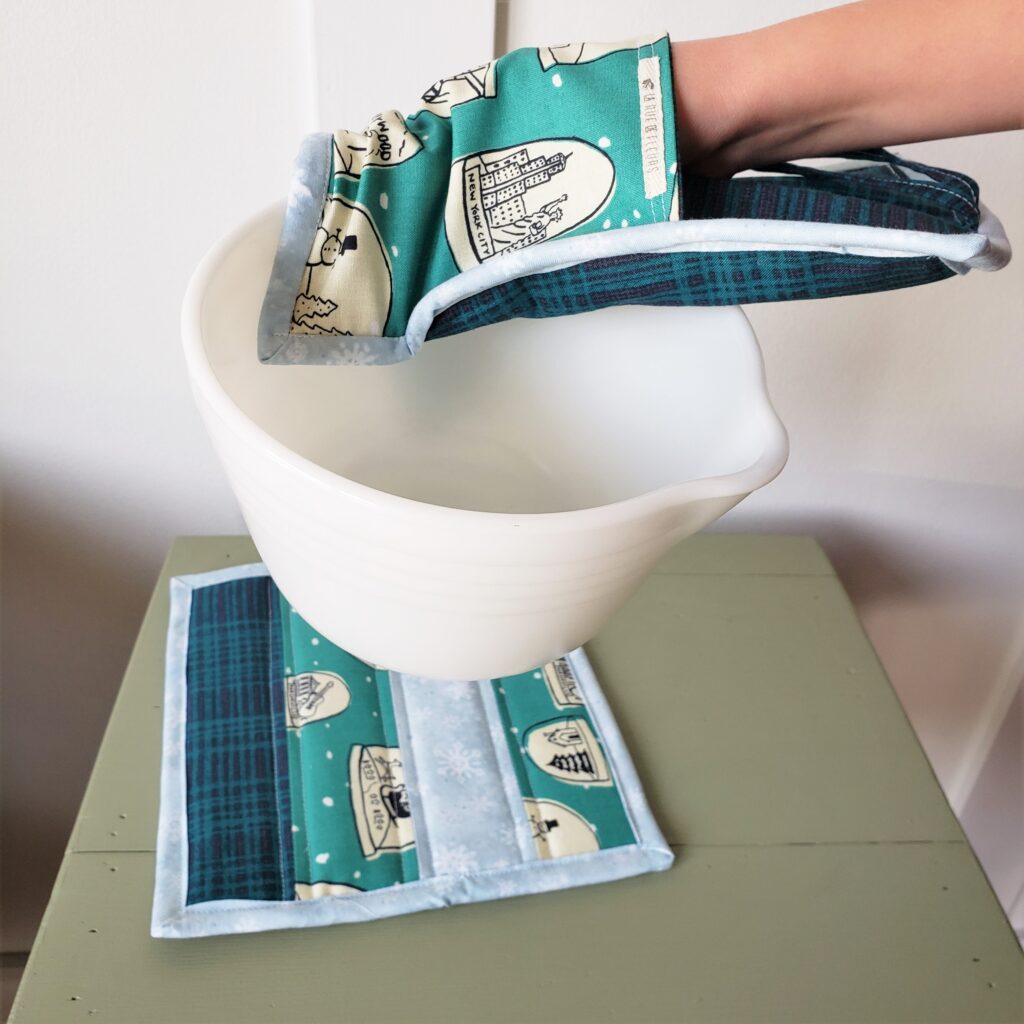
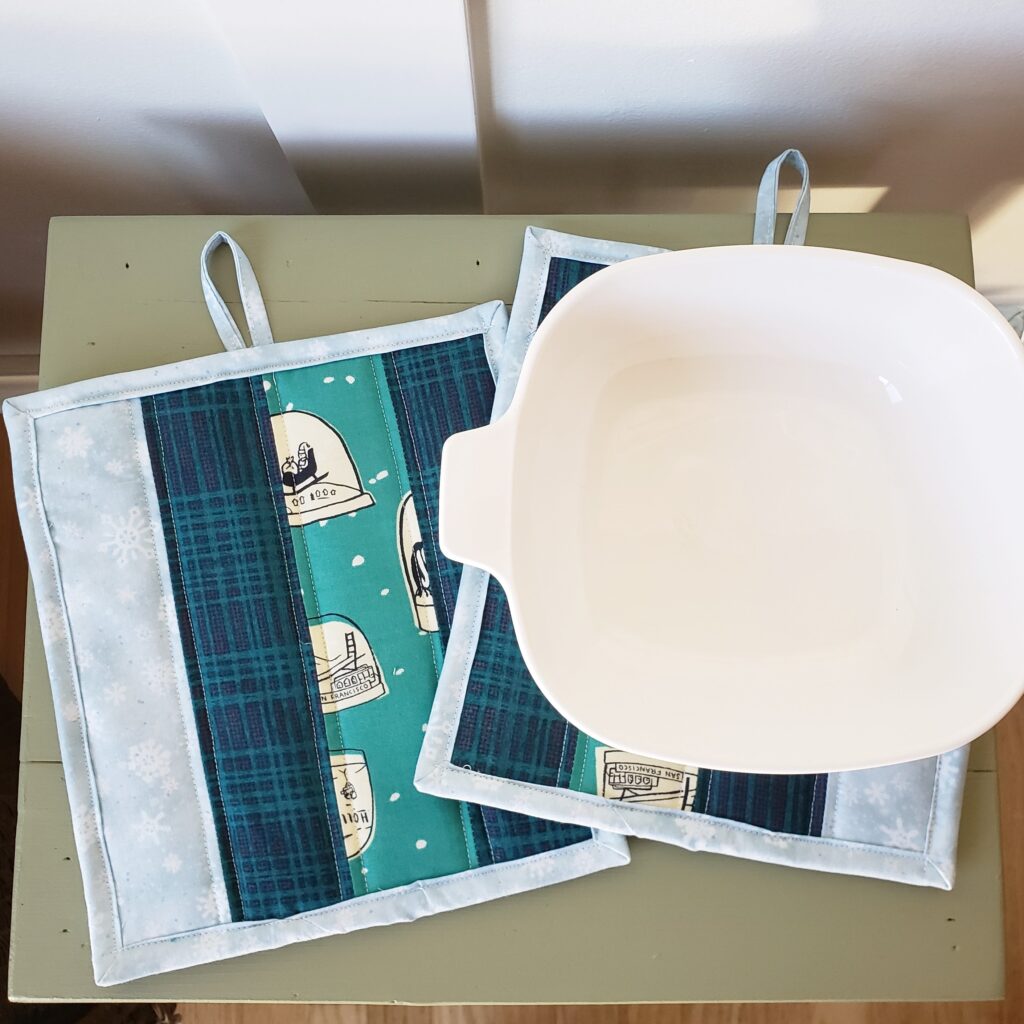
Repeat the process above to make a set of patchwork potholders as a great refresh for your kitchen this holiday baking season or as an easy to gift/mail holiday gift for your favorite foodie!


For a video tutorial on how to make these simple and fun patchwork potholders, watch my latest video.: https://youtu.be/Fm7mDExPcxI

Have fun playing with all the creative combinations of fabrics. I know all of the chefs on your list will love getting a handmade set of potholder mitts for a gift this year! Stay creative friends, Janice
Inspiration and resources are linked where applicable. All written work and photographs are original content and are copyright protected; kindly give due credit by linking back to my website if you use or share.
(©2020, Janice Bailor // laruedefleurs.com)