
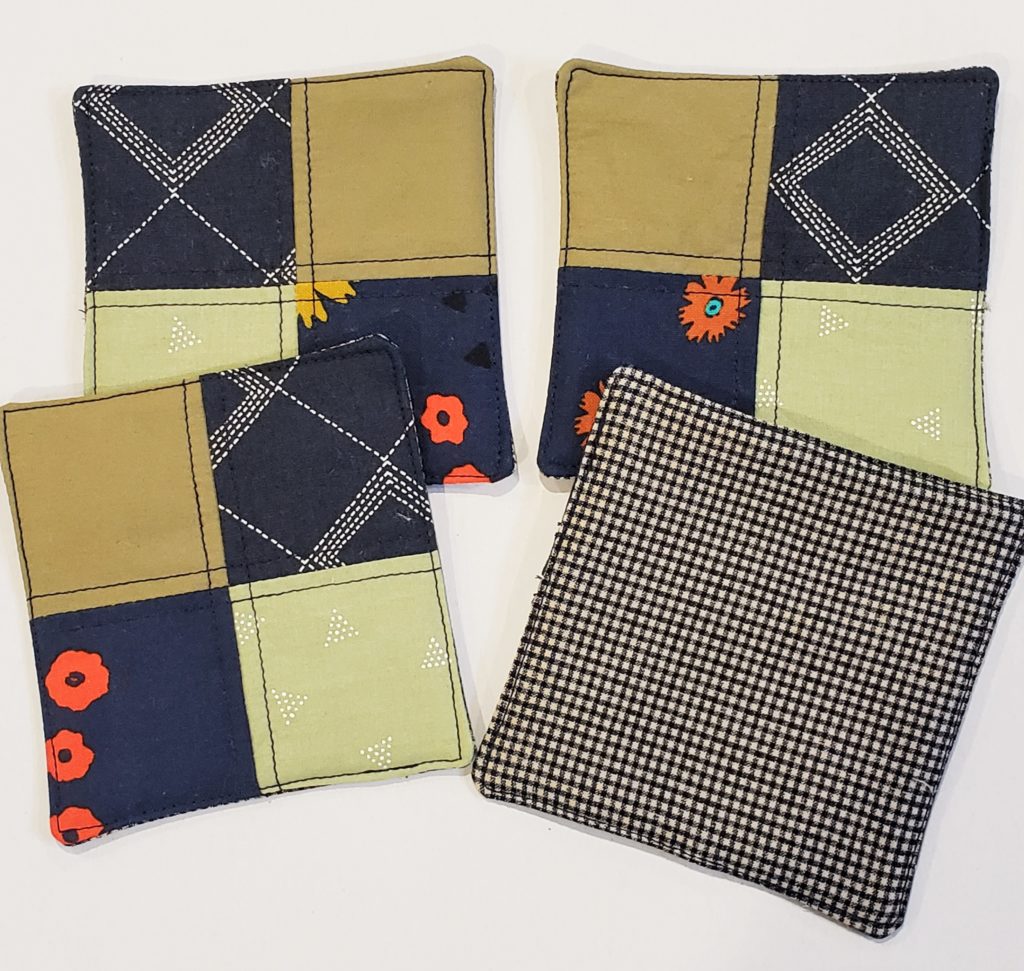
If you are new to the world of quilting and looking for the very basic foundation blocks, the Four Patch is it. The Four Patch block is four of the same size pieces of fabric sewn together into a larger square unit. Beginning with this very basic block allows you to create a variety of quilt layouts from just patches, to chains, to a buffalo check. Requiring only a few of the same size of squares of fabric, the Four Patch is also the ideal block to start with if you are working with repurposed fabrics or a pre-purchased stack of charm squares since is easy to build upon to make a larger quilt over time. The Four Patch is also an excellent block to use to make basic household items like a coaster, a great beginner project and a great gift to show off your new quilting talents. Below is a quick and simple tutorial on how to make a basic Four Patch coaster or hot pad. To simplify the process even more, I sell coaster making sets in my Etsy shop that include coordinating squares of fabric, batting, binding, and a simplified instruction sheet so you can whip up a batch of cute coasters in no time.
Supplies (per coaster- if you want to make a set, multiply amount needed by 4 or 6) Purchase a kit with all supplies for 4 coasters here.:
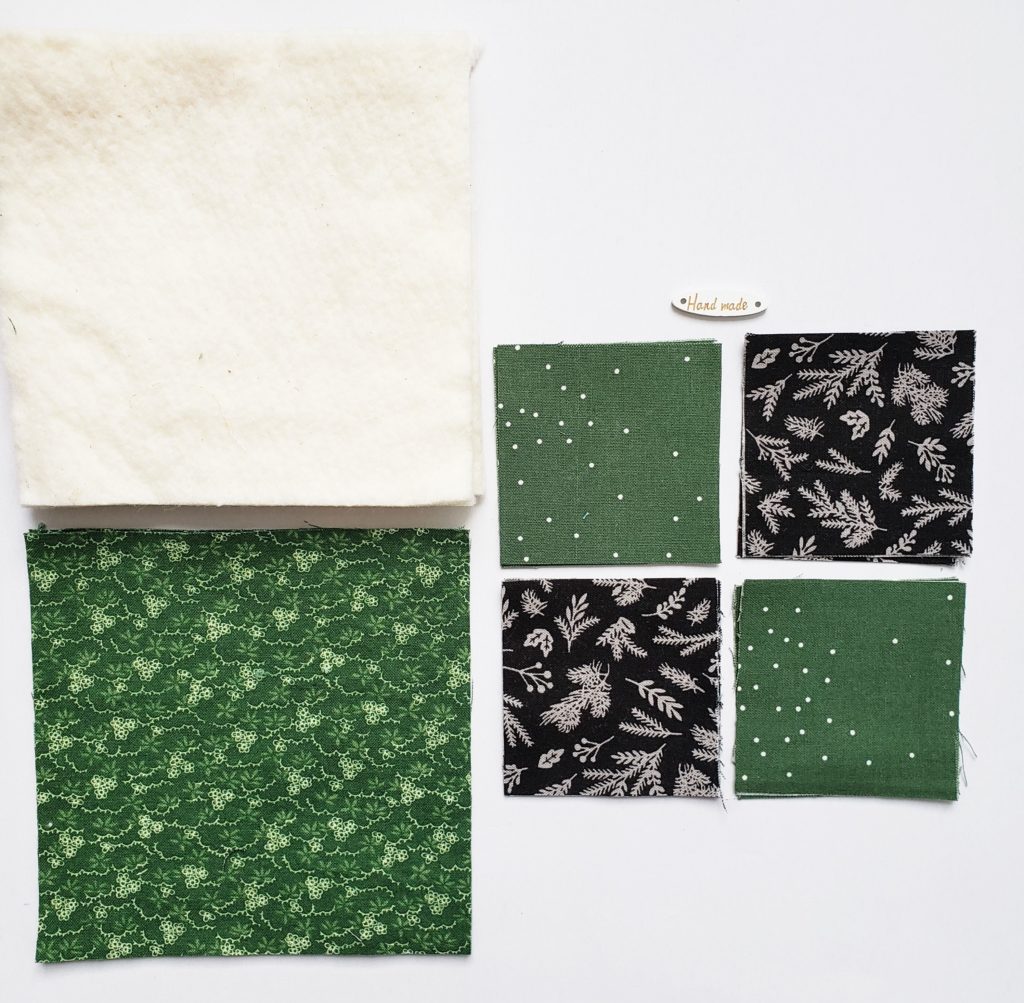
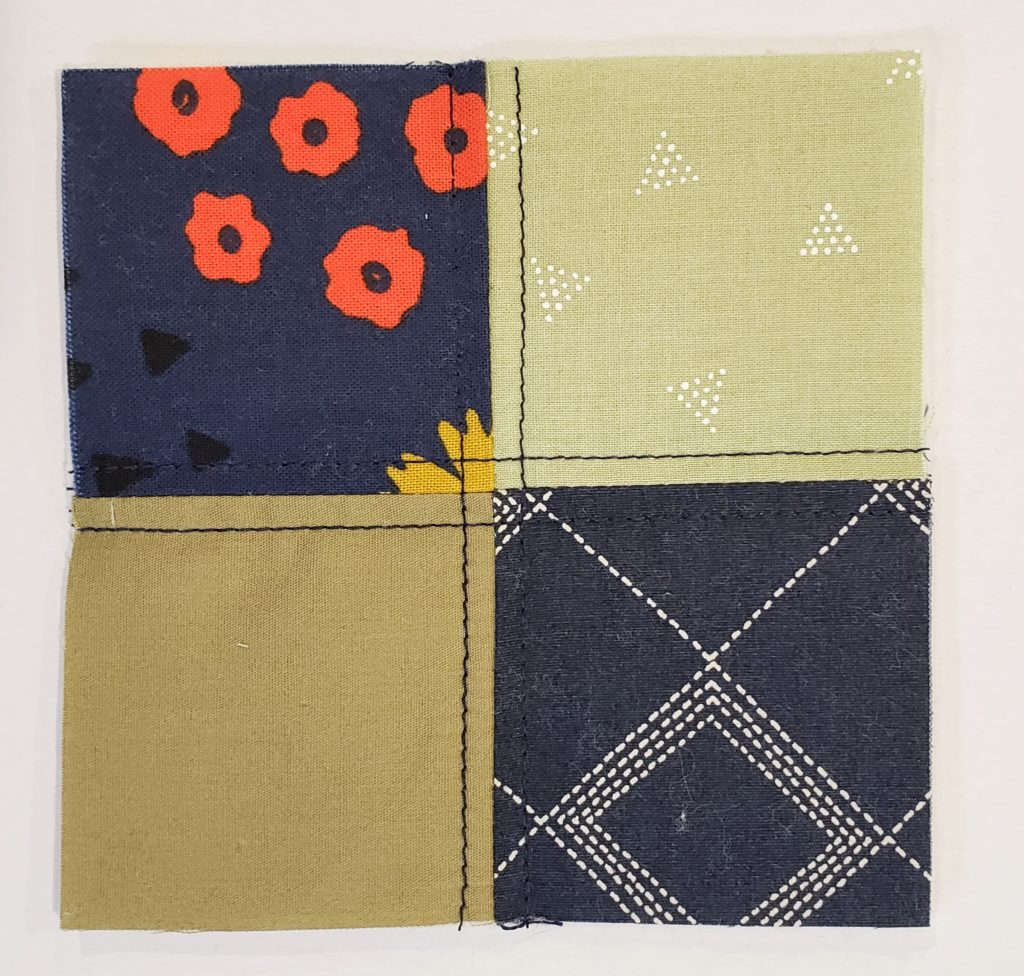
4 – 2.5in squares of cotton fabrics for the Four Patch. To achieve the desired effect, you should have two contrasting fabrics, as shown above.
1- 6in square piece of cotton quilt batting
1- 6in square of cotton fabric for the backing
Tools -sewing machine, sewing ruler, cutting mat (recommended), rotary cutter (recommended) or scissors, thread
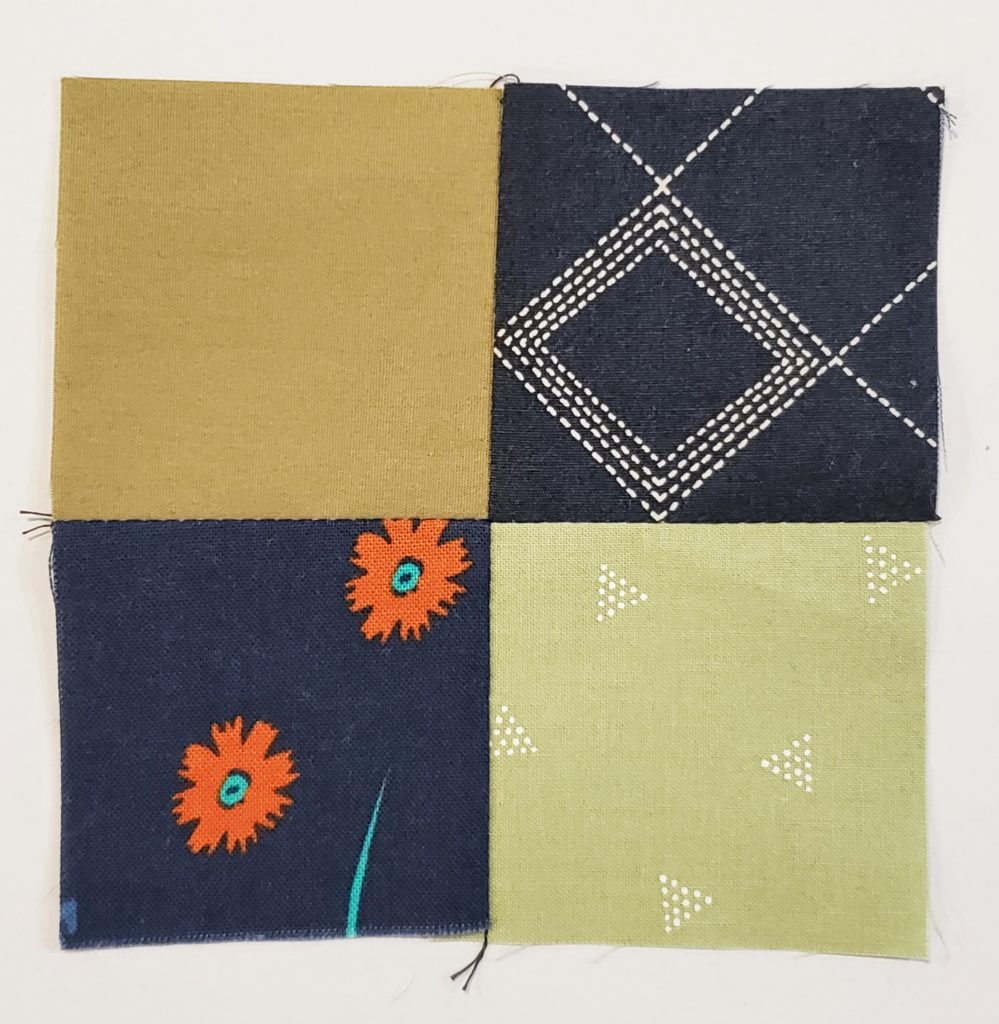
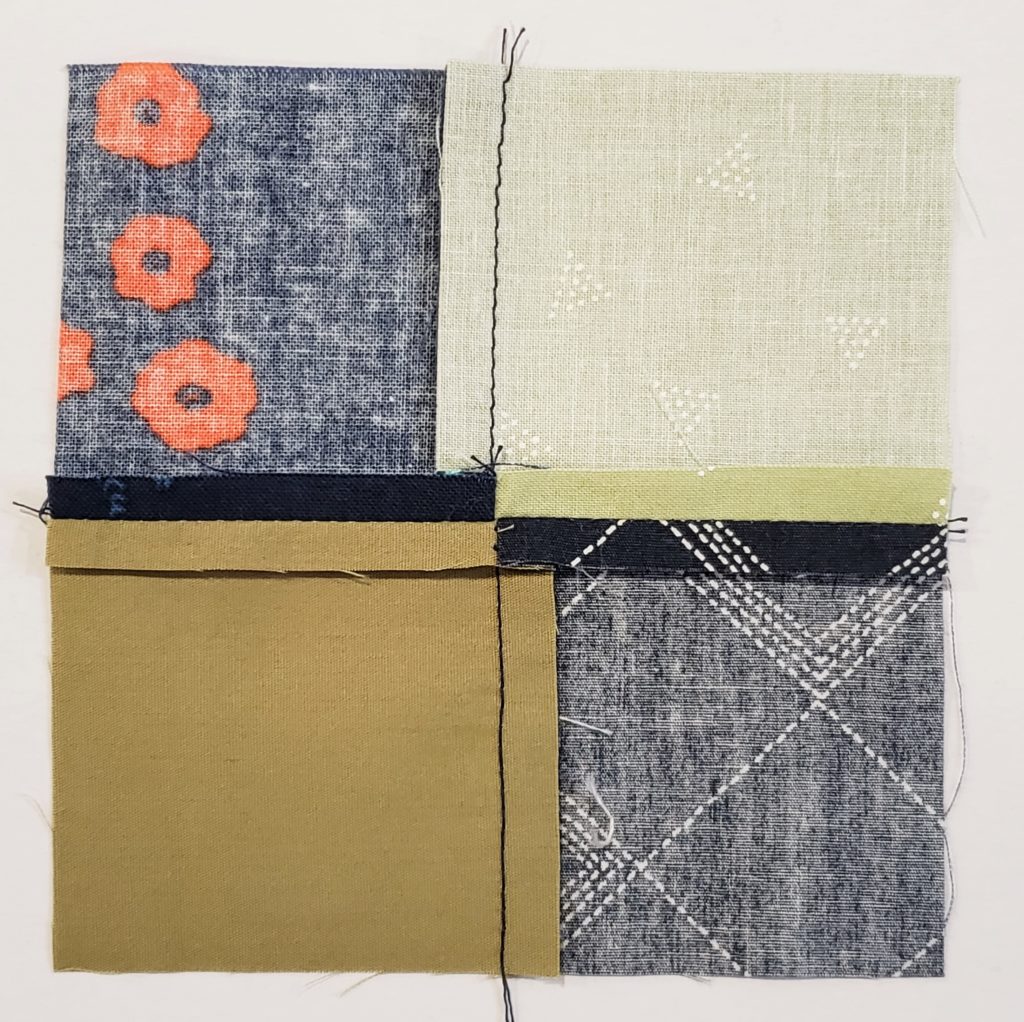
Begin creating your Four Patch block by laying out your fabrics with contrasting fabrics touching, as shown above. Flip the right square of fabric onto the left square of contrasting fabric so the right or printed sides of the fabric are touching and line up all of the edges. (This is called sewing Right Sides Together, abbreviated as RTS in sewing patterns and jargon.) Pin in place if you feel it is necessary, this will reduce shifting of the fabric when you are transferring it to and feeding it through the sewing machine. Sew the top row of blocks together along the right side seam using a 1/4in seam allowance. With a hot iron, press the seam of the fabrics toward the darkest fabric. Repeat for the bottom row, pressing toward the dark side of the fabric. To combine the top and bottom rows, place the top row RST using the seam ledge created by pressing the fabrics to the dark side to help nestle your seams together and pin in place just below the raw edges to hold your seam in place while you sew. When you use this little ledge as a guide for nestling the seams a very crisp center point of all the squares will be achieved making your finished project look very professional. Sew a 1/4in seam across the raw edges to combine your top and bottom rows. Once combined, take the Four Patch unit over to your iron and give it a good press.
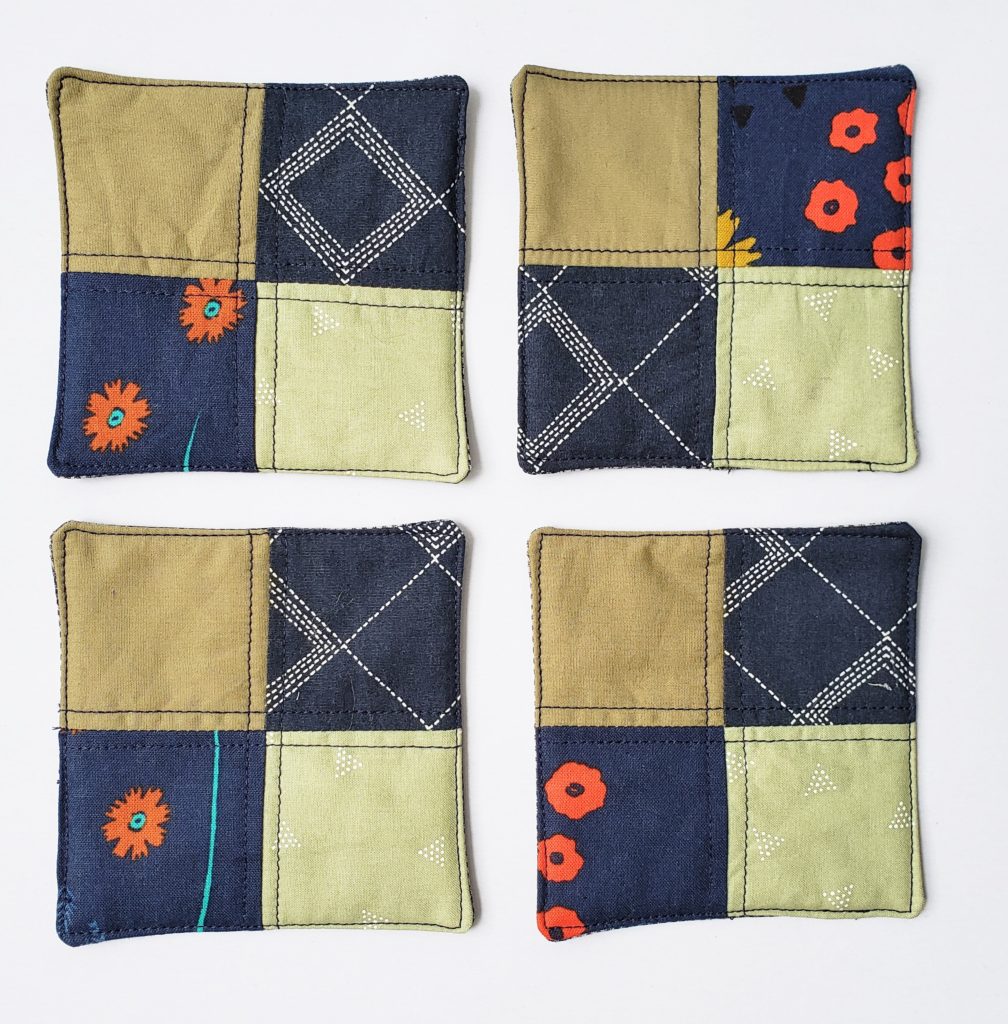
Yay, you have completed your first Four Patch block. Yes, it really is that simple! If you were making a larger quilt you would simply repeat those same steps until you had combined all of the required blocks, working in ever-increasing sized units. If you are making the simple Four Patch coaster set, you will now repeat those steps to make the remaining 4-6 Four Patches for the tops of the coasters.
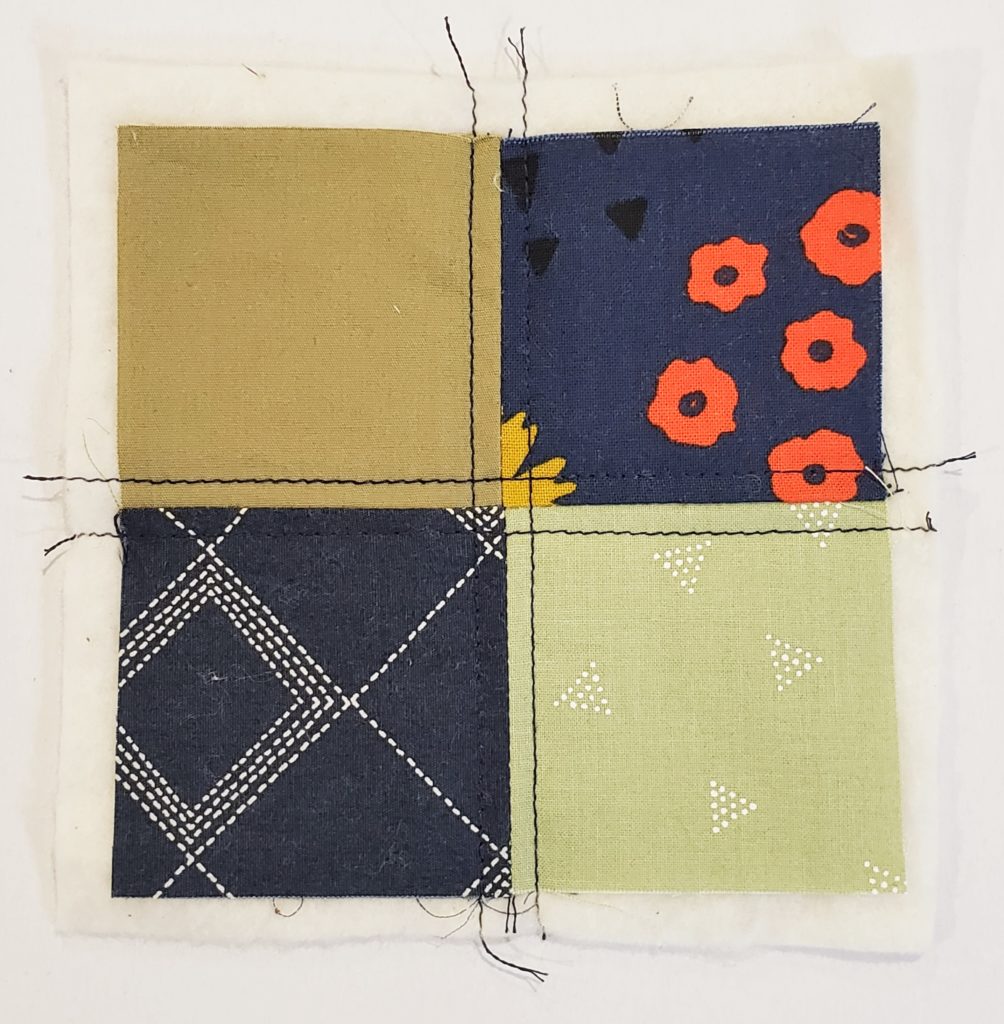
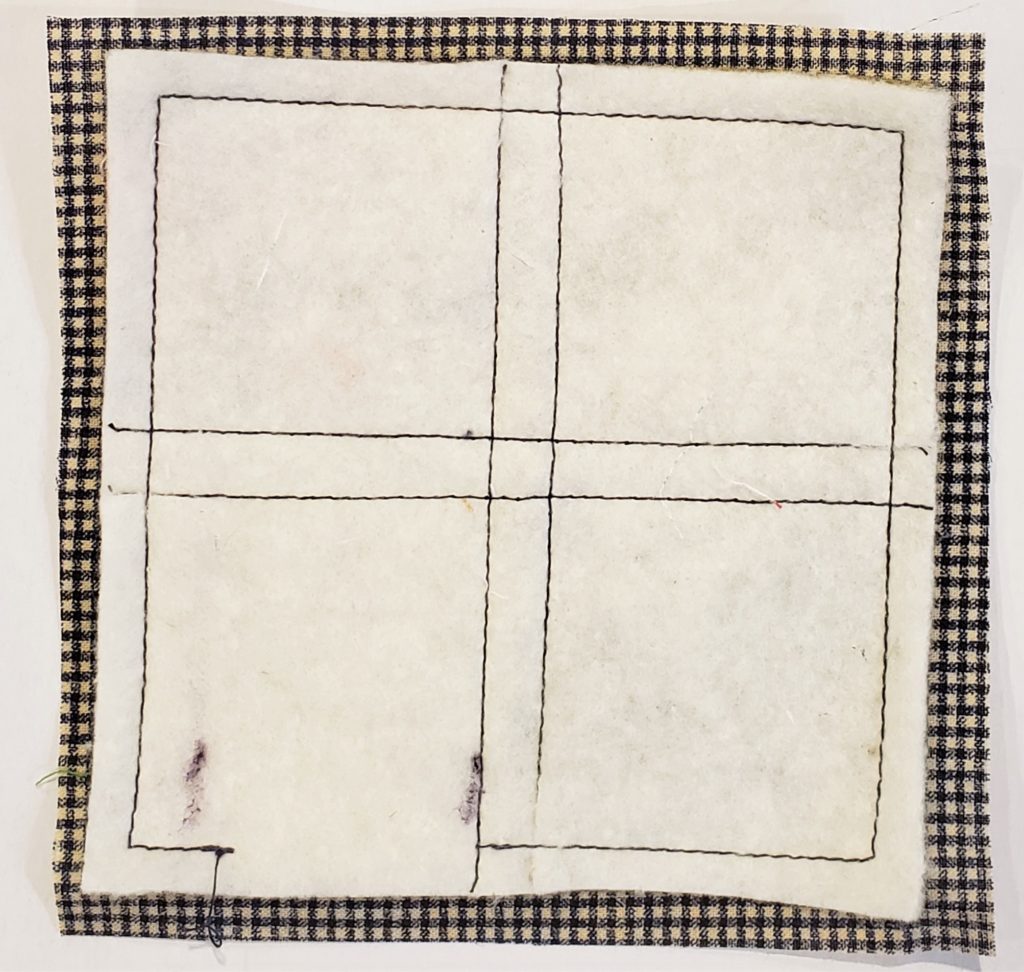
Once you have created all of your Four Patches, place each Four Patch block with the right side facing up onto the 6in piece of batting. Center the block on the batting creating an equal amount of batting around the entire edge of the block. Pin the block to the batting with a pin in the center of each square. Again, this will reduce the shifting of the block while you run it through the sewing machine to quilt it.
To quilt your Four Patch coaster, use the center seam as a guide and line up a notch on or the edge of your presser foot to create an even quilted stitch line off of the center seam of your block. Watch the alignment mark, not the needle, while you guide the coaster top and batting through the machine. Once you sew down one side, rotate the block and come back up on the other side. Repeat on all four sides of the center seam of your coater Four Patch. This will create a lovely quilted grid on the top of your Four Patch coaster. Again, complete this step for all of your remaining coaster top and batting units.
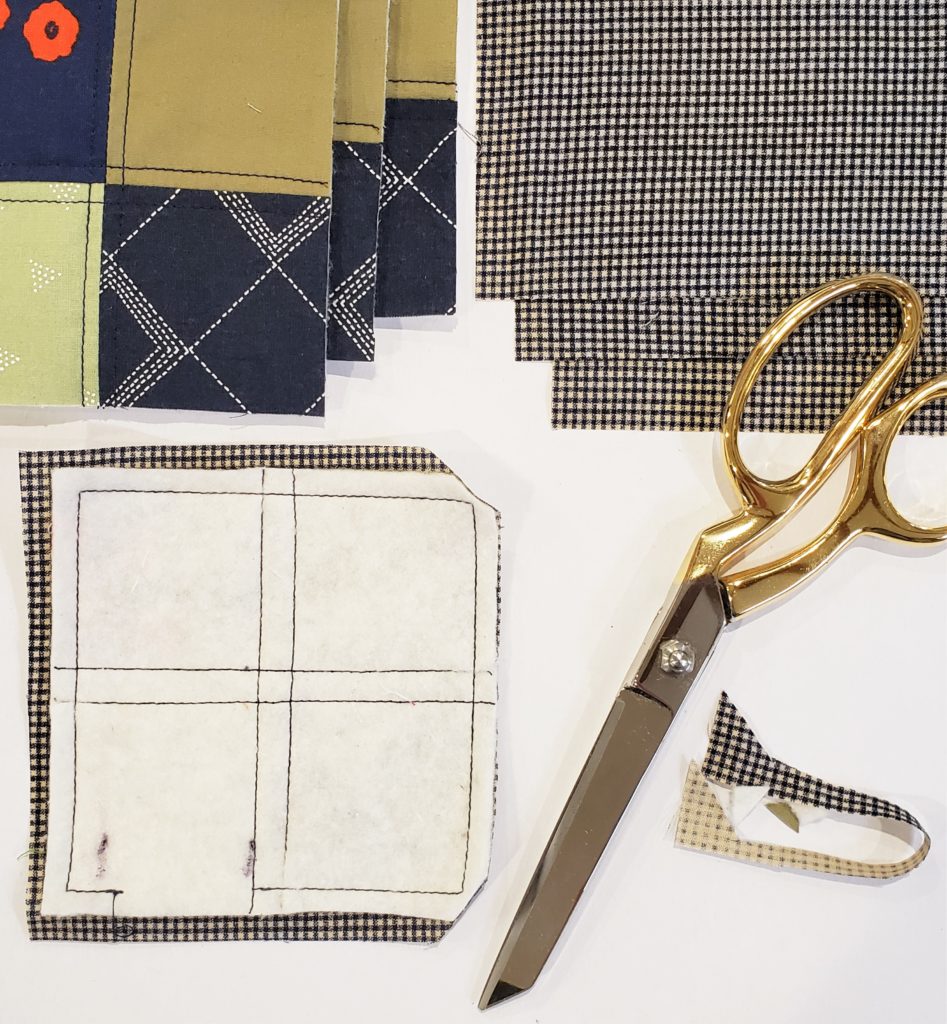
Once you have completed the quilting it is time to “square up” or trim all of the edges of our Four Patch. Use a clear acrylic ruler and rotary cutter, lining up the acrylic ruler with the center seam of your Four Patch on a line of the ruler and the edge of the ruler along the raw edge of two sides of your block and batting unit. Using the center seam of the patch helps to square the block up and will trim neatly any of the wonky edges created while quilting. Try to trim away as little as possible while still taking the batting and edges back to the print fabrics. Repeat on the remaining sides of your batting and block unit.
Rather than binding the Four Patch coaster as you would a larger quilt, the coaster will have an enclosed seam. To create the enclosed seam, place the 6in square of backing fabric RST onto the quilted Four Patch unit and pin in place at all four corners to reduce shifting while sewing. Sew a 1/4in seam along the entire outer edge of the block and backing leaving a 1.5in opening in the seam to turn the unit right sides out. Backstitch at the beginning and end of the opening to lock the stitches in place and hold them tightly while you pull the layers of fabric right sides out.
Before turning the fabric, use your scissors to cut off any excess backing fabric and crop the corners of the coaster by cutting on the diagonal right outside of the corner seam. This reduces the excess fabric in the seams and corners and allows them to be crisper when turned. Reach your finger into the opening and turn the fabric, using a chopstick or similar to help poke the corners out.
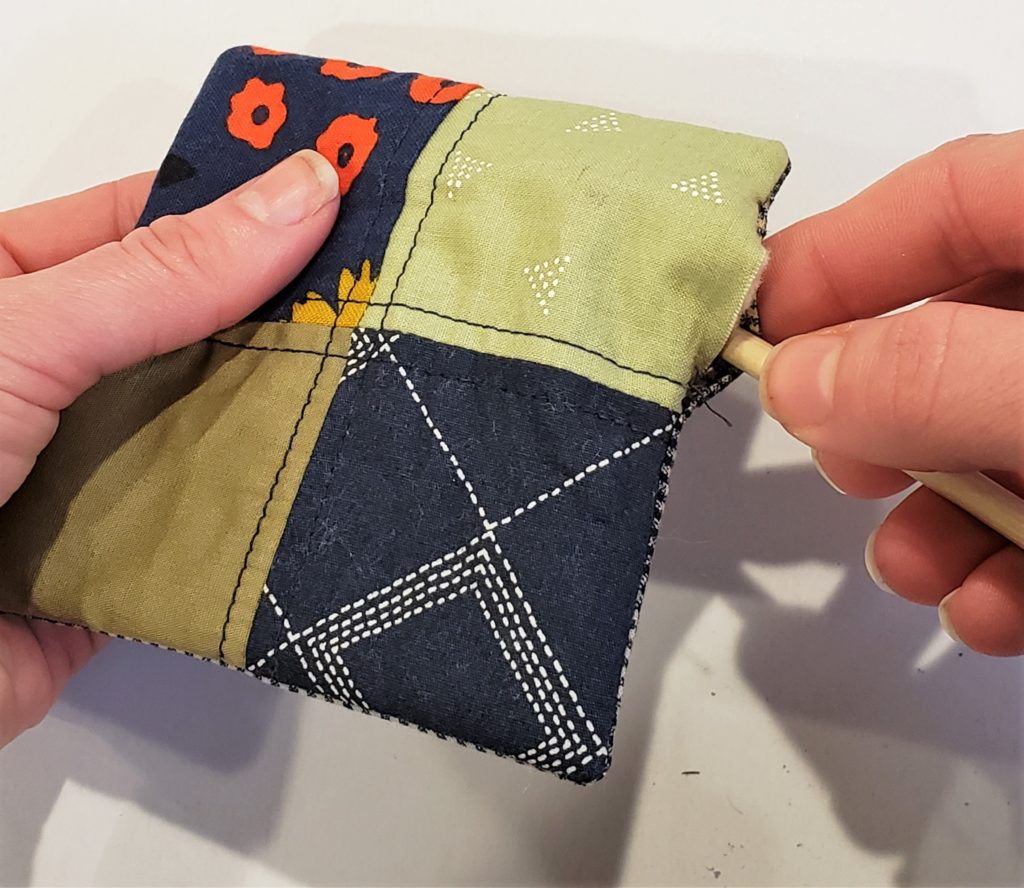
After you have turned all of the coaster units and poked out the corners, take the coasters to your iron and give them a good press. Pay particular attention to pressing the edges nice and flat, as well as folding and pressing the opening edges even with the sewn seam edge. To finish your Four Patch coaster, return to your sewing machine and topstitch a 1/8in seam around the entire perimeter of the coaster. Backstitch at the beginning and end of your top stitch and don’t forget to leave your needle down and pivot the coaster when you get into each corner. This topstitch seam should be close to the edge of your coaster and will close the turning opening and create a crisp finish to the entire perimeter of the coaster.
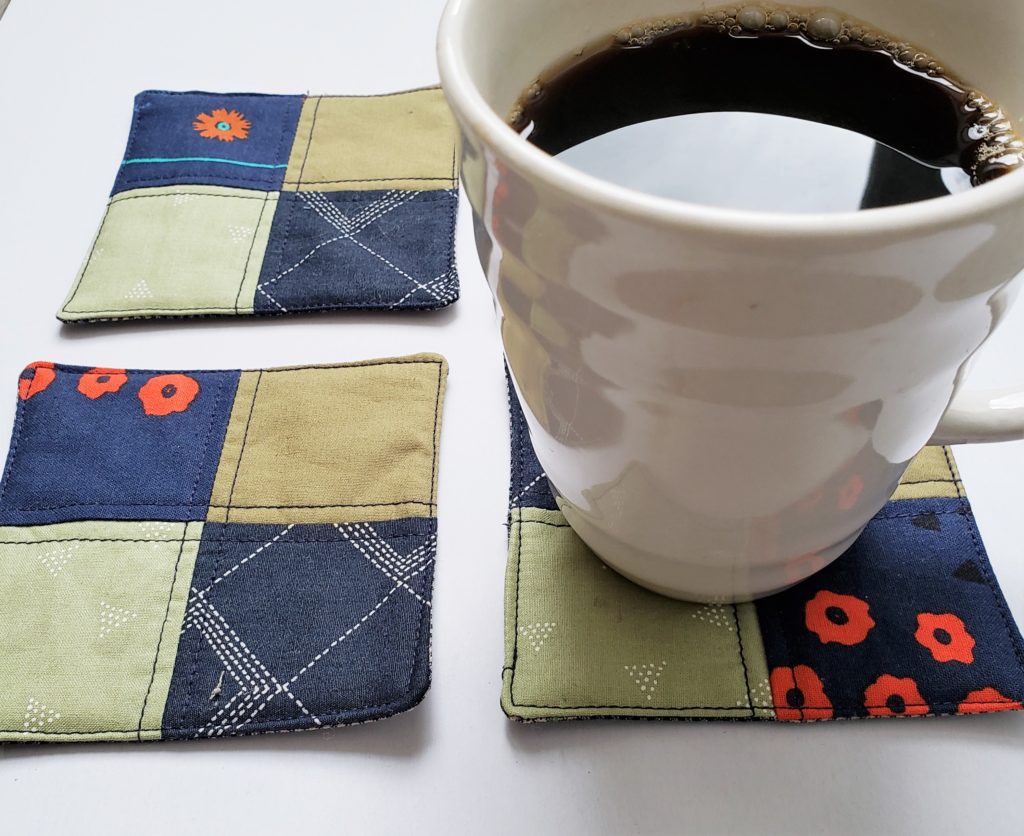
Congratulations, you’ve just made a super cute set of quilted coasters! If you’ve tackled the coasters you could easily scale the concept up to a real quilt! You can find all of the materials needed to complete more coaster sets for gifts and practice for sale in my Etsy shop. (Purchase the DIY Coaster Kit and get started right away.)

Watch a quick and dirty video on how to make the Four Patch Coaster set on the La Rue de Fleurs YouTube channel. Don’t forget to subscribe for future videos!:
If you are looking for more simple quilting tutorials, subscribe to my newsletter or add this blog to your RSS feed so you never miss a post. I hope you have enjoyed learning how to make a basic Four Patch Coaster set. Go forth and create, Janice
Inspiration and resources are linked where applicable. All written work and photographs are original content and are copyright protected; kindly give due credit by linking back to my website or source website if you use or share.
(©2020, Janice Bailor // laruedefleurs.com)