Temperatures are warming up and we are getting back outside for the patio season! If, like me, you are looking around your home and patio this time of year and accessing the décor, or lack thereof, perhaps you would like to join me in this fun little project. I created this quick tutorial for how to create a camp lantern terrarium to add an instant pop of personality and outdoorsy style to a little tabletop on your porch or patio.
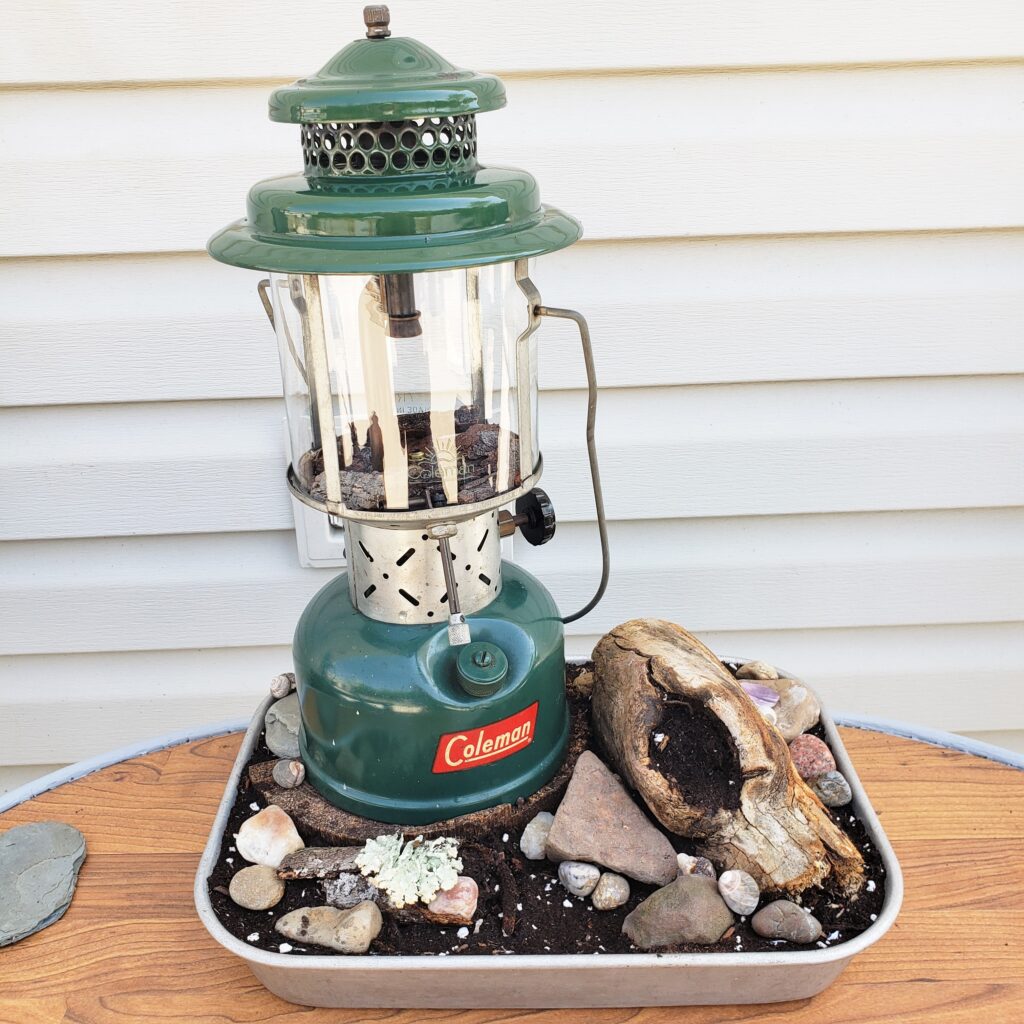
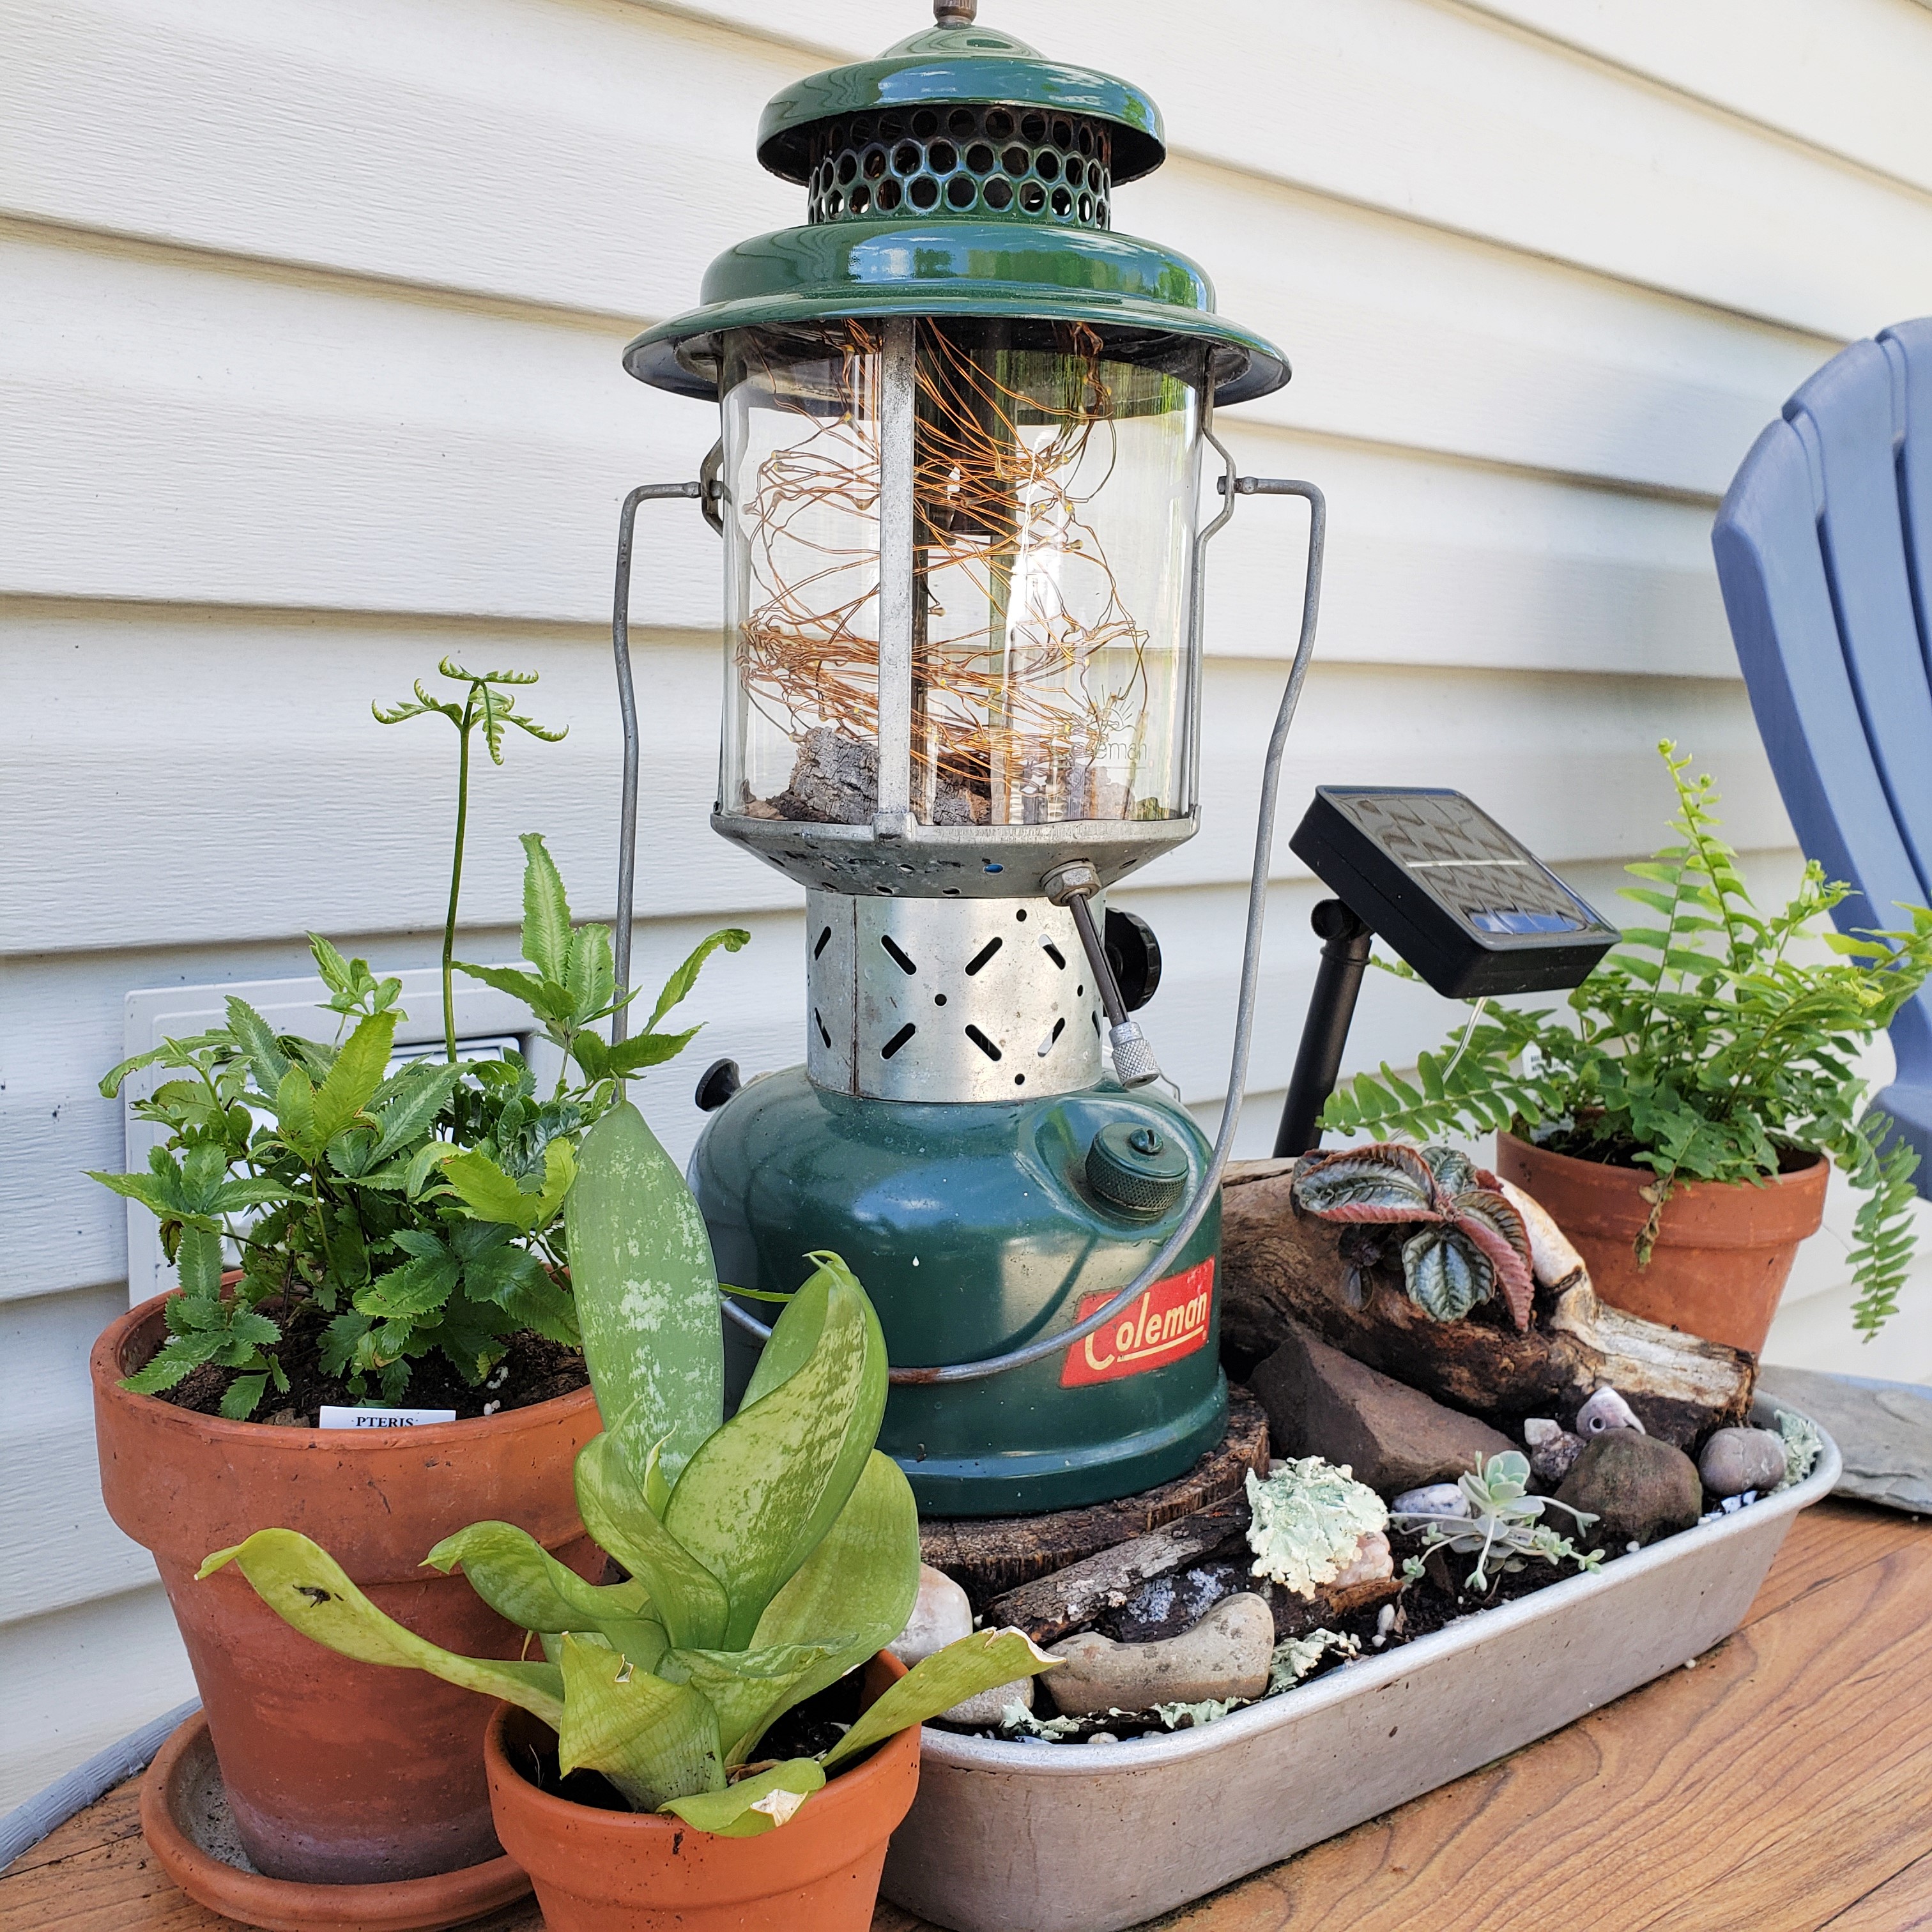
The supplies are almost totally comprised of items I had on hand at my house. My husband tried to rehab this old Coleman lantern to no avail. Instead of tossing it, I had an idea to create a little planting project. At first, I thought I would put a tiny fern inside of the lantern glass, but later I changed my mind. Just the lantern on its own didn’t seem to make enough impact as a focal point in my opinion, so I also brought out an old galvanized baking tray. With the addition of the tray, I would have more planting area to create the impact I desired.
Thought the tray is nothing special, I thought it probably wise to try to extend its life a little by lining it with some plastic packaging, luckily this bubble mailer had just arrived. I split it down the center and was happy to see it filled the entire bottom of the tray. Don’t worry, we’ll cut the excess later. I left the liner fall outside of the tray while I stuffed it with a potting mix. I think potting mix is a good idea here versus regular soil because it will allow more air to flow around the pant roots and not get hard and compacted when it dries out which is generally why you would use it in containers.
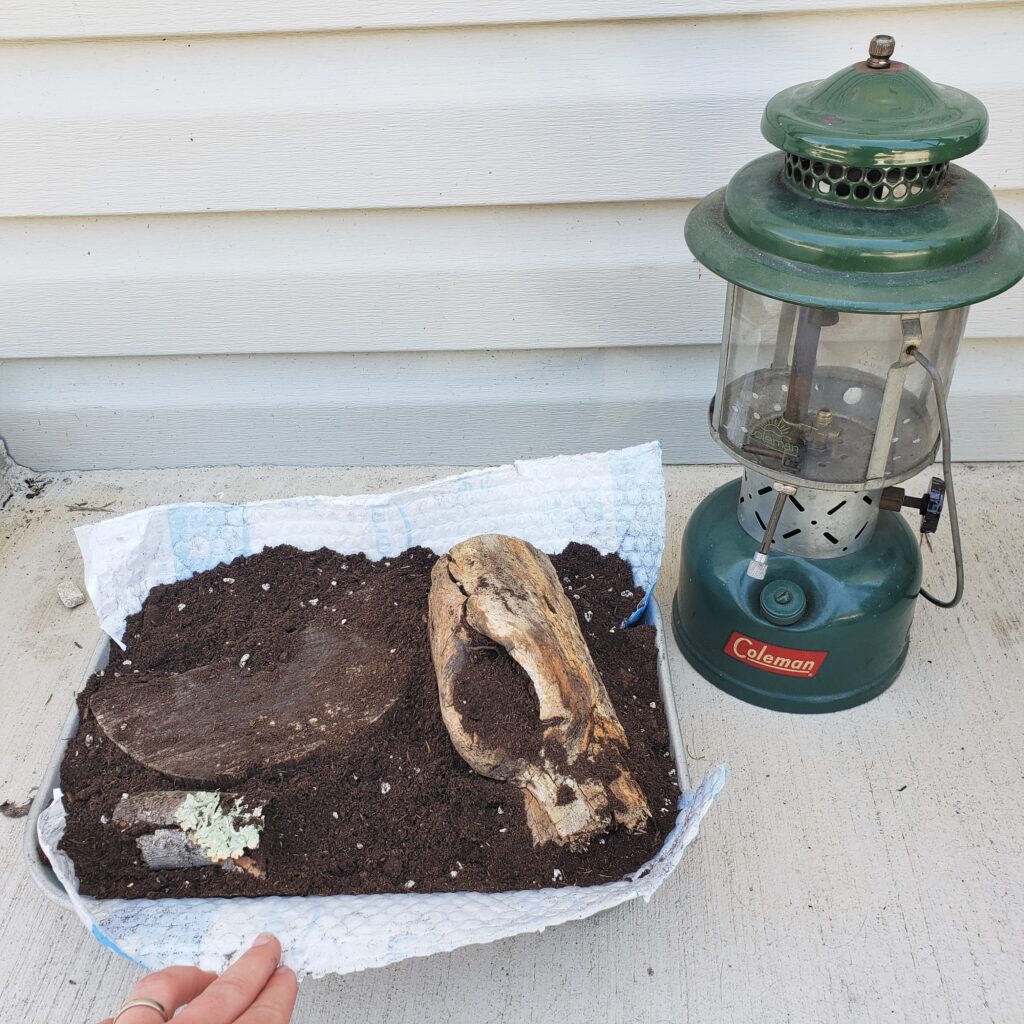
After I filled in the soil, I knew I needed a raised platform area on which I could set the camp lantern. I had been saving this half plate of wood for a long time and it was perfect as the base. Adding the wood plate and an additional piece of flat rock to the back left corner allowed me to add a small stump with a planting hole. I am really feeling the wood-floor vibe with this arrangement now, are you?!
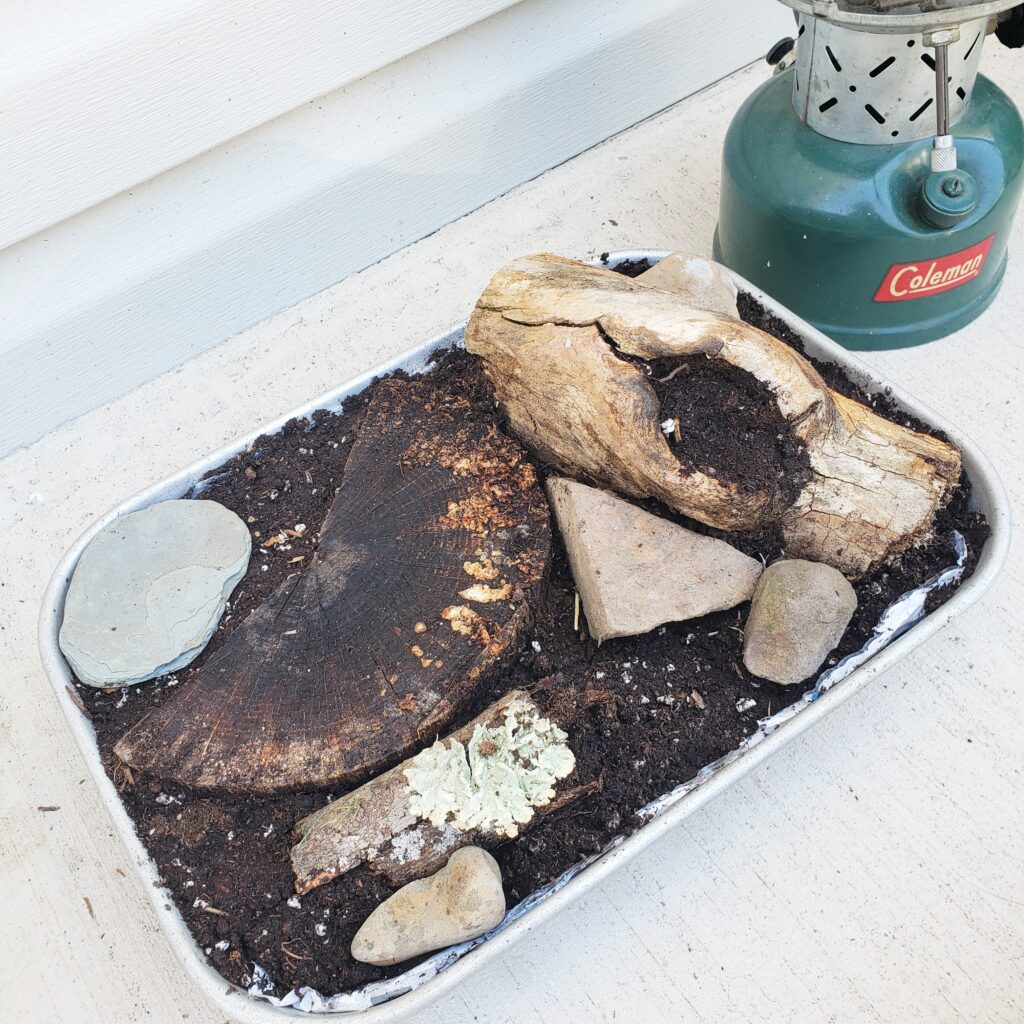
Continue adding larger rocks and another small partial branch. This one had a great patch of lichen for more interest. Really, I just foraged my yard, potting shed and woodpile for this whole project. I am a natural hoarder of all the pretty and interesting woodland bits, so it is nice to have a purpose for showing some of this stuff off and enjoying it.
Anyway, keep adding larger rocks as you see fit to create a forest floor effect. If you are struggling with this I recommend closing your eyes and trying to picture the last hike you went on. If your imagination escapes you, perhaps actually go on a hike and take some pictures. As a last resort, I guess you could scroll the internet or kind of copy what I did here.
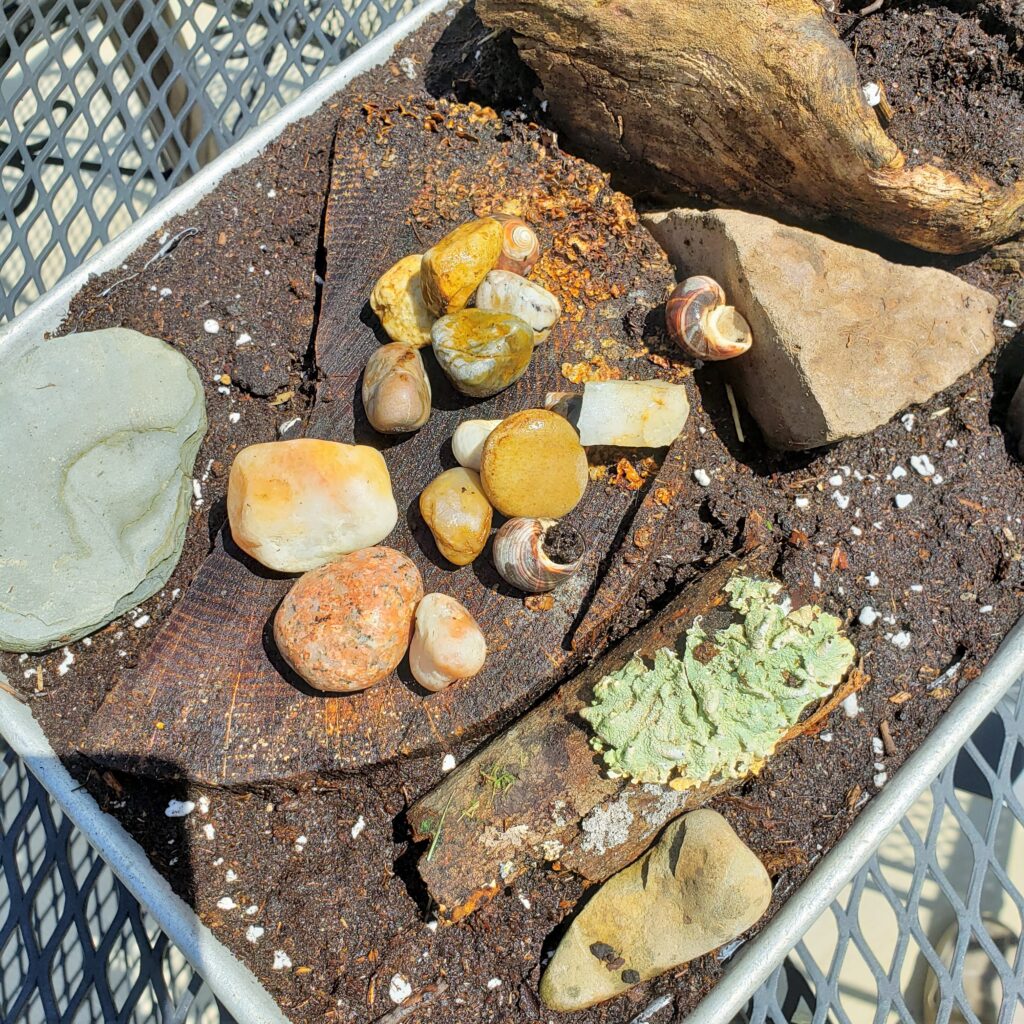
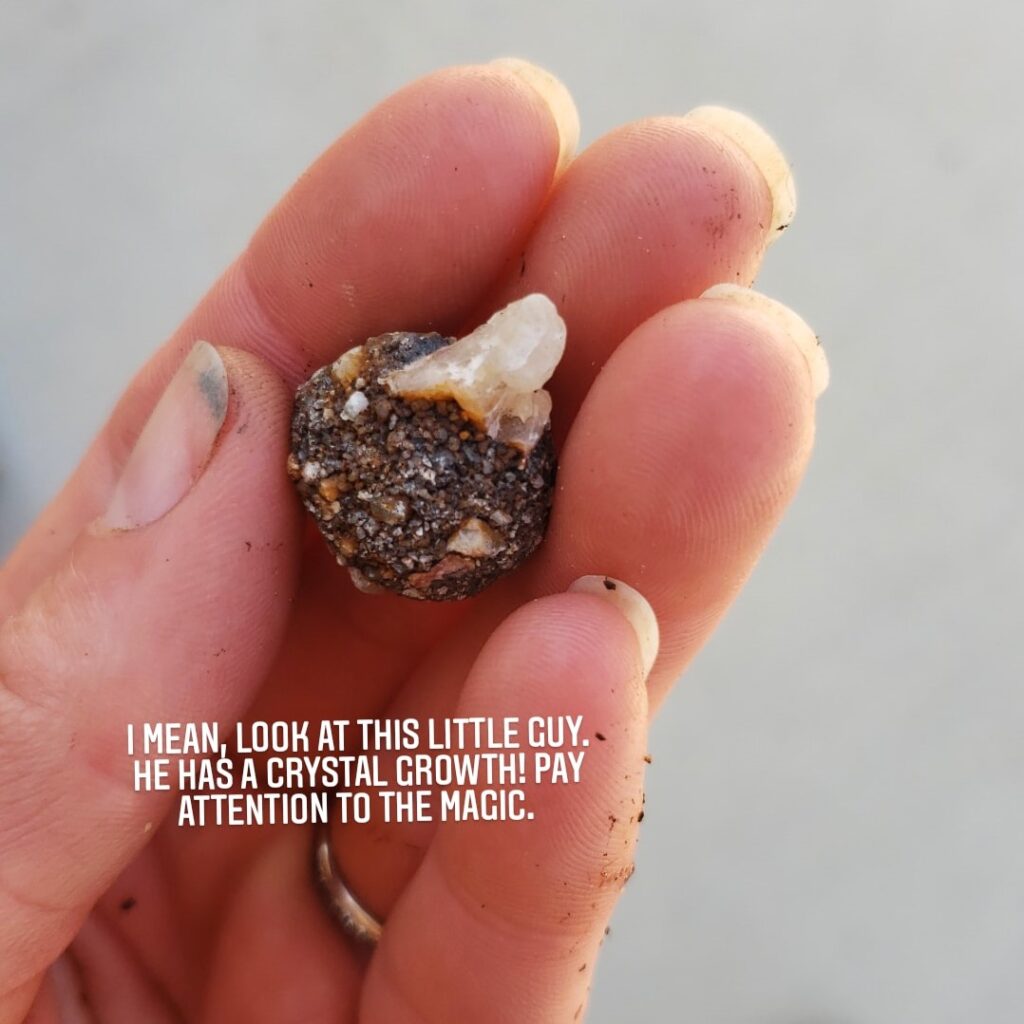
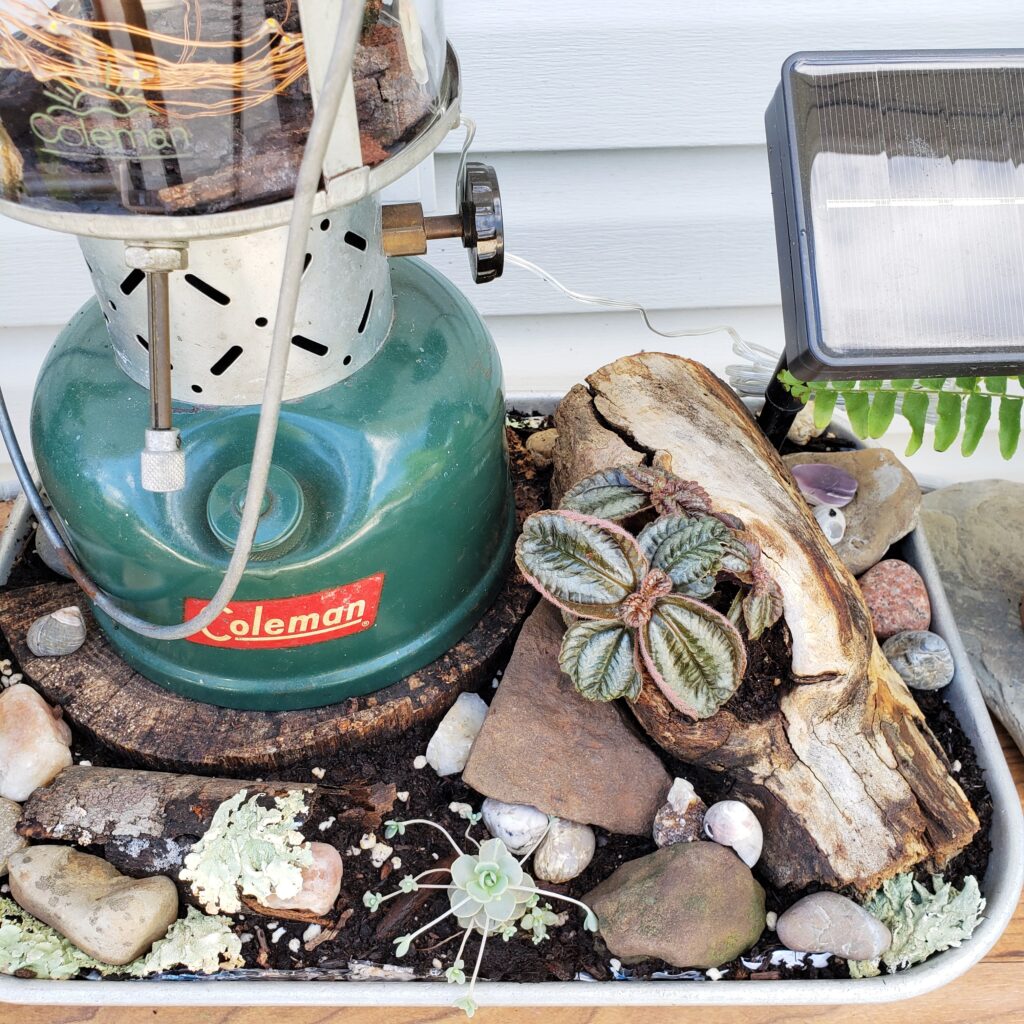
Once the larger rocks and stumps are in place, it is time to add all the rock and shell confetti. These should be some of your most precious, colorful, shiny, and unique hoarded rocks and shells. They don’t necessarily have to be actual items you would find in nature. It’s your arrangement, so I say do what you want and will make you smile. Again, I have a lot of odd little rocks. Every time we go on vacation, I walk the shoreline and gather some shells, sea glass, or precious stones. A lot of the ones here are from a not too long ago trip to Lake Erie.
To mimic nature, who obviously knows what she’s doing, tuck the little rocks into and slightly on top of the larger groupings. Keep some space free for the eye to rest and also to add in a few plants. I added the lantern and took a moment to wet the whole thing down to make sure the soil was settled. (Then I took a bit longer break because I realized I didn’t actually have any plants for this and needed to go shopping.)
Remember earlier when I said I had changed my mind about using the camp lantern as the terrarium itself? Well, I couldn’t just leave it empty! Fortunately, we had bought these lovely twinkly fairy lights for outside the past holiday season and they were perfect to coil up and add to the interior glass of the lantern creating a cute twinkly glow at night. The solar panel is not the cutest part of the arrangement admittedly, but solar is a much better way to go than batteries or electric. (Twinkle light resource.) If you wanted to or had an extra place to hide the panel that would obviously be better, but I find it ignorable as is so I will not be working that hard on changing it.
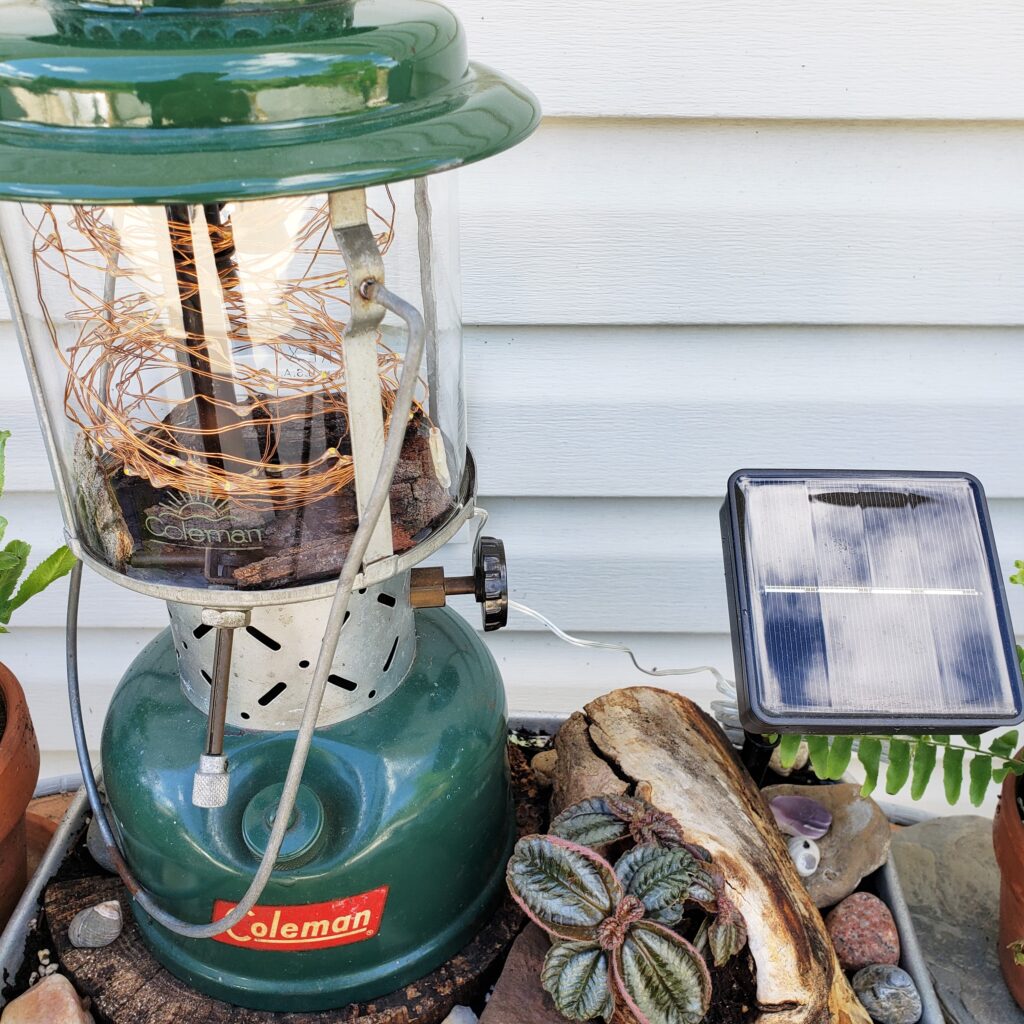
Then, the best part is adding the little plants! Think tiny ferns and succulents. I unfortunately did not save the tags for any of this, but I recommend taking yourself on a fun outing to your local greenhouse or favorite plant place and having a look around at what is available and catches your eye. For my arrangement I also stole a hardy succulent that volunteered to come back up in my garden and placed it in the bottom portion of the tray where it can spread out. The colorful leaves of this (possible) tiny brunnera went in the planting cavity of the log. I love this natural look and you don’t have to worry about the space because they are unlikely to outgrow it in just one season.
Just a few plants is, obviously, not enough, so I extended the grouping with additional potted ferns and a houseplant I think would love to summer vacation outdoors. To enhance the look more flat river rocks have been added under the pots to serve as the drip tray.

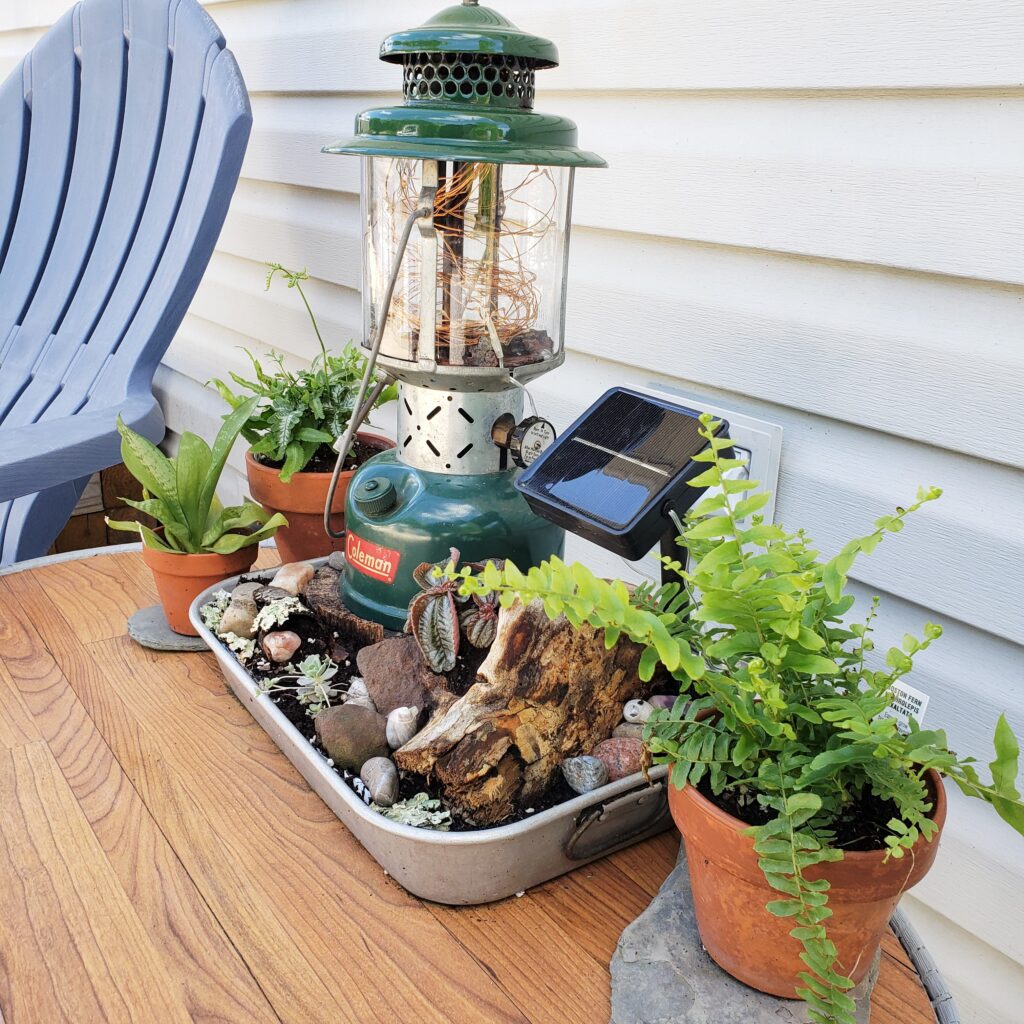
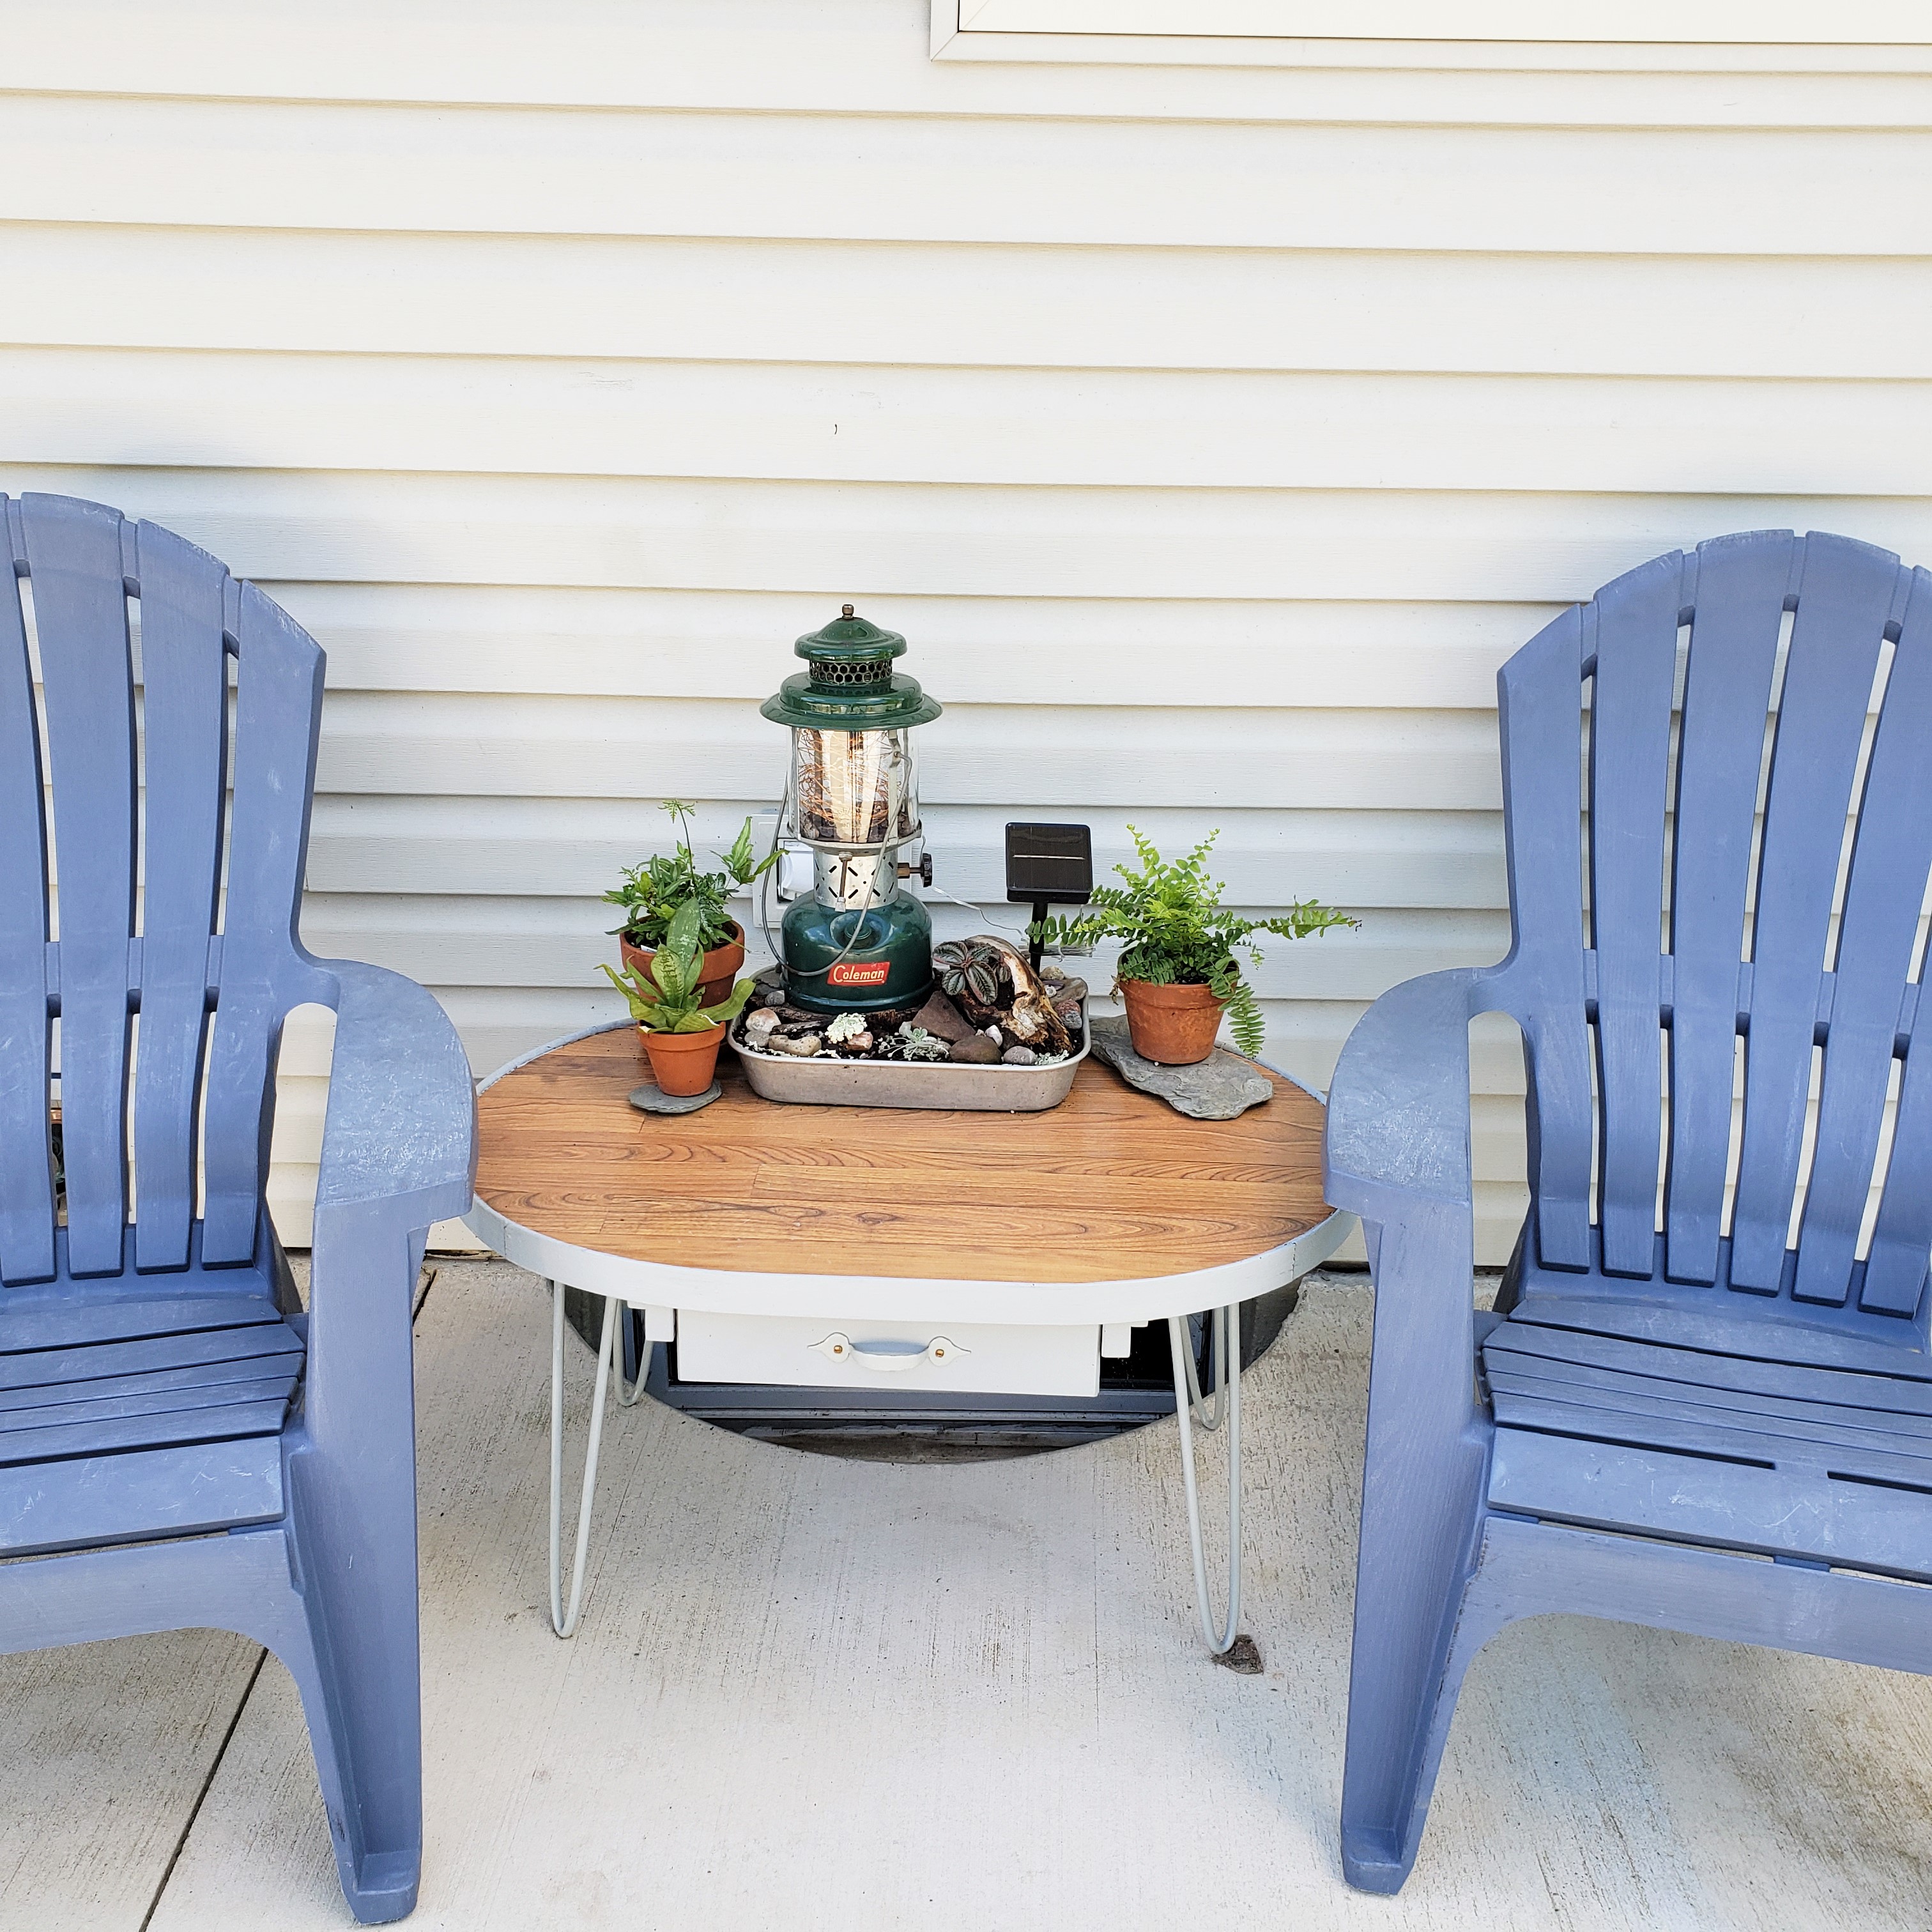
This arrangement seriously makes me so happy! I love the statement it makes on the table and really anchors the Adirondack style chairs we have in this area. (Also, it covers the tripping hazard that is this awkwardly placed basement window. Plants truly make everything better!)
I hope you enjoyed this cheeky little tutorial/how-to and you feel inspired to create your own vignette. If you can’t find an old lantern, I think it would also be charming with an old kerosene lantern which you could likely find at a thrift shop, yard sale, or perhaps the attic. For me, the point with the majority of little projects like this is just to take what I have lying around and turn it into something I enjoy. Take time to look at what you might otherwise think of as junk and use your imagination to make it bring joy. Not only will your pocket book be thankful, but you are saving the world a bit of waste – a win, win!
Thank you so much for your continued support of my artwork and for reading, commenting, and sharing these articles.
Stay creative, friends! Janice
Inspiration and resources are linked where applicable. All written work and photographs are original content and are copyright protected; kindly give due credit by linking back to my website or source website if you use or share.
(©2021, Janice Bailor // laruedefleurs.com)