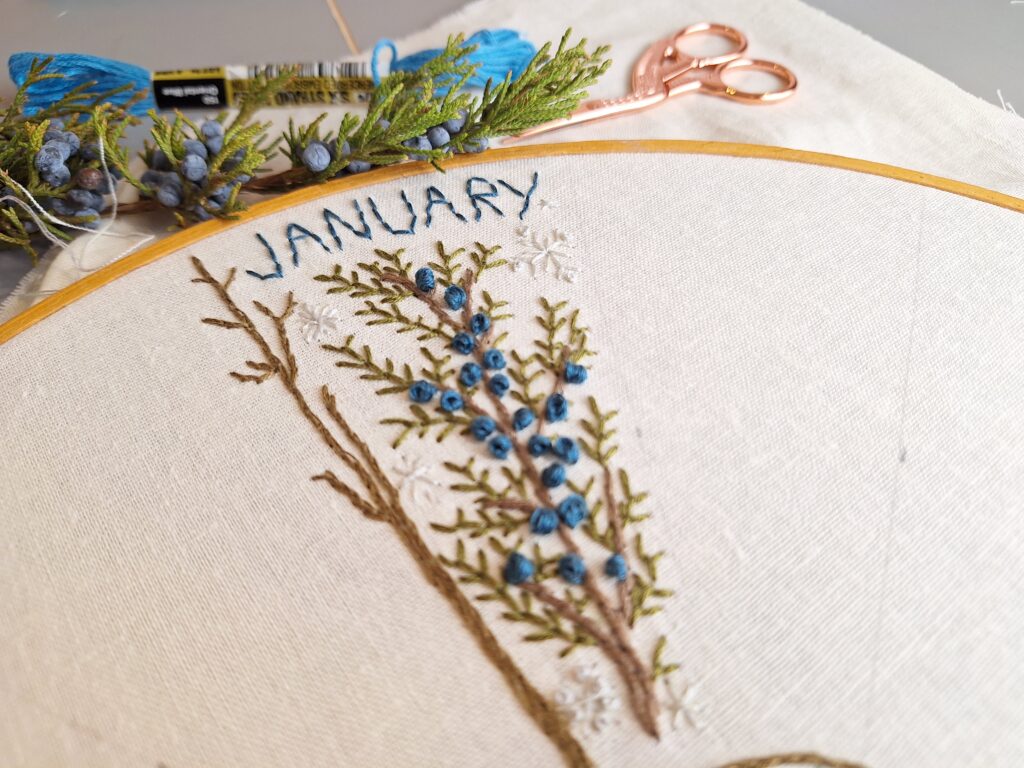
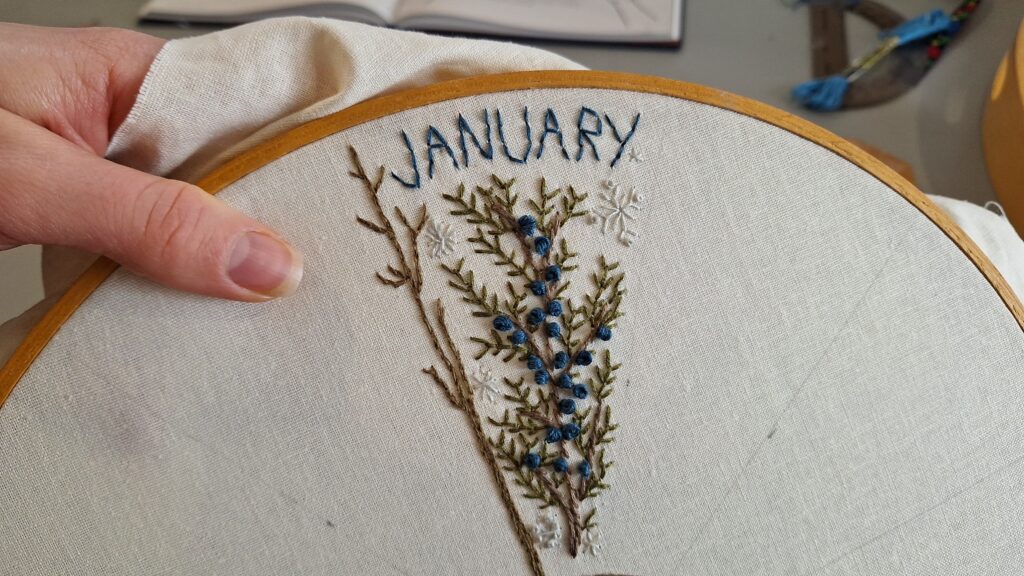
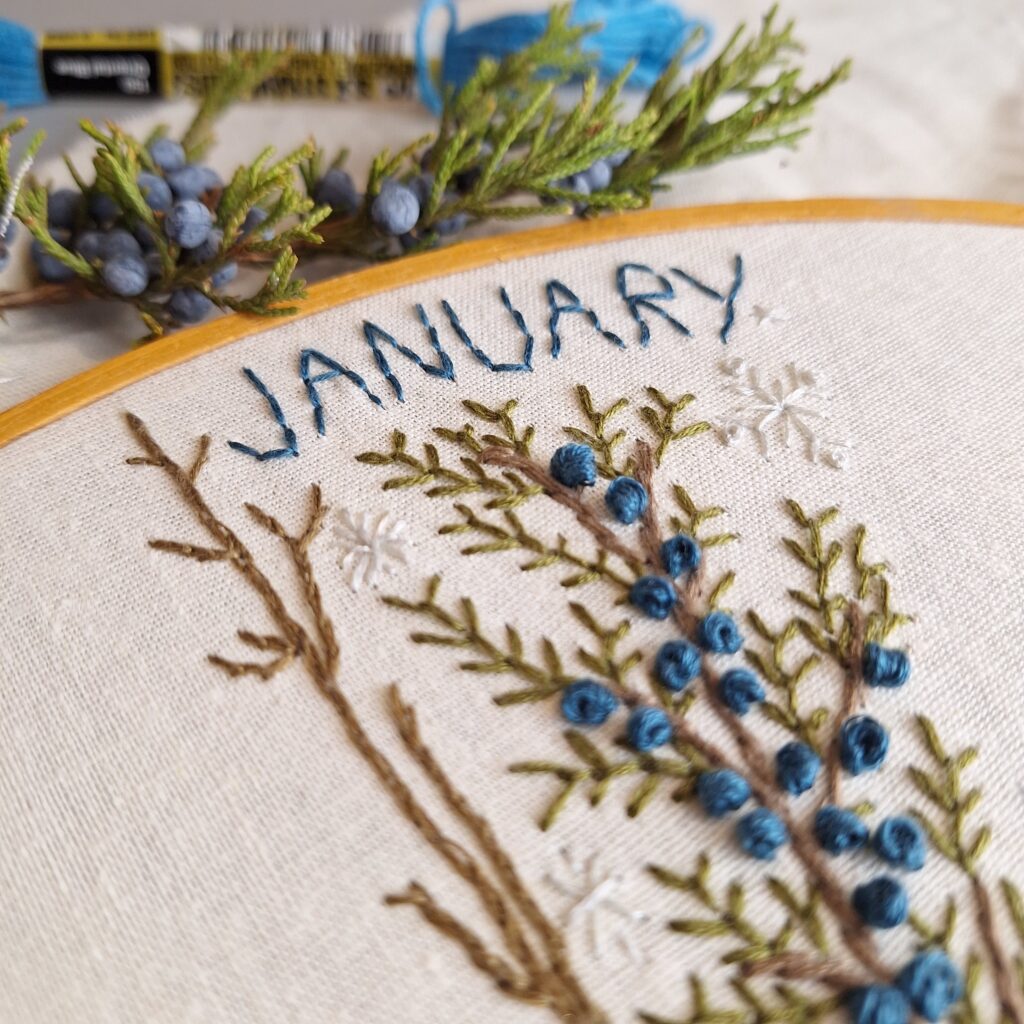
My first entry in the 2024 Embroidery Garden Journal is a sprig of juniper for January! I live in zone 6b in central Pennsylvania. There is not much alive in the garden during any given January. We have been having highs in the 20°F with lots of snow, so mostly my garden is a bare, blank slate at the moment. However, I am inspired by a majestic plant that surrounds our property, the Juniper! In splendid green and ripe with blue berries for the birds, the Junipers are a stalwart at the edge of our land and help protect my garden from the brutal winter winds. I think this feat is well worth celebrating in the embroidery garden journal for January.
Laying Out the Branch Foundation
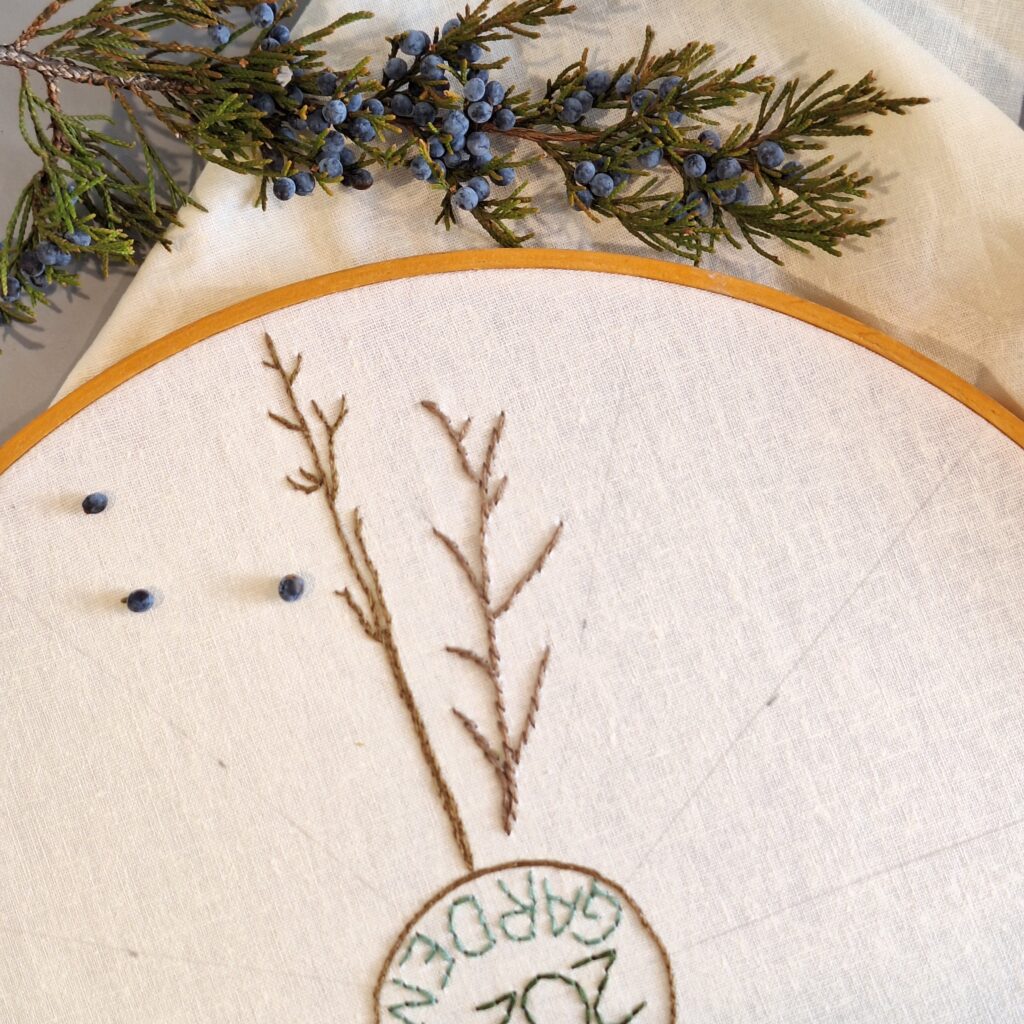
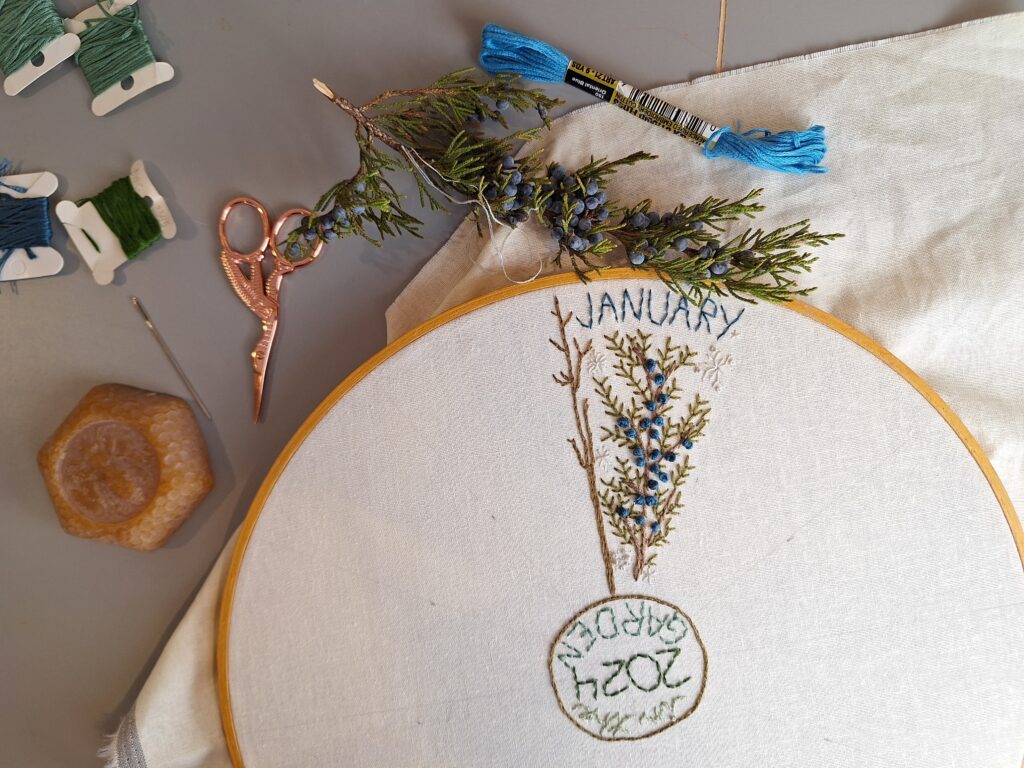
After a quick walk through the snowy driveway, I chose a juniper branch to work off of for sketching out the form of my embroidery. I simply use a light pencil line drawn directly onto the fabric in the approximate center of the January wedge. Make sure to leave room at the top widest part of the wedge to add the month label, but otherwise, fill up the wedge with all the stitching!
I began by using the stem stitch to follow the lines of my branch sketch in a soft gray-brown color I thought matched the juniper bark well. I am only working with embroidery floss I have in my stash, so I will just work to find a color that matches as closely as possible without stressing over perfection as much as possible. The color was DMC 410 for the stem, I believe.
The stem stitch is quite easy and can best be described as a running stitch where the starting “up” stitch begins halfway through the prior stitch, but off-set to one side. The needle comes up just slightly to the side of the last stitch at the halfway point, creating a slight angle when you put the needle back down in line. I think it truly does represent the movement and texture of bark. It is also a strong line which makes it good for sturdy stems and outlines.
Learning the Variegated Fly Stitch
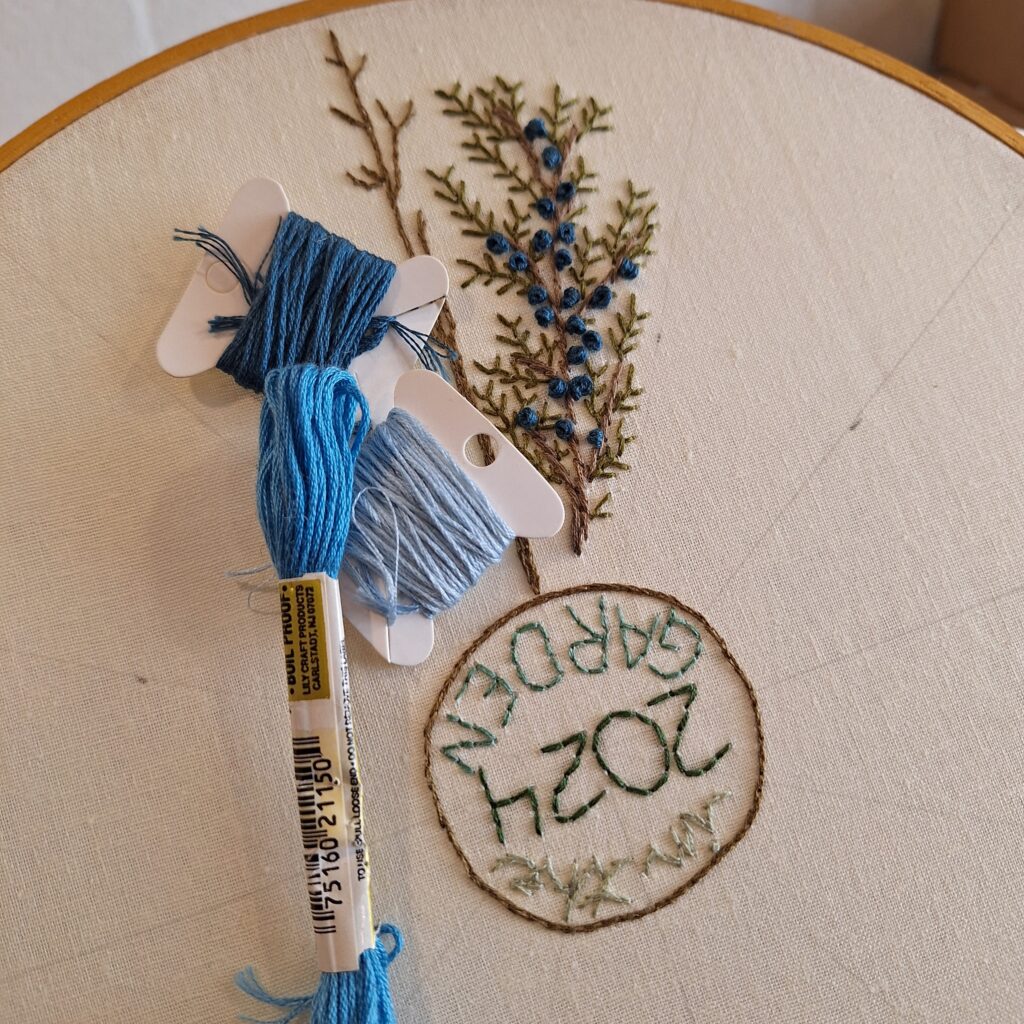
Can you believe I never used the variegated fly stitch before this project!?! Woah, I am so glad to have the opportunity to push myself to try and to learn new things as I work through this year-long journal. Honestly, I think that will be the best part, a chance to try new things to achieve all of the vegetation I want to capture as closely as possible via stitch.
Initially, I just glanced at the Mystical Stitches book for guidance, but boy was I glad to have it on hand when I was first attempting this stitch. At first, I did not star my second stitches High enough up to get the correct “V” shape and be able to connect them with a little line of thread. Thankfully, I was able to pick out my first attempts, take a good hard look at the fly stitch instructions in the book, and rework the stitch to make a perfect capture of the juniper needles.
To make the variegated fly stitch, bring up the needle and thread through the back to the front of the fabric. Then put the needle down horizontally across from the “up” stitch about 1/4 in. Stop before you pull the tread the whole way tight, so a little loop of thread is left to catch with your needle. Then bring your needle up in the center of your last tow stitches, slightly down from them in lin and catch the loop with that “up” thread. Finally, end the stitch about 1/4 inch down from the loop catching to create a “V” with a 1/4 inch tale. Begin your next stitch with the tops of the “V” right at the catch tail top of the last stitch to create a chain of “V” stitches with tails that will interconnect to make a branch or needle effect.
Adding Finishing Touches
After all of my needles were completed, I added in the fat berries of the juniper the birds love so much! For this detail, I used all 6 strands of the embroidery floss to get fat berries. I used the French knot stitch, wrapping the tread around my needle 4 times and gliding the twists down off the top of my needle as I swung it back down through the fabric right next to my “up” stitch. I loosely followed the amount and placement of berries on my branch, which had more berries toward the center and middle of the stem.
Finally, I added a few snowflakes to represent the current weather conditions using a combination of simple cross stitches, the fly stitch and a few tiny French knots as well.

Lastly, I made sure to sketch out my month title at the top widest part of my wedge, using the center to roughly line up the center of my month. Then I used a simple backstitch to trace over my outline with the same blue thread I used of the juniper berries.

I am so happy with how my first entry turned out! I hope you are excited to start your January entry too and begin this creative embroidery journal throughout the year.
More Details in the Video
Didn’t get enough details from this post? I filmed the whole thing for YouTube! Watch me create my January Juniper entry for the monthly embroidery garden journal below right now. Then return every month for a new video featuring what plant I’m working on that month!
Top Tips
Here are my top tips for getting started with your first entry in your 2024 monthly embroidery garden journal.:

Sharing is Caring!
As I mentioned above, this is a new monthly video and blog series in which we will use hand stitching and embroidery techniques to document a year in our garden! Our monthly embroidery journal will focus on capturing stitched memories of the garden one month at a time. I will share my process each month here on the blog and with a monthly feature video on the La Rue de Fleurs YouTube channel. Make sure to like, subscribe and sign up for my newsletter for notifications of each new installment.
If you join in with the videos or create the monthly embroidery garden journal above, don’t forget to share your work with the La Rue de Fleurs community by tagging me on IG @laruedefleurs and using the hashtags #larueygej24 and #embroideryjournal2024. I hope you’ll join me and have fun using creative stitches to document a year in your garden!
Stay creative friends, Janice
Inspiration and resources are linked where applicable. All written work and photographs are original content and are copyright protected; kindly give due credit by linking back to my website or source website if you use or share.
(©2023, Janice Bailor // laruedefleurs.com)