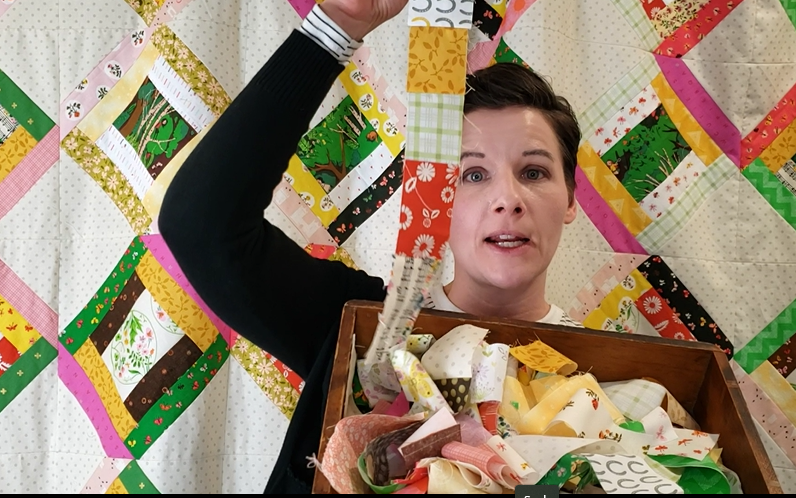
The Scrappy Strips Quilted Tote Bag is our next project in the Zero Waste quilting series. This simple pattern is a great way to use up small strips of quilting cotton that may be left over from a myriad of your quilting projects. For this version, I am using the leftover 2-inch strips that made the logs of my Geometry Dash blocks, but you could use any size strips you have on hand. Totes like these are a simple, very functional DIY that can be completed in an afternoon. Here’s how:
Materials and Supplies
- 2″ strips of various length cotton fabrics
- a cut of cotton fabric for lining
- a cut of cotton fabric for straps
- extra patch of cotton fabric for exterior pocket (optional)
- 2 cuts of quilt batting
- general sewing supplies, such as sewing machine, thread, and scissors
To make the scrappy strips quilted tote, you will need two strips of quilting cotton that measure 2″ by 20″. I am using up the strips that remain from the Heather Ross Tiger Lily Geometry Dash Quilt project. Alternatively, you could use any variety of 2″ tall leftover quilting cottons you love. You will also need a piece of coordinating fabric for the lining piece, straps, and exterior pocket if you’d like to add that. Other supplies include some matching thread, needles, a sewing machine, and either a pair of scissors or a rotary blade and cutting mat.
Quilted Panel Construction
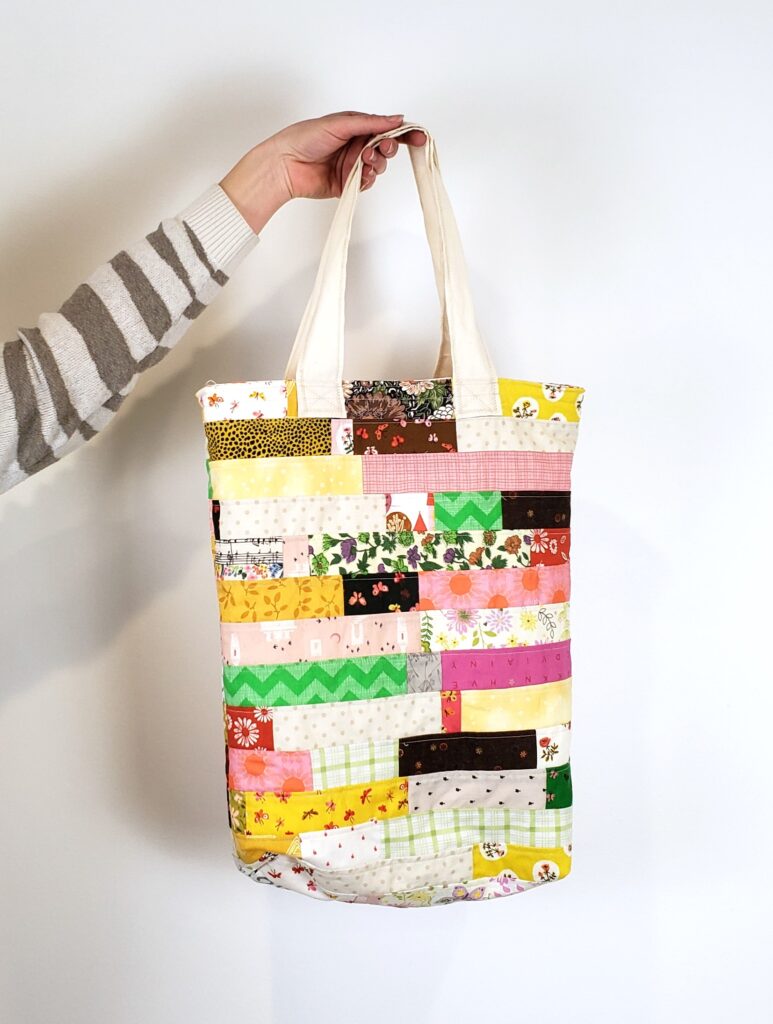
Begin by ironing your 2″ strips and joining along the short side until you create lengths approximately 20″ long. My rule for this was to get a nice mix of all of the colors and prints I used in the construction of the Geometry Dash quilt. I also tried to keep similar fabric prints and colors spaced out so they were not right next to each other. Otherwise, I just grabbed some strips from my leftovers bin and sewed them together. Very relaxing!
I ended up needing 14 2″ by 20″ strips for one side of the tote bag, a total of 28 in all.

I laid each of my strips out across the quilt batting panel to make sure I had a nice distribution of the colors throughout the side. Then I began to quilt the strips to the batting in a quilt-as-you-go fashion. If you’ve never done QAYG, first you stitch the starting piece right side up (RSU) using a 1/4″ seam along the edge of your batting leaving an approximate 1″ to 1/2″ of batting around the outside. Then you place your second piece facedown (RST) on top of the starting piece and sew the 1/4″ seam as you would if you were connecting any strips in a quilt. Then you open the top strip up and smooth down onto the batting RSU and quilt a 1/8″ topstitch along the seam you just made.
Once I finished the QAYG panel for one side, I trimmed it to be 16″ wide by 20″ long. I want the approximate finished measurements of my tote to be approximately 15.5″ to 15″ and 18″ tall. We will box out the corners on the bottom by 2″ to create a nice flat area at the bottom of the tote, which I will describe in an upcoming section. Therefore, I left a bit of extra length to accommodate for that. If you just want to sew your sides together without boxing out the bottom, you could make up for that change by adjusting the length of your panels.

Then, like the rest of quilting, you just repeat and repeat that workflow until you have filled up the panel. This both attaches the strips to the batting and quilts them at the same time. The end result is a cute strip pieced quilt panel we can use to make the tote bag. Be sure to repeat the process to create two separate sides for our bag.
Making the Tote Bag Straps
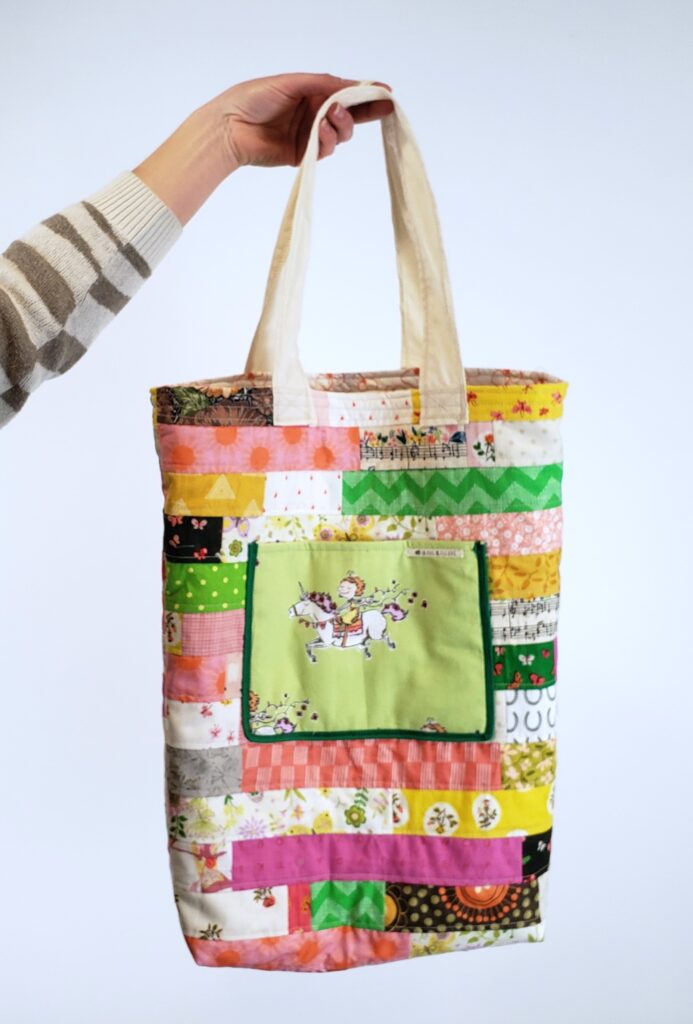
Because I loathe turning straps inside out, I usually create mine similarly to how you would prepare binding. I double the width I want my final straps to be and cut lengths. For this tote bag I cut 4″ wide widths by 24″ long to create a set of straps that will have an approximate 10-12″ drop from the top of my tote bag. If I have to, I will sew several strips together to get the length desired. Next, fold the strips in half and press a crease to designate the center. Then I fold each end in 1/4″ to create a finished edge and sew along the edge to finish the strap. Ta-da! Straps without turning! Usually I will also add a strip of interfacing down the middle to reinforce the straps and make them a bit stiffer for carrying, but you can also skip this step.


Once you’ve completed the length, turn the bottom edge under and give it a slight hem to finish the raw edge. Then I crease or measure the bag panel and place the straps 2″ from either side of the center and top stitch them in place. Be sure to leave a 1/2″ seam allowance sew your straps don’t get caught in the seams when we add our lining.
Creating an Exterior Pocket
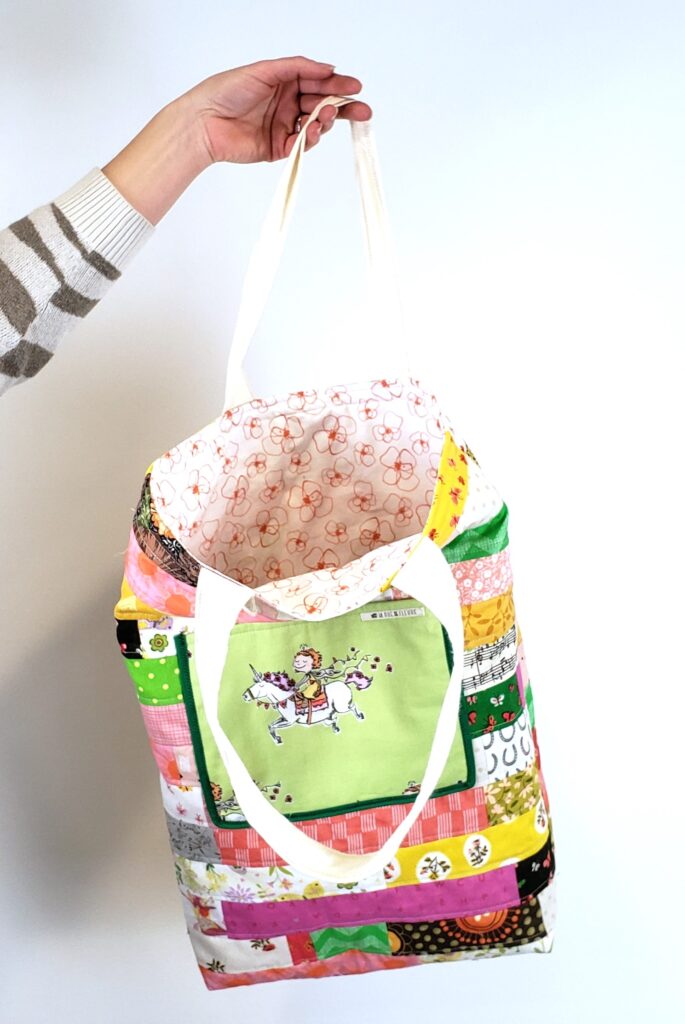
I chose to use a square of the Heather Ross “Chloé” feature fabric for a center front pocket. To make the pocket, I simply lined up my clear ruler on top of the print and slid it around a bit to figure out where to fussy cut. Then I laid my pocket on top of a piece of medium-weight interfacing and a simple backing fabric and cut them out to the same size. The interfacing will give a bit of stiffness to the finished pocket and hold it in place.
Then I stacked the interfacing on the bottom with the Chloé fabric on top of that and finally the lining fabric RST with Cholé. I sewed them all together with a 1/4″ seam. Then flip the lining back over both the outside fabric and lining to encase the seam and top stitch along the top edge of the pocket to finish. I also added my label here on the pocket.
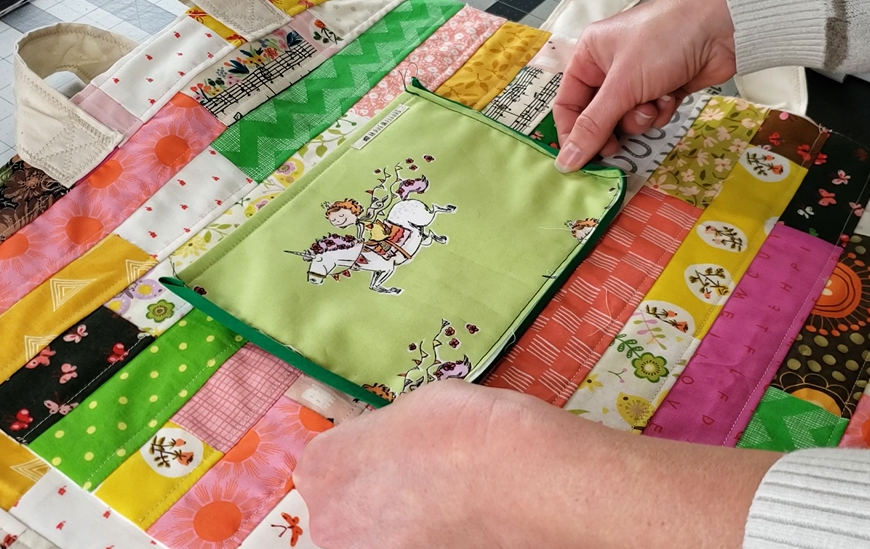
Originally, I had planned to enclose the sides with the straps, but I then changed my mind – mostly because I miss-measured. So, I ended up using a piece of binding tape to finish the edges of the pocket. I top-stitched the whole pocket in place on one side of my quilted tote using a zigzag stitch. I like how the dark green binding sets the pocket off from the rest of the patchwork. What a happy accident!
Adding the Lining
The lining I chose was a leftover piece I did not end up including in my Geometry Dash fabrics. Luckily I had a nice large cut, approximately a half yard, I was able to trim to two 16″ by 20″ for my lining. I just joined the pieces RST so they would match up with my bag panels. I also sewed my front and back bag panels together in preparation for the final assembly of the tote.
I like to box out the corners of my bags to give that extra width at the bottom. I feel this helps the bag hold more and also stand up a little when you are loading and unloading. To box out the corners, start by lining up the bottom and side seams with the wrong side out. Use your acrylic ruler to measure the depth of the corner you’d like to create. Line the depth measurement, here 2″ along the seams, and use the 45-degree line to line up the angle in the side of the bag as shown. Use a pen or pencil to draw a line straight across the bottom of the bag and the seams. Then, simply sew on the line. Ta-da! you’ve created a flat bottom that will be twice the width you measured down. I measured 2″, but my boxed bottom is 4″ wide; perfect for a haul of library books! Repeat for the other side of the quilted panel and both bottom corners of the lining.

To attach the quilted interior and lining you need to sew them together, leaving a small opening, approximately 2-3″, so you can turn everything right sides out. Begin by turning the quilted exterior right side out and leaving the lining piece with the RST. Place the quilted tote panel inside the lining piece RST. Make sure to tuck or pin your straps down and out of the way of the top seam. Line up the side seams of the quilted panels and the lining and pin in place. Add a few more pins in either side of the seams and make sure the pieces line up and are evenly spaced. Sew a 3/8″ seam all the way around the top of the pieces, leaving that couple of inches to turn everything.
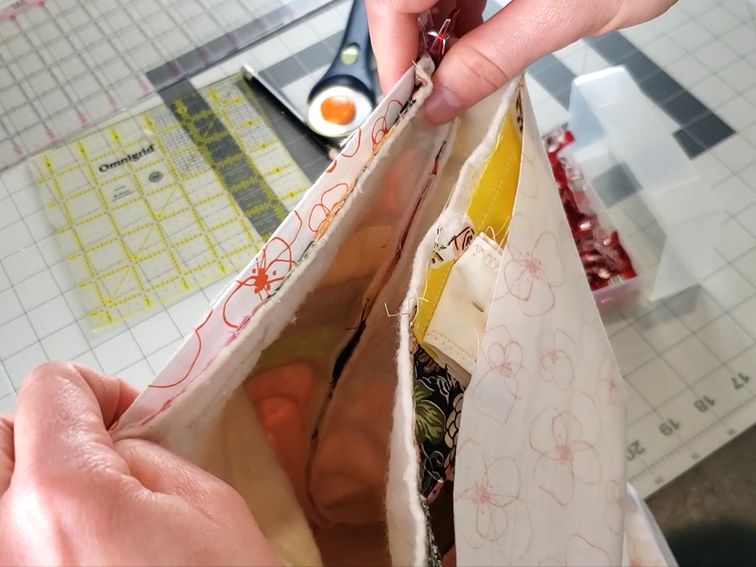


After sewing, reach your hand inside the opening and pull all of the fabric until the right sides are all out. Then stuff the lining inside the quilted panels and use your hands to line up and push out the corners.
Finishing The Scrappy Strip Tote
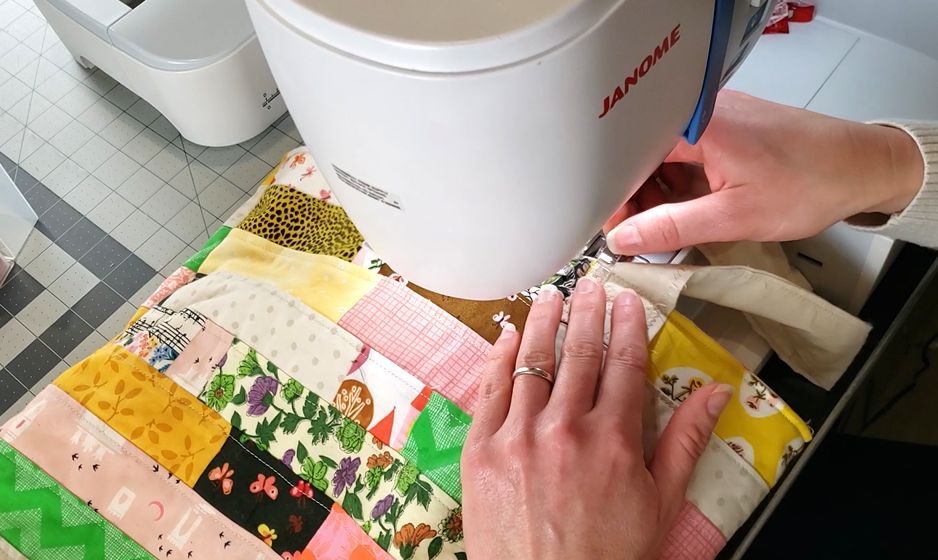
To complete our tote, we just need to press around the top of the bag to make sure all of the fabric lines up nicely for our finishing top stitches. Make sure the opening you used to turn has all of the raw edges tucked in. Then sew two rows of top-stitching around the top edge. I like to do a 1/8″ and also a 1/4″ seam.

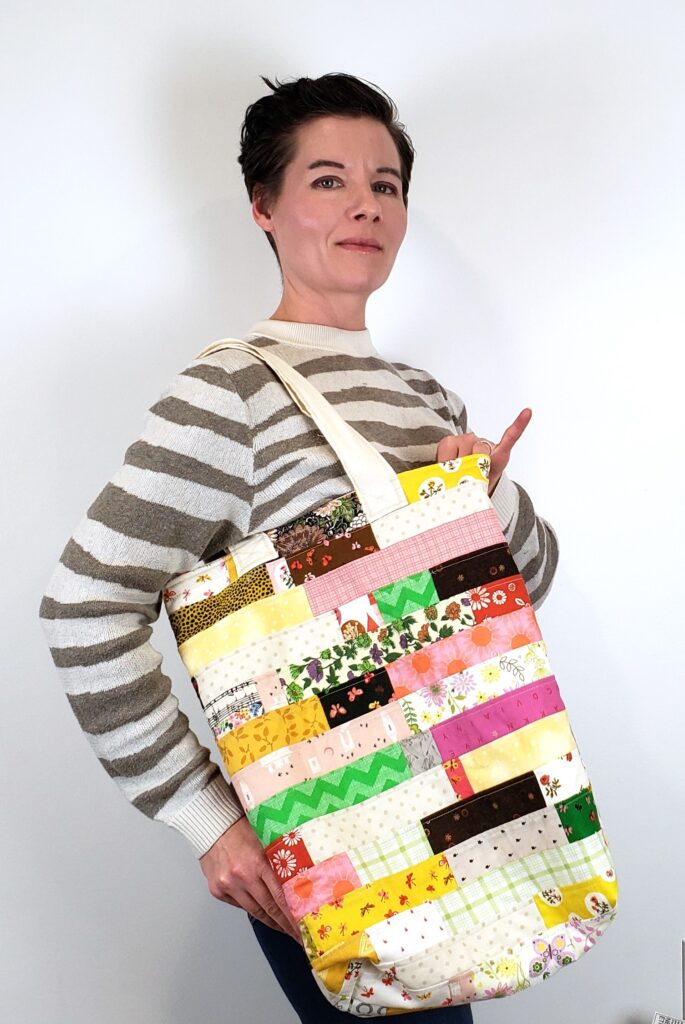
Yeah! What a lovely, scrappy, fun quilted tote! Not only did we keep those 2″ strips from going into scrap bin purgatory, but we also have a great zero-waste reusable tote for our efforts. I love how colorful and fun the Heather Ross Tiger Lily fabrics are and I am so glad I am finally using and enjoying them.
Follow Along on YouTube
Making the Scrappy Strips Quilted Tote Bag is a simple and fast way to use up those smaller cuts of fabric following a larger project or quilt. In an effort to reduce waste following my quilt projects, I plan to showcase several zero-waste or scrap projects using what is left over from those projects. After you’ve created the project quilt with me, pop back and hit the Zero Waste Playlist HERE for some projects to use up those scraps. Each project in the playlist will focus on small, simple projects with a nod to replacing waste or single-use items in the home. The scraps here are from the Geometry Dash Quilt quilt series and pattern, which you can watch HERE or purchase HERE.
Here is the very cute scrappy strip tote in the Zero Waste series on the La Rue de Fleurs’ YouTube channel:
Other Scrappy Tote Inspirations
I absolutely love a great scrappy tote, but I’m not alone! Here are some additional scrappy or QAYG tote bags to inspire your sewing.:


In addition to making these for yourself, they would make a great gift for a sustainable-minded friend or relative. Simply tailor your fabric choices to their favorite colors or style for an instant, personalized, and pocket-friendly gift!

Grab the Geometry Dash Quilt Pattern for just $10 USD HERE. Watch the complete Quilt with Me! videos HERE, where we will work together to piece the entire quilt top and complete our Heather Ross Geometry Dash Quilt. After you’ve completed the pattern, join in to make this cute tote from the strip off-cuts!
If you join in with the video series or create the Geometry Dash Quilt on your own, don’t forget to share your work with the La Rue de Fleurs community by tagging me on IG @laruedefleurs and using the hashtags #geometrydashquilt and #zerowastesewing and #laruedefleurspatterns. I hope you’ll join me and have some fun using those large prints and strip scraps!
Stay creative, friends!
Inspiration and resources are linked where applicable. All written work and photographs are original content and are copyright protected; kindly give due credit by linking back to my website if you use or share.
(©2023, Janice Bailor // laruedefleurs.com)