In the midst of struggling through the Coronavirus like the rest of the world, I received a custom order request to make a little girl’s pinafore dress. I do not typically make children’s clothes or any clothes for that matter, but having made a few before and wanting the distraction from daily mask making, I accepted. Though I struggled just a bit, overall the process went well and I was really pleased with the result. Most importantly of all, the client was pleased and I was able to get the dress made and out the door in one afternoon. I thought I would share a bit about the pinafore process here and a link to the pattern I used in case you are looking for a beginner-friendly dress pattern for a little one in your life.

The customer requested a pinafore style dress for a size 2T in a bright and bold color print with the addition of large pockets. Not being able to readily shop for fabric right now, I had to remind the customer she would have to choose from my fabric stash a print. Since I mostly make quilts requiring little bits of fabric, I rarely buy more than a half-yard of just about anything, therefore her selections were limited. I actually think this worked really well in this case, as we did not get bogged down in the endless possibilities which often holds a project up while a customer tries to wade through the literal thousand of fabric options. This time it was simply, here is what I have in the needed amount, what do you like from these four or five options. Luckily, she really liked the ikat deer print. Without having to order anything, I was able to start creating the dress the next day.
The pattern for this dress is the Smashed Peas and Carrots Blog Little Girl’s Crossover Pinafore Pattern and Tutorial. As I mentioned I had made this pattern before, but since it is created for a size 6month to 1 year, I knew I would have to add a bit to the size to make it a little bit larger to fit the requested 2T size. I do not have pattern grading experience, however, I have made this pattern before and seen it on the recipients enough to know how it fits the body and also how forgiving the pattern is, so I felt confident I could make the adjustments. I added a half-inch to all of the top and side seams to accommodate a slightly larger chest and shoulder area and added an inch and a half to the bottom hem to make the pinafore longer for the 2t size. To do this, I used a clear acrylic ruler and went around the outside of the pattern adding dash lines at the half-inch and one and a half-inch marks onto the fabric and then cut along those pencil lines. The pattern also calls for a lining, so I used coordinating orange gingham broadcloth and repeated the aforementioned steps.
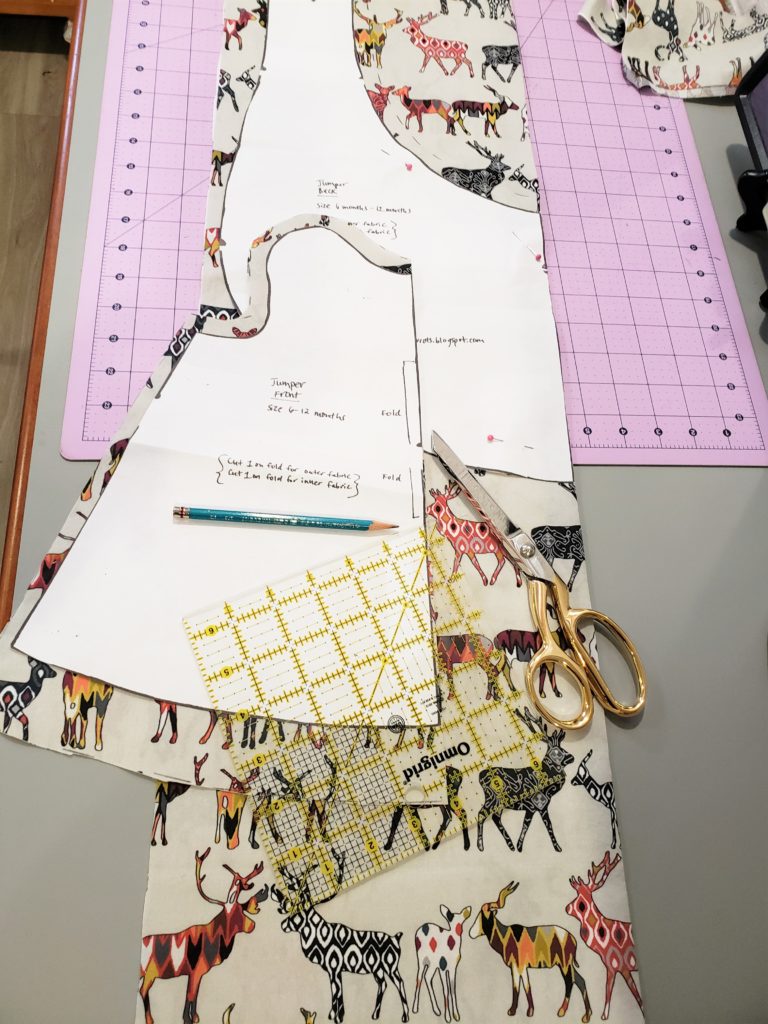

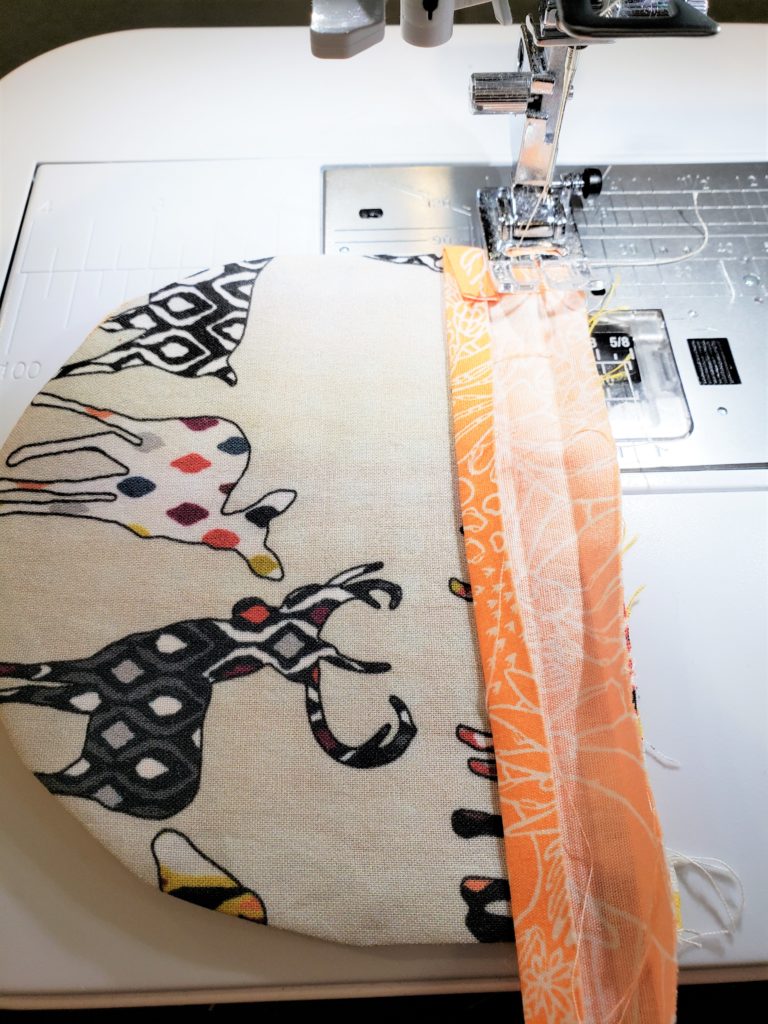
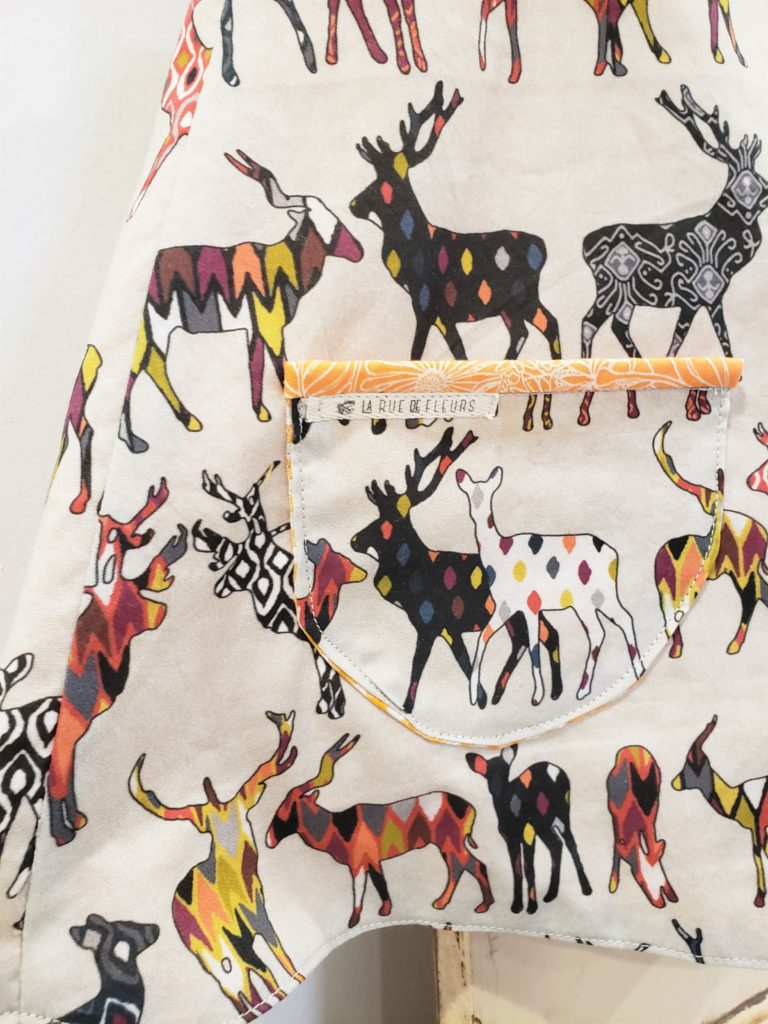
The Smashed Peas and Carrots pattern does not include pockets, so I just had to wing it here. The customer had requested large patch pockets on the front of the dress because her granddaughter (the future dress owner) loves to put things in pockets. Patch pockets can be thought of as patches and simply topstitched onto the outside of the dress. I used the interior swoop of fabric cut from the pinafore pattern to make the pockets. I decided on their size by holding the leftover piece of fabric on the front piece of the dress and eyeballing what I thought looked like a large pocket that would not overwhelm the dress. Since I would be adhering to the pockets right on the front, I thought a few finishing details would give them an appropriate haut couture touch. Therefore, I again used a piece of the gingham to line the pocket and finished with a piece of seam binding made from a quilting project off cut to finish the top seam and create a contrasting detail.

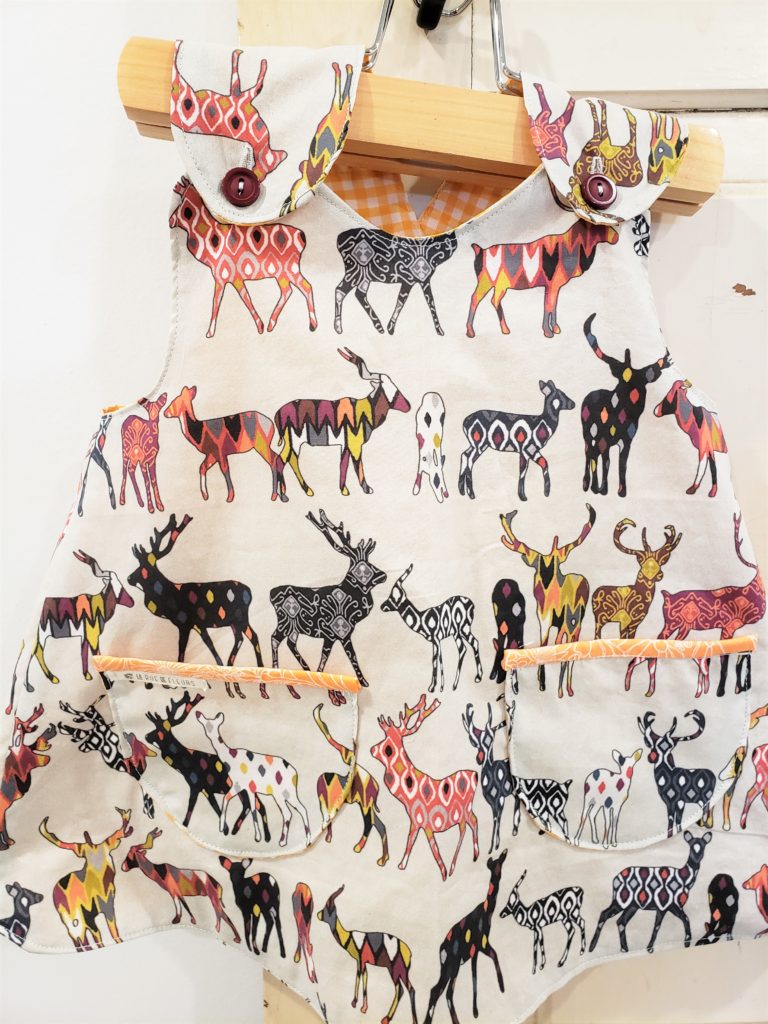
After cutting all of the pieces and creating the pockets, it was time to stitch the pieces of the pinafore together. Essentially, there are only six pieces to the dress, the outer front, the front lining, the two crossover pieces, and their linings as well. To put the pieces together you simply sew up the side seams for both the front pieces and the lining pieces, then lay them right sides together and sew around the entire perimeter of the garment, leaving a small opening to turn everything right side out. After turning, press the garment nice and flat and topstitch around the entire perimeter, catching the opening hole to close everything up and give a nice completed look to the pinafore. The shape at this point looks a little like a flying bat to me, but once you cross the side pieces over one another in the back and bring them to meet up at the shoulders the structure of the pinafore really takes shape.


The final step is to add the buttonholes to the straps of the pinafore and sew on the corresponding buttons. Again, not being able to readily run out and purchase anything, I simply hit up my little jar of collected and repurposed buttons to find a pair I felt coordinated well with the rest of the colors in the pinafore. Luckily, I had two matching buttons in a maroon color that was the same shade as the maroon in the deer ikat print. How serendipitous! It took me a few minutes of reading the sewing machine manual instructions to figure out how to use the buttonhole feature on my Janome Skyline S5 since this was the first time after having the machine for nearly a year I had needed to sew a buttonhole, but it was so easy to create those buttonholes with the automatic buttonhole feature and corresponding foot. I used a light gray Aurifil thread for all of the topstitching and the buttonholes to blend into the background of the ikat deer fabric and not add to the business of the print. Once the buttonholes were complete, I sliced them open with an Exacto knife and used the buttonhole opening to help me line up where to attach the buttons on each side.
Et Voila, the pinafore is complete!

Yes, it really was that simple! I would highly recommend the Smashed Peas and Carrots Little Girl’s Pinafore Pattern and Tutorial for any beginner sewist. With about a yard of fabric and one afternoon, you can create an adorable frock for the sweet little girl in your life without having to have very technical dressmaking or pattern reading skills. Best of all it is a satisfying project with pleasing results that could be made over and over again in many fabric combinations for unlimited personalization. I sincerely appreciate the opportunity this special request created and I look forward to making more of this pattern in the future. Please comment below if you’ve made the pattern or have any others you’d recommend, I would love to up my clothing game.
Thanks for reading and stay creative friends! Janice
Inspiration and resources are linked where applicable. All written work and photographs are original content and are copyright protected; kindly give due credit by linking back to my website or source website if you use or share.
(©2020, Janice Bailor // laruedefleurs.com)
Pingback: Making a Toddler Apron Without a Pattern – laruedefleurs.com