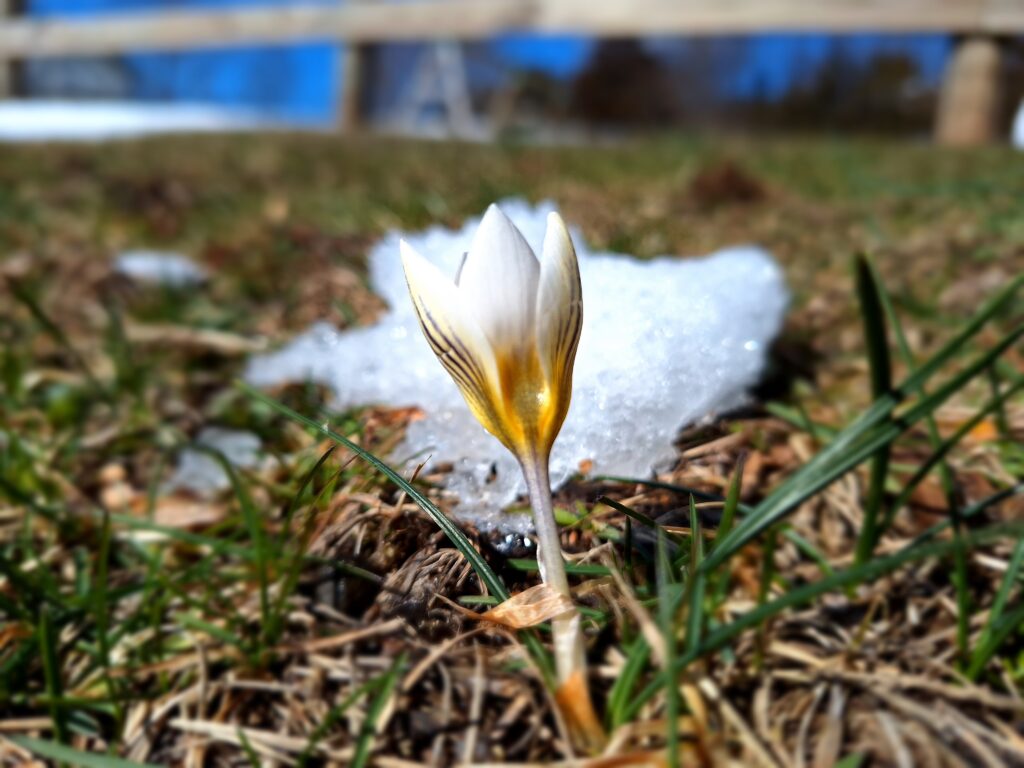
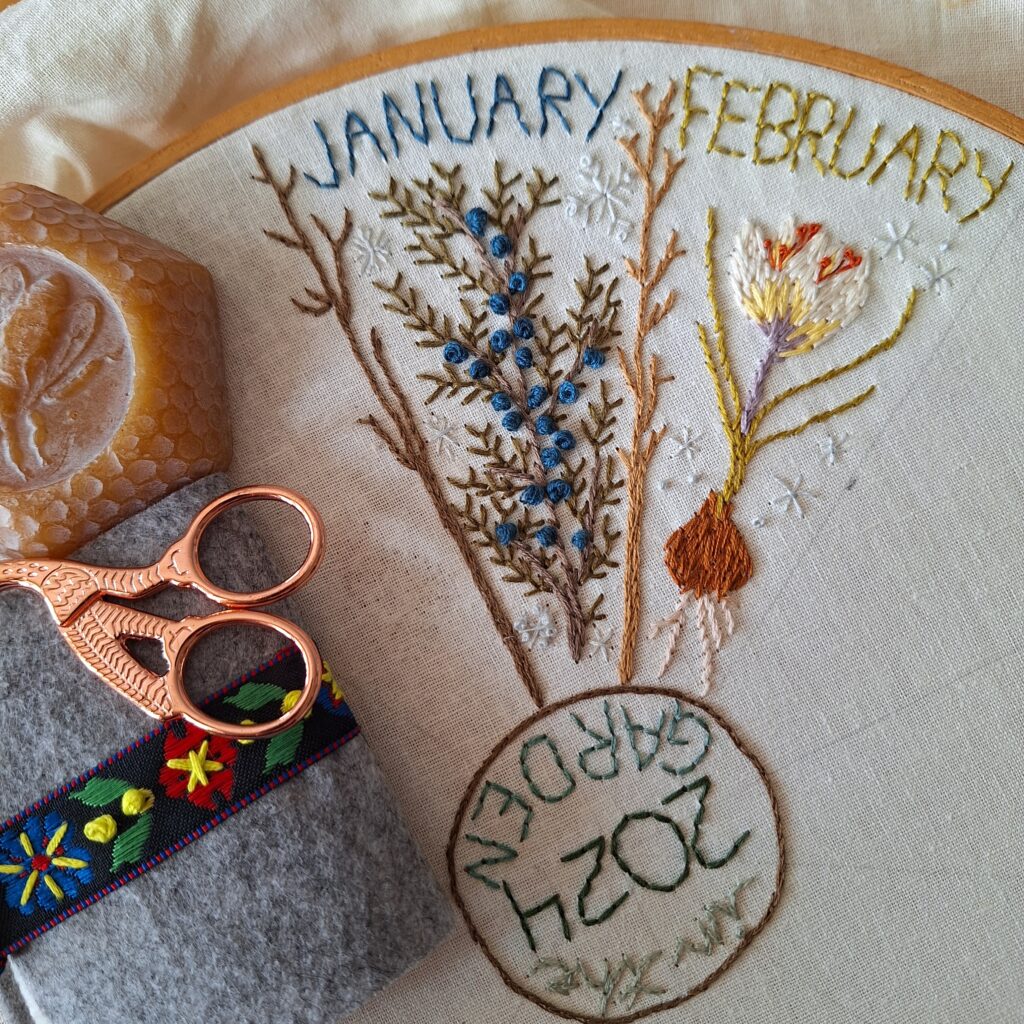
My second entry in the 2024 Embroidery Garden Journal is a small snow crocus for February. I live in zone 6b in central Pennsylvania. The small white snow crocus is one of the first flowers to appear in my garden each year. We have been having more snow this month, and my garden remains mostly asleep for the season. However, I noticed the small snow crocuses appearing through the grass just a day before we got another heavy snow! I had to wait for the snow to melt and the top layer of soil to unfreeze before I could dig my inspiration out from the soil and bring it inside for inspiration. I think this tiny, delicate flower is worth celebrating in the embroidery garden journal for February.

Beginning with the Bulb
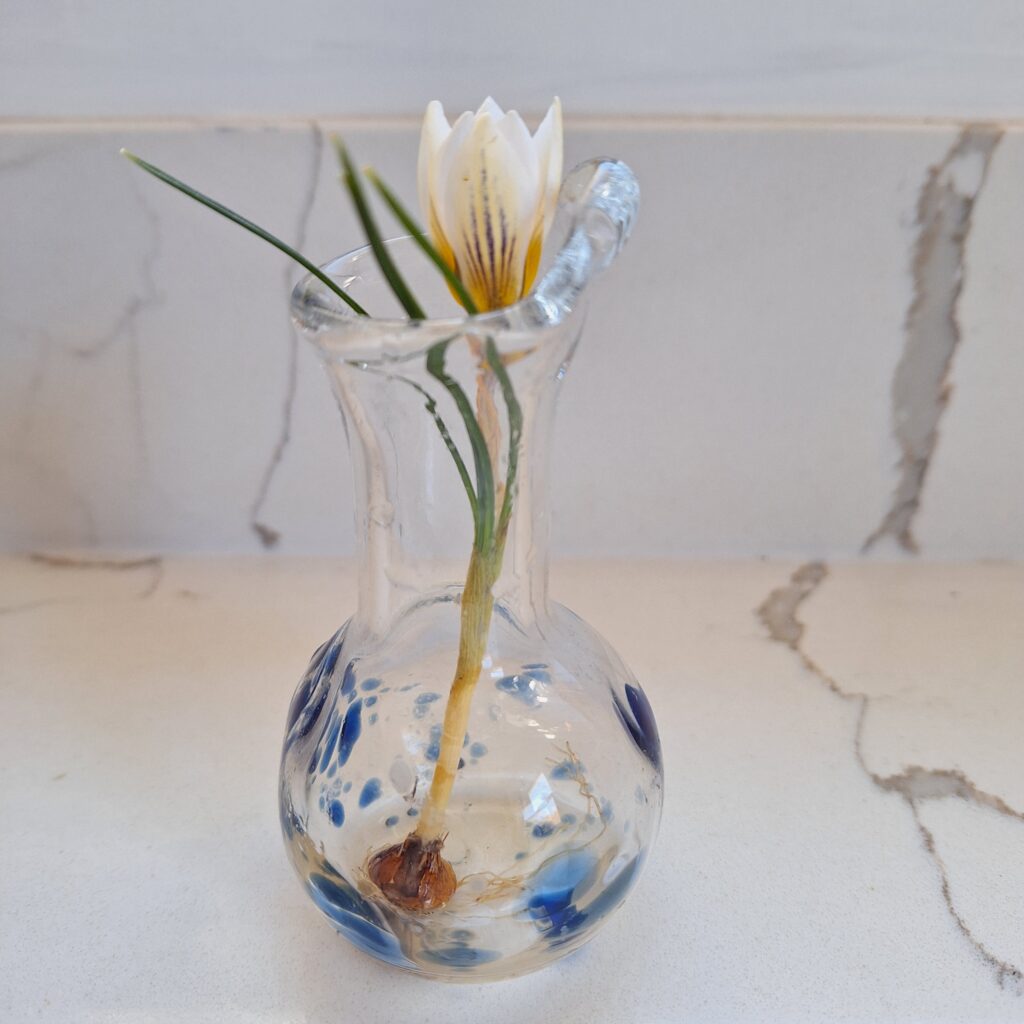
After freeing the tiny bulb from the frozen soil, I was the little bulb and added it to a small bud vase to work off of for sketching out the form of my embroidery. I simply use a light pencil line drawn directly onto the fabric in the approximate center of the February wedge. Make sure to leave room at the top widest part of the wedge to add the month label, but otherwise, fill up the wedge with all the stitching!
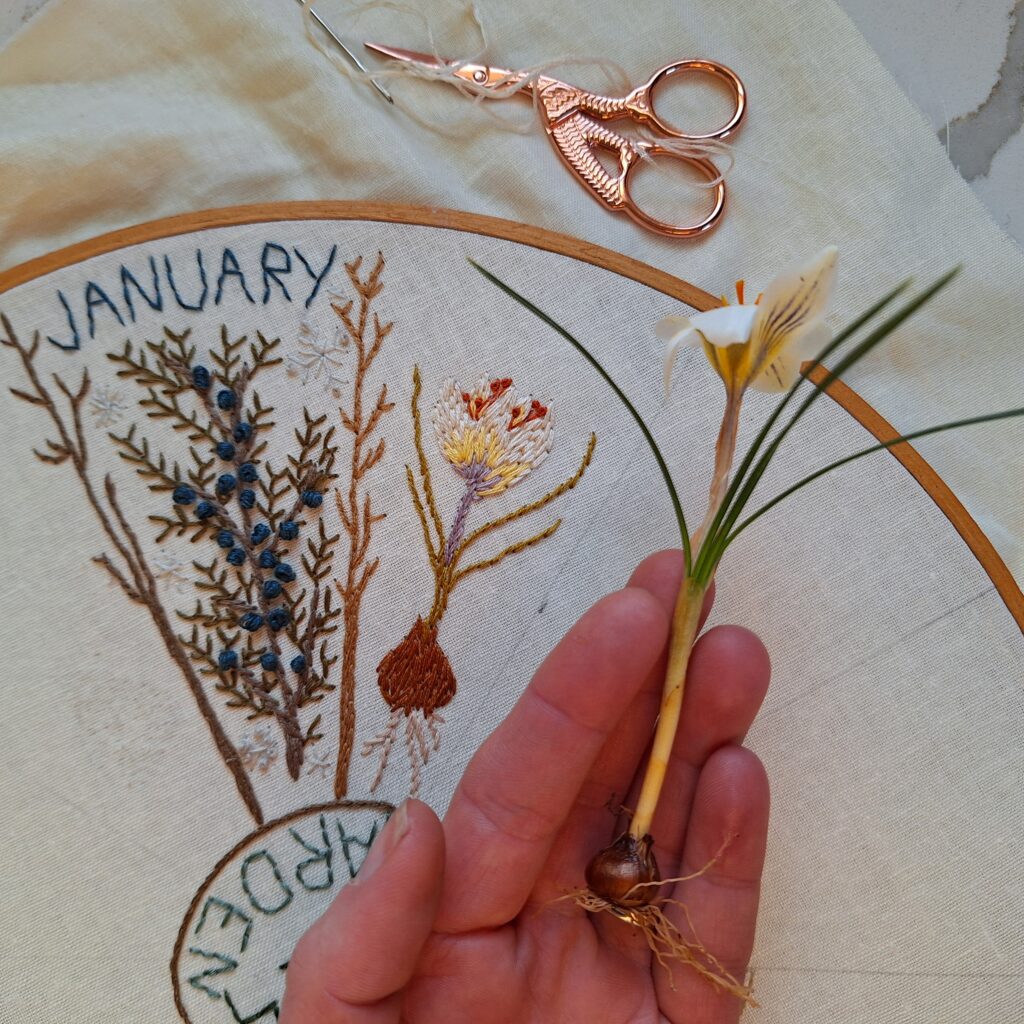
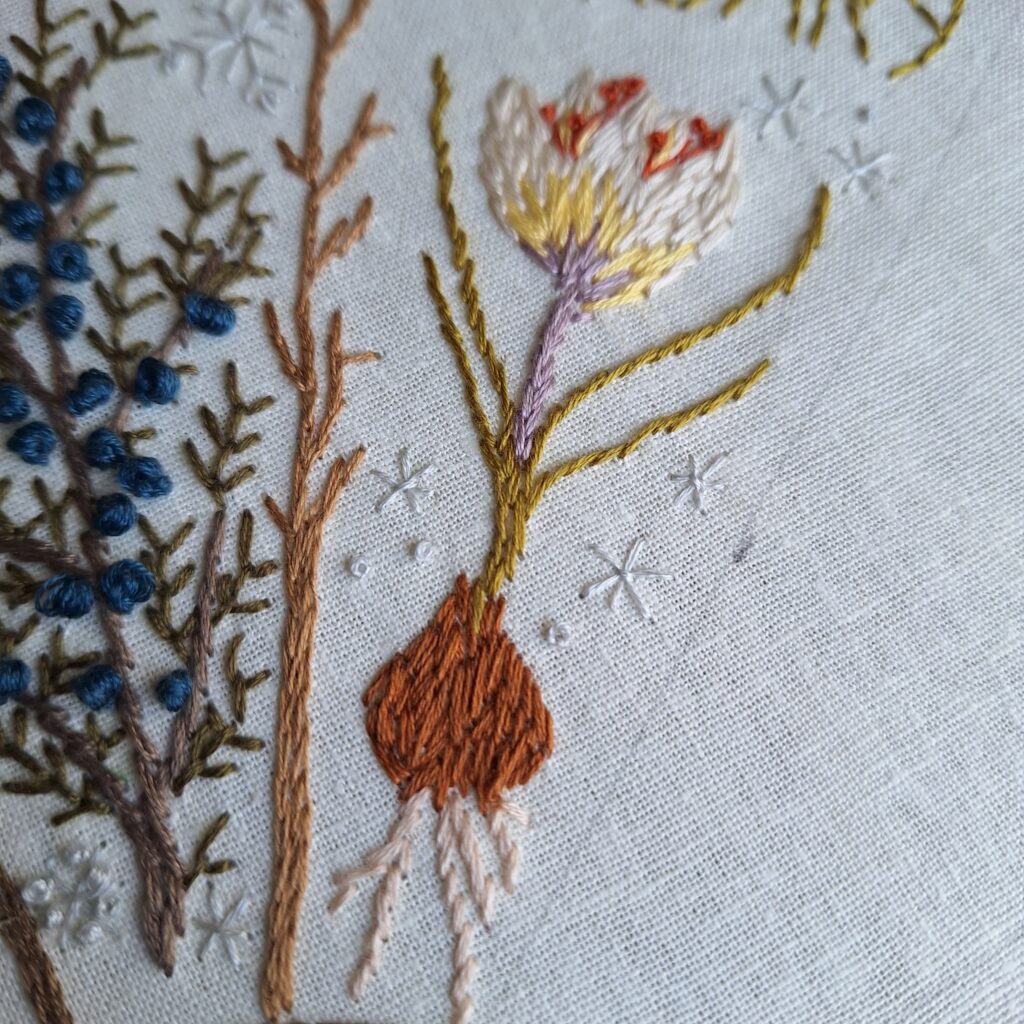
I began by using the satin stitch to create and fill in the small bulb of the crocus. The satin or fill stitch is made by creating a variety of shorter (1/16th inch) and longer (1/8th to 1/4 inch) stitches tightly packed together to fill an area. I chose a mid-tone brown with slight red undertones to match the color of my crocus bulb.
Layering in the Stem Stitch
After finishing the bulb area, I used the stem stitch to insert several roots in a soft taupe color I thought matched the root color well. The stem stitch is quite easy and can best be described as a running stitch where the starting “up” stitch begins halfway through the prior stitch, but off-set to one side. The needle comes up just slightly to the side of the last stitch at the halfway point, creating a slight angle when you put the needle back down in line. I think it truly does represent the movement and texture of both the roots and the leaves. It is also a strong line, making it good for sturdy stems and outlines.
In addition to the roots, I used the stem stitch to carry on with creating the leaves coming off the top of the bulb as well. I am only working with embroidery floss I have in my stash, so I will just work to find a color that matches as closely as possible or that I think will blend well with the overall look of the flower without stressing over perfection as much as possible. For the leaves of my crocus, I chose a green much brighter and with stronger yellow undertones than my real-life crocus because I thought it would tone in well with the other yellows to be featured in the flower. Plus I was really attracted to the color as soon as I saw it in my box of threads! Bring on more green for the spring!

Layering the Petals
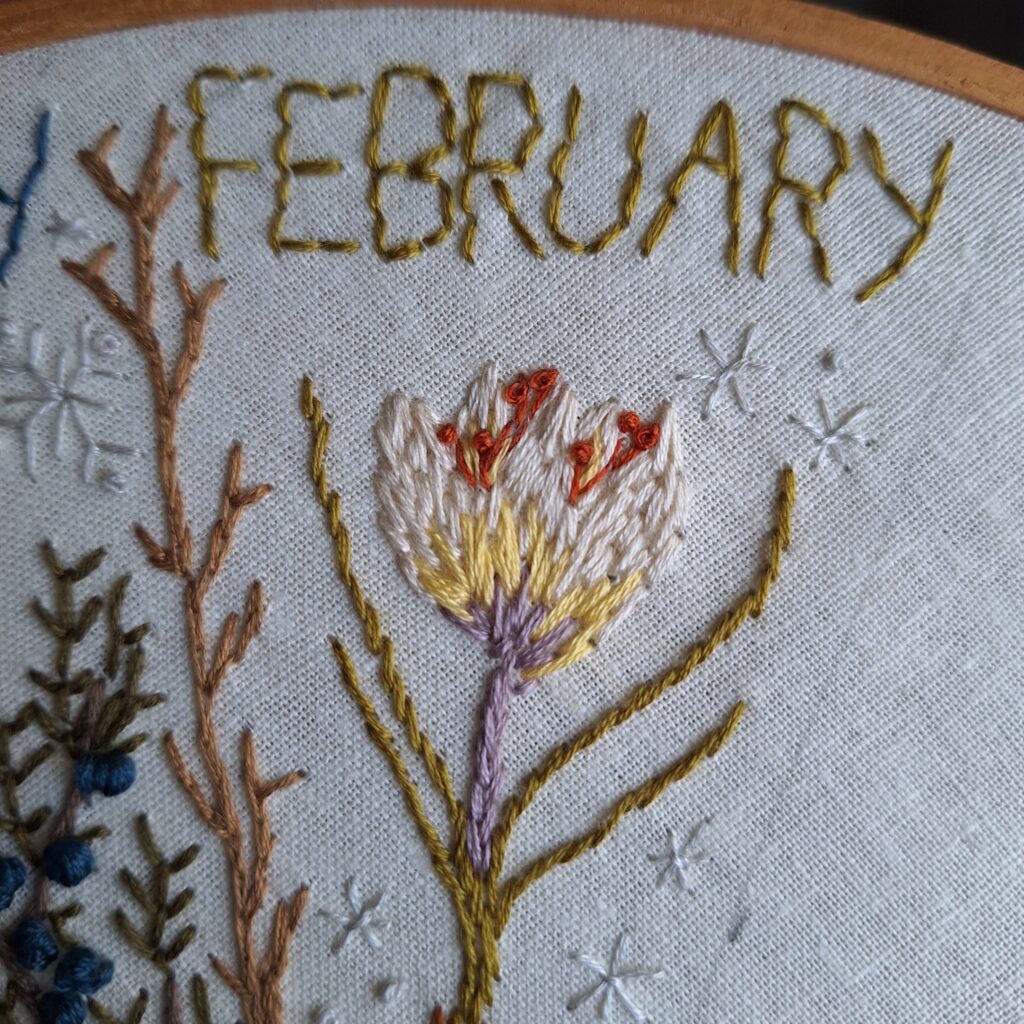
To help create the petals, I began with the soft purple at the base and used the ray stitch to fan the color out from the base of the flower. The ray stitch is created by coming up from a central point, and then slightly angling each stitch off of that central point to create a fan or ray shape.
I finished up each of the three foreground petals with a layer of yellow thread branching off of and blending with the purple. I also used the ray stitch with the yellow thread to add in some shading in the back petals. Finally, I used the saying stitch to again fill in the remainder of the petals with the off-white thread. In all honesty, I wished I had left a small gap between some of the petals to provide a little definition.
To complete the crocus, I used a tiny hand embroidery needle and just two strands of bright orange floss to create the tiny stamen of the crocus. I layered those little stitches topped with tiny French knots slightly over the two back petals to create a bit of depth to the design. By wrapping just two strands of tread around my needle 3 times, I was able to keep the knots tiny and in proportion.
Creating the Title and Final Details
Lastly, I made sure to sketch out my month title at the top widest part of my wedge, using the center to roughly line up the center of my month. Then I used a simple backstitch to trace over my outline with the same bright green thread I used for the crocus leaves.
Finally, I added a few snowflakes to represent the current weather conditions using a combination of simple cross stitches, the fly stitch, and a few tiny French knots as well.
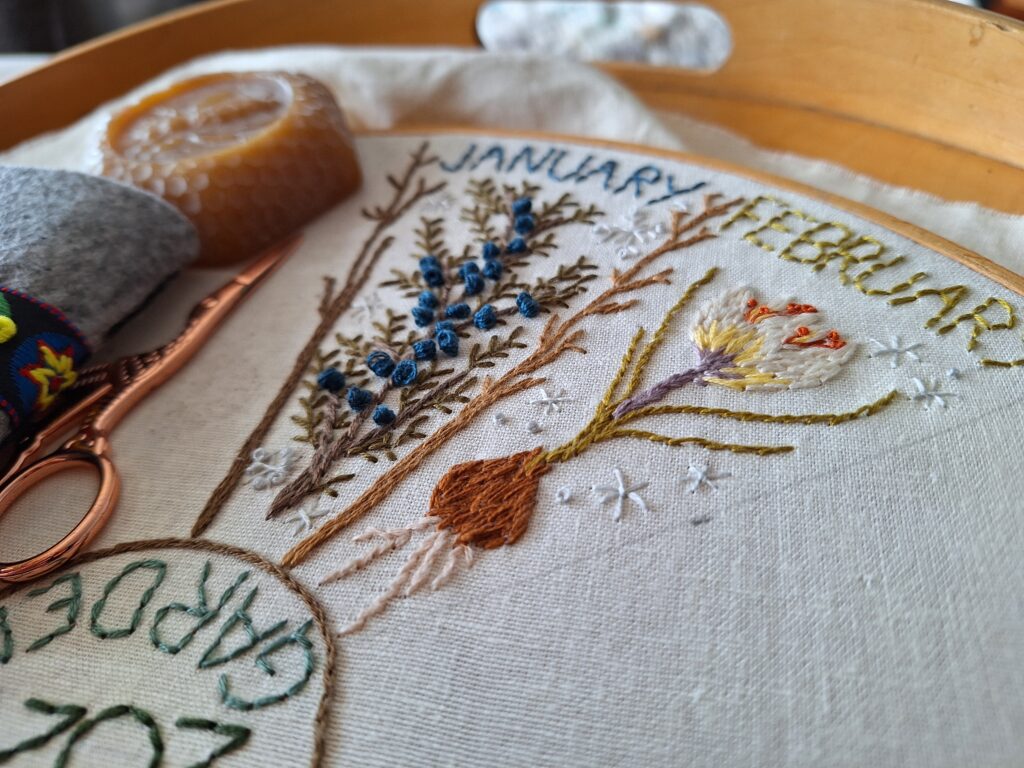
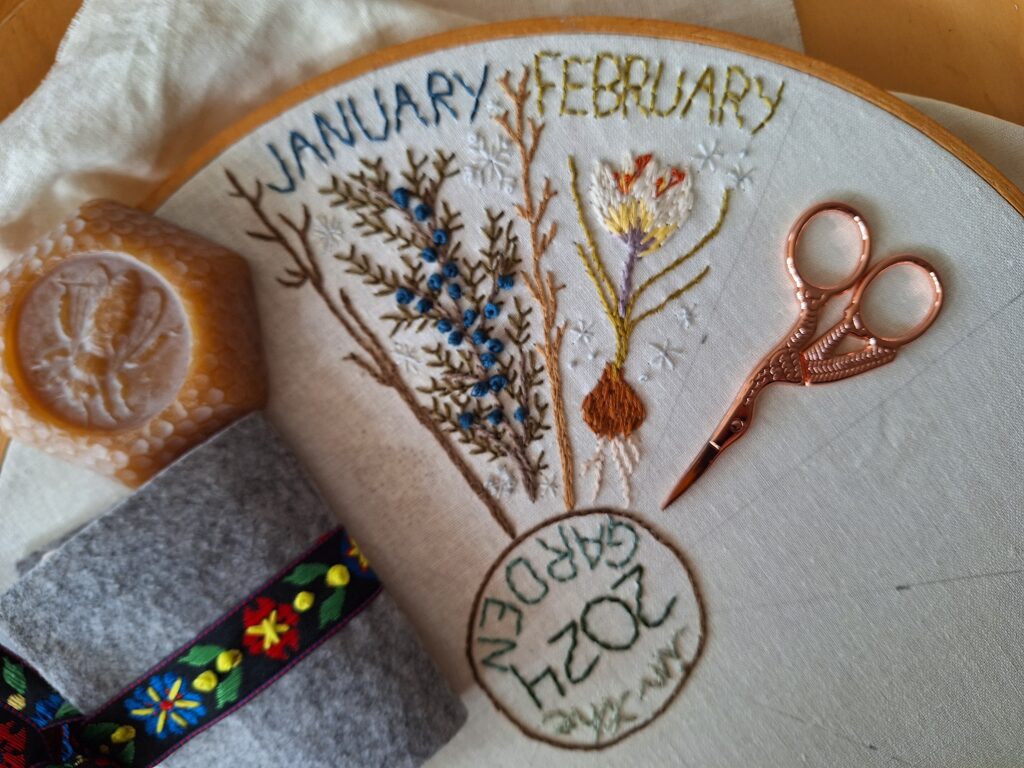
I am so happy with how my second entry turned out! I am really pleased to have included the bulb and roots as a detail. I think I would like to attempt to find a few other flowers throughout the year to add in these more structural elements of the plant as well.
More Details in the Video
Didn’t get enough details from this post? I filmed the whole thing for YouTube! Watch me create my February Crocus Bulb entry for the monthly embroidery garden journal below right now. Then return every month for a new video featuring what plant I’m working on that month!
Top Tips
Here are my top tips for progressing through the second month of your 2024 monthly embroidery garden journal.:

Sharing is Caring!
As I mentioned above, this is a new monthly video and blog series in which we will use hand stitching and embroidery techniques to document a year in our garden! Our monthly embroidery journal will focus on capturing stitched memories of the garden one month at a time. I will share my process each month here on the blog and with a monthly feature video on the La Rue de Fleurs YouTube channel. Make sure to like, subscribe and sign up for my newsletter for notifications of each new installment.
If you missed the set-up and January entries, you can find them both on my blog and on YouTube by clicking on the respective highlighted text.
If you join in with the videos or create the monthly embroidery garden journal above, don’t forget to share your work with the La Rue de Fleurs community by tagging me on IG @laruedefleurs and using the hashtags #larueygej24 and #embroideryjournal2024. I hope you’ll join me and have fun using creative stitches to document a year in your garden!
Stay creative friends, Janice
Inspiration and resources are linked where applicable. All written work and photographs are original content and are copyright protected; kindly give due credit by linking back to my website or source website if you use or share.
(©2023, Janice Bailor // laruedefleurs.com)